💅 How To Do French Tips
💄 The Everyday Glamour Routine
You do not need to spend hundreds of dollars at Sephora to achieve a flawless, airbrushed finish. Professional makeup artists secretly rely on these 5 incredible, highly-rated viral drug store dupes and tools to create stunning looks that last all day.
✨ e.l.f. Power Grip Primer
The undisputed holy grail of primers that broke the internet. The unique gel-based formula literally 'grips' onto your foundation, blurring pores and completely preventing your makeup from melting off, creasing, or fading for up to 14 hours.
💧 Real Techniques Miracle Complexion Sponges
Stop applying liquid foundation with brushes that leave streaks. When used slightly damp, these ultra-soft, latex-free sponges seamlessly bounce liquid products into your skin for an incredibly natural, dewy, 'no-makeup' finish.
🖤 Maybelline Sky High Lengthening Mascara
You don't need expensive lash extensions. This wildly popular formula features a flexible tower brush that bends to volumize and extend every single tiny lash from root to tip without flaking, smudging, or weighing your eyes down.
🌟 L'Oreal True Match Lumi Glotion
The ultimate secret for that radiant 'glass skin' look. Use it alone for a sheer, healthy tint on no-makeup days, or mix a tiny drop into your foundation to instantly add an incredibly expensive-looking, natural luminosity to your face.
🌋 Revlon Oil-Absorbing Volcanic Roller
The modern replacement for messy blotting papers. Made from real volcanic stone, this tiny tool fits perfectly in your purse. Simply roll it across your T-zone to instantly absorb excess shine without messing up the makeup underneath.
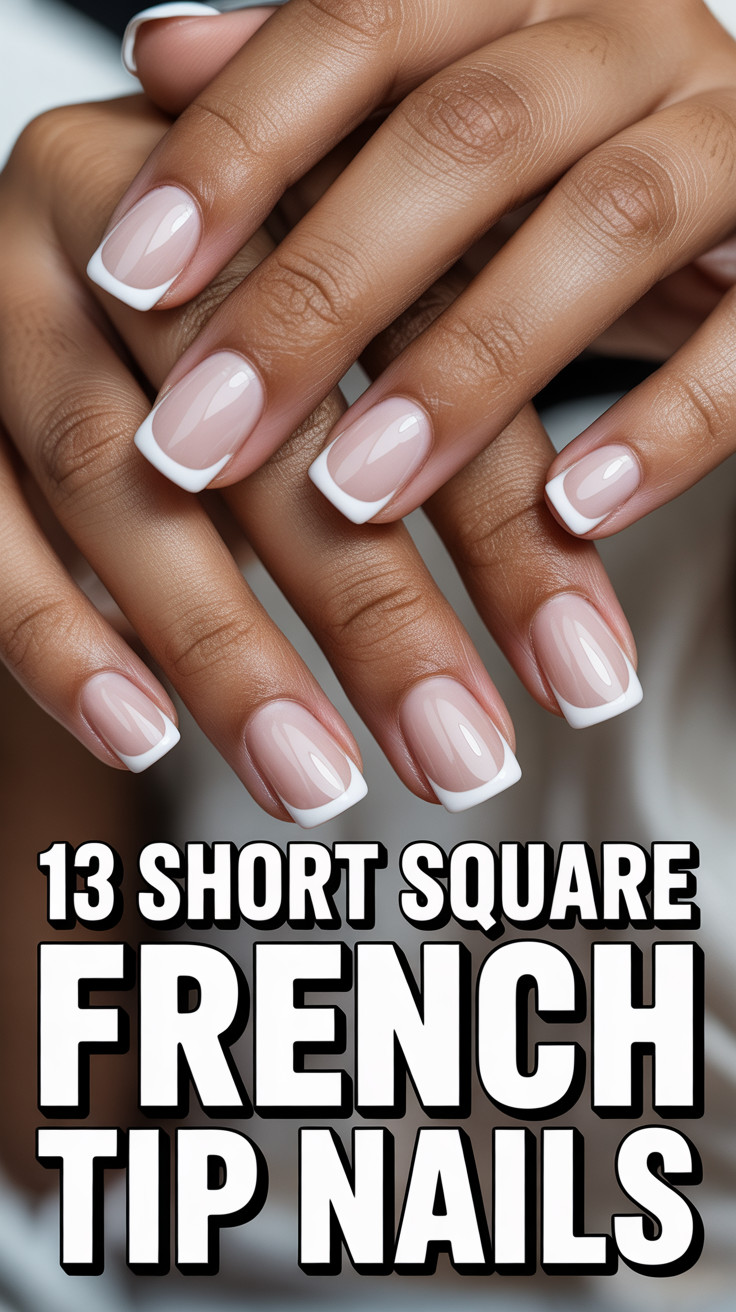
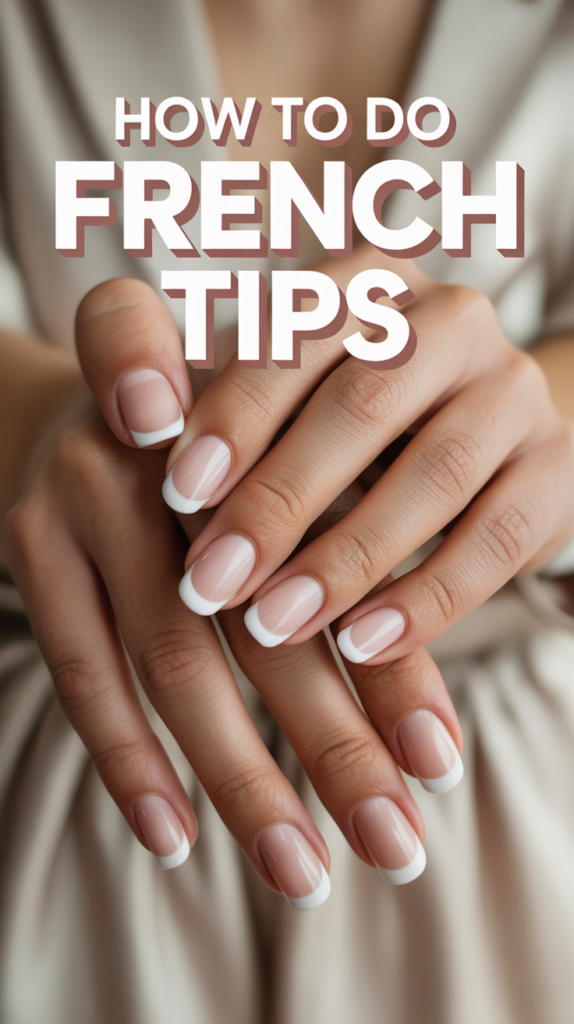
The French tip manicure is a timeless symbol of elegance and sophistication, a classic look that never goes out of style. With its crisp white tips and natural, often sheer pink or nude base, it exudes a polished simplicity that complements any occasion, from a casual brunch to a black-tie event. While achieving that perfectly curved “smile line” might seem daunting, it’s an entirely attainable skill with the right guidance and a bit of practice. This comprehensive guide will demystify the process, empowering you to create salon-quality French tips from the comfort of your home, saving you time and money while boosting your confidence with beautifully manicured nails.
Quick Overview
In this guide, you’ll learn to meticulously prepare your nails, apply a flawless base, master various techniques for creating the iconic white tip, and finish with a protective top coat, culminating in a professional-looking French manicure. You’ll gain the skills to replicate this classic style with precision and ease, transforming your nail routine.
- Time needed: 60-90 minutes (including drying time)
- Difficulty: Intermediate (requires patience and precision)
- What you’ll need: Nail file, buffer, cuticle pusher, nail cleanser/alcohol, cotton pads, base coat, sheer pink/nude polish, white nail polish, top coat, small detail brush, nail polish remover/acetone, optional: French tip guide stickers or silicone stamper, cuticle oil.
Step-by-Step Instructions
Step 1: Gather Your Arsenal and Prepare Your Canvas
Before you even think about polish, proper preparation is paramount to a long-lasting and pristine French manicure. Think of your nails as a canvas; a well-prepared surface ensures a smoother application and a more durable finish. Begin by gathering all your supplies. Having everything within reach minimizes interruptions and allows for a more fluid process. This includes your chosen base coat, sheer nude or pink polish, the crisp white polish for the tips, a high-quality top coat, nail file, buffer, cuticle pusher, and essential clean-up tools like a small detail brush and nail polish remover.
Once your tools are ready, start with nail shaping. Use a fine-grit nail file to gently shape your nails. For French tips, a square, squoval (softened square), or almond shape typically works best, as these shapes provide a clear, defined edge for the white tip. File in one direction to prevent splitting and ensure a smooth edge. After shaping, gently push back your cuticles using a cuticle pusher. You can apply a cuticle remover beforehand to soften them, making this step easier and safer. Be gentle; never cut your cuticles, as they protect your nail bed from infection.
Next, lightly buff the surface of your nails. This step creates a slightly rough texture, which helps the polish adhere better, preventing chipping and extending wear. Use a fine-grit buffer and buff just enough to remove any natural oils and create a matte finish – over-buffing can weaken your nails. Finally, cleanse your nails thoroughly. Soak a cotton pad in nail polish remover or rubbing alcohol and wipe down each nail. This removes any dust, oils, and residue, ensuring a perfectly clean surface for your base coat. A clean canvas is the secret to a professional-looking, chip-resistant manicure.
Pro tip: Always ensure your nails are completely dry after cleansing. Any lingering moisture can compromise polish adhesion and lead to premature chipping. For an extra clean base, use a lint-free wipe for the final cleanse.
Step 2: Lay the Foundation with a Base Coat
The base coat is not an optional step; it’s a critical layer that serves multiple vital functions, especially for a manicure as delicate as French tips. Firstly, it creates a protective barrier between your natural nail and the colored polish. This is particularly important when working with white polish, as it prevents staining of your nail plate, ensuring your natural nails remain healthy and unstained even after repeated manicures. Secondly, a good base coat provides a smooth, even surface for your subsequent polish layers. It fills in minor ridges and imperfections on the nail surface, allowing the sheer pink/nude and white polishes to glide on more evenly and appear flawless.
To apply, start with a thin, even layer. Begin by applying a small bead of polish near the cuticle, then push the brush towards the cuticle line, leaving a tiny margin to avoid flooding it. Sweep the brush upwards towards the free edge in a single, smooth stroke. Repeat this for the sides of the nail. It’s crucial to “cap” the free edge of your nail with the base coat. This means running the brush horizontally along the very tip of your nail, sealing the edge. Capping helps to prevent chipping from the tips, which is a common issue and especially noticeable with French tips.
Allow the base coat to dry completely. While it might feel dry to the touch quickly, give it a few minutes to fully cure. A tacky base coat is actually ideal, as it provides a grip for the next layer of polish, enhancing adhesion. Rushing this step can lead to a streaky application of your colored polish and can compromise the longevity of your manicure. Many base coats also come with added benefits, such as strengthening properties or ridge-filling capabilities, further enhancing the health and appearance of your nails.
Pro tip: For extra protection and a smoother canvas, consider applying two very thin layers of base coat, allowing each to dry thoroughly before the next. This can significantly improve the wear time of your French tips.
Step 3: Apply the Sheer Base Color
With your base coat dry, it’s time to apply the sheer, natural-looking color that forms the body of the French manicure. This layer creates the illusion of healthy, well-maintained nails and provides a subtle backdrop for the crisp white tip. Choose a sheer pink, nude, or peach-toned polish that complements your skin tone. The key is “sheer” – you want your natural nail to show through slightly, giving a delicate, translucent effect rather than opaque coverage.
Apply your first thin coat of the sheer polish. Use the same technique as with the base coat: a small bead near the cuticle, pushed back slightly, then swept upwards towards the free edge. Ensure you cap the free edge with this layer as well. Thin coats are crucial here; thick coats will appear streaky, take longer to dry, and can obscure the natural look you’re aiming for. Allow this first coat to dry completely. It doesn’t need to be rock-hard, but it should be dry enough that it won’t smudge when you apply the second coat.
Once the first coat is dry, apply a second thin coat. This will deepen the color slightly and even out any minor imperfections, creating a more uniform and polished appearance. Again, remember to cap the free edge. For a truly natural look, two thin coats are usually sufficient. If your chosen polish is very sheer, you might opt for a third thin coat, but always prioritize thinness over opacity. The goal is a subtle wash of color that enhances your natural nail, not covers it completely. Let this layer dry thoroughly before moving on to the most iconic part of the French manicure: the white tip.
Pro tip: If your sheer polish is prone to streaking, try rolling the bottle gently between your palms (never shake!) before applying. This helps to mix the polish without creating air bubbles, ensuring a smoother application.
Step 4: Master the White Tip (Method-Specific Instructions)
This is arguably the most challenging, yet most defining, step of the French manicure. The perfect “smile line” – the curve of the white tip – is what elevates this look. There are several techniques to achieve this, and the best one for you might depend on your skill level and personal preference. We’ll explore the most popular methods here.
Method A: Freehand Application (For the Steady Hand)
Freehand is the most traditional method and, with practice, can yield the most natural-looking results. You’ll need a steady hand and a good quality white nail polish (preferably one with a slightly thinner consistency for easier manipulation).
Start by wiping excess polish from the brush, so it’s not overloaded. Begin applying the white polish from one side of your nail, just inside where your free edge begins. Create a thin line following the natural curve of your nail. Imagine extending the natural curve of your nail bed. Slowly sweep the brush across to the other side, creating the “smile line.” Don’t aim for perfection on the first pass; focus on getting the general shape.
Once you have the basic curve, go back and fill in the free edge with more white polish. Apply a second thin coat of white to ensure opacity and crispness. The key is to work quickly and confidently. If you make a mistake, don’t panic. You can clean up the line in the next step.
Pro tip: Rest your painting hand on a flat surface or on your other hand to stabilize it. You can also rotate the nail you’re painting rather than moving the brush in a large arc. This gives you more control over the curve.
Method B: Using French Tip Guide Stickers (For Precision Seekers)
French tip guide stickers are an excellent option for beginners or anyone seeking perfectly uniform smile lines without the freehand challenge. These are adhesive strips, often crescent-shaped, that you apply to your nail to create a stencil.
Ensure your sheer base color is completely dry before applying the guides. If it’s even slightly tacky, the sticker might lift the polish. Carefully peel a guide sticker and place it across your nail, just below where you want your white tip to begin. Press it down firmly, especially along the edge where the white polish will meet it, to prevent bleeding. Ensure it forms an even, pleasing curve across all nails.
Once the guides are in place, apply your white polish directly over the free edge, painting from the guide upwards to the tip. You can use two thin coats for full opacity. Make sure to paint only on the exposed area.
Crucially, remove the guide sticker while the white polish is still wet. If you wait until it dries, the polish might peel or create a jagged edge. Gently peel the sticker off, pulling it straight back, not upwards, to reveal a crisp, clean smile line.
Pro tip: Before applying the sticker to your nail, stick it to the back of your hand once or twice. This reduces some of its tackiness, making it less likely to lift your base polish when removed.
Method C: The Silicone Stamper Technique (For Unique Consistency)
This method has gained popularity for its ease and ability to create a consistent smile line across all nails. You’ll need a nail stamper (the squishy silicone kind) and a stamping plate, though some people use just the stamper head.
Apply a small amount of white nail polish directly onto the edge of your silicone stamper head. You want a thin line of polish, not a glob. Gently press the tip of your nail into the white polish on the stamper, rolling your finger slightly from side to side to transfer the polish onto your free edge. The curve of the stamper will naturally create the smile line.
You might need to adjust the amount of polish or the angle of your nail to get the desired thickness and curve. Practice on a single nail or a practice wheel first. This method can be incredibly fast once you get the hang of it, producing uniform results. Clean the stamper head with a lint roller or tape after each use.
Pro tip: For a crisper line, use a slightly thicker white polish designed for stamping, but ensure it’s not so thick that it becomes clumpy. Experiment with how much pressure you apply to the stamper.
Step 5: Perfect the Smile Line
Regardless of the method you chose for applying the white tip, there will almost certainly be some need for refinement. This step is where you transform a good French tip into a perfect one. A crisp, clean smile line is the hallmark of a professional French manicure, and minor adjustments can make all the difference.
You’ll need a small, flat-edged detail brush (often called a clean-up brush or concealer brush) and some nail polish remover or pure acetone. Dip the brush into the remover, then gently blot it on a paper towel to remove excess liquid – you want the brush damp, not soaking wet. A brush that is too wet will flood the nail and smudge your polish.
Carefully trace along the bottom edge of your white tip, using the damp brush to push back or remove any white polish that has bled onto your sheer base or is not perfectly curved. Work slowly and with a light hand. For freehand applications, this step is crucial for sharpening the curve and making it symmetrical. For guide stickers, it helps clean up any slight bleeding that might have occurred. Even with a stamper, you might need to refine the edges. If you remove too much, simply dab a tiny bit of white polish back on with the detail brush and then reshape.
Continuously clean your brush on a paper towel as it picks up polish. This prevents you from redepositing polish onto your nail. Take your time with each nail, ensuring the smile line is consistent in thickness and curve across all fingers. This attention to detail is what separates an amateur attempt from a salon-quality finish. Once you are satisfied with the smile lines on all nails, allow the white polish to dry completely. This is critical before applying the top coat, as a wet white tip will smudge and ruin your crisp lines.
Pro tip: For ultimate precision, use a brush with very fine, stiff bristles. If you don’t have a dedicated clean-up brush, a small, angled eyeliner brush can work in a pinch.
Step 6: Seal and Protect with a Top Coat
The top coat is the grand finale of your French manicure, providing a protective layer that ensures longevity, adds a brilliant shine, and seals in all your hard work. It’s not just for aesthetics; a good top coat prevents chipping, protects against UV damage (which can yellow white polish), and gives your nails a smooth, professional finish. Never skip this step!
Ensure that all previous layers – the base coat, sheer color, and especially the white tips – are completely dry before applying the top coat. If any layer is still wet, the top coat can drag the polish, smudging your crisp smile lines and creating an uneven finish. Apply a generous, but not overly thick, layer of your top coat over the entire nail surface. Start from the cuticle area and sweep towards the free edge, making sure to cover the white tip completely.
Just like with the base coat and sheer polish, it is absolutely essential to “cap” the free edge of your nail with the top coat. This means running the brush horizontally along the very tip of your nail. Capping creates a seal over all the layers, significantly extending the wear time of your manicure and preventing chips from starting at the tips – a common vulnerability for French manicures. If you find your top coat dragging the white polish, you likely applied it too soon. Wait a few more minutes for the white tips to dry.
Allow the top coat to dry thoroughly. This is often the longest drying stage, especially if you’ve applied a slightly thicker layer for extra durability. Many quick-dry top coats are available, which can significantly reduce waiting time. However, even with quick-dry formulas, be mindful of bumping your nails for at least 30-60 minutes after application. For maximum chip resistance, consider reapplying a thin layer of top coat every 2-3 days.
Pro tip: If you use a quick-dry top coat, ensure it’s applied over fully dry layers. While it speeds up the top layer, it won’t cure the layers underneath, which can still smudge if not dry. For extra shine, apply a second thin layer of top coat after the first has dried for about 10-15 minutes.
Step 7: The Final Polish: Clean Up and Hydrate
You’re almost there! Your French tips are looking stunning, but the final touches are what truly elevate your manicure from homemade to professional. This step focuses on cleaning up any stray polish and nourishing your cuticles to complete the polished look.
Even with the most careful application, a tiny bit of polish might have ended up on your skin around the cuticles or sidewalls. Now is the time to meticulously clean these areas. Using your detail brush (the same one you used to perfect the smile line) dipped in nail polish remover, carefully trace around the edges of your nails. Gently wipe away any excess polish from your skin. Work slowly and precisely to avoid touching the freshly painted nail, especially if the top coat isn’t completely rock-hard. A clean perimeter around your nails makes the entire manicure look much neater and more intentional.
Once you’ve cleaned up any errant polish, the very last step is to hydrate your cuticles. Nail polish removers and even the drying process of polish can dehydrate the skin around your nails, making cuticles appear dry or ragged. Apply a small drop of cuticle oil to the base of each nail. Gently massage the oil into your cuticles and the surrounding skin. This not only nourishes and moisturizes, promoting healthy nail growth, but also adds a beautiful sheen that completes the “salon fresh” look.
Take a moment to admire your handiwork! You’ve successfully created a classic French manicure. Remember that practice makes perfect. The more you attempt French tips, the steadier your hand will become, and the more confident you’ll be in achieving that flawless smile line. Don’t be discouraged by initial imperfections; every attempt is a step towards mastery.
Pro tip: Keep a small, pointed cotton swab or a wooden cuticle stick wrapped in a thin layer of cotton (dipped in remover) handy for cleaning up tiny mistakes. It offers even more precision than a brush for some areas.
Common Mistakes to Avoid
Even with clear instructions, certain pitfalls can derail your French tip efforts. Being aware of these common mistakes can help you sidestep frustration and achieve better results.
- Skipping Nail Preparation: Failing to properly shape, buff, and cleanse your nails is a recipe for disaster. Polish won’t adhere well to oily or uneven surfaces, leading to premature chipping and an unprofessional look. Always dedicate time to thorough prep.
- Applying Thick Coats of Polish: This is a common beginner error. Thick layers of base coat, sheer color, or white polish take forever to dry, are prone to smudging, and create a lumpy, uneven finish. Always opt for two or three thin coats, allowing each to dry sufficiently.
- Rushing the Drying Process: Patience is a virtue in nail art, especially with French tips. Applying the next layer before the previous one is fully dry will cause dragging, smudging, and can even create bubbles. Invest in a good quick-dry top coat, but still respect the drying time between layers.
- Overloading the White Polish Brush: Too much white polish on the brush makes it incredibly difficult to create a neat, thin smile line. It leads to thick, gloopy tips and a messy application. Wipe excess polish off the brush before attempting the tip.
- Inconsistent Smile Lines: One of the biggest giveaways of a homemade French manicure is uneven or lopsided smile lines. Strive for symmetry and consistent thickness across all nails. Use your detail brush and remover for meticulous clean-up to perfect each curve.
Troubleshooting
Even the most experienced nail enthusiasts encounter issues. Here are quick solutions to common French tip problems:
- Issue: White tip looks streaky or transparent.
Solution: You likely applied too thin a coat or your white polish isn’t opaque enough. Allow the first thin coat to dry completely, then apply a second (or even third, if needed) very thin coat. Consider investing in a highly pigmented white polish specifically for French tips.
- Issue: White polish bled under the guide stickers.
Solution: The sticker wasn’t pressed down firmly enough along the edge, or your base coat wasn’t completely dry when you applied the sticker (causing it to lift the base slightly). Ensure the base is bone dry and press the sticker down meticulously. You can clean up minor bleeding with a detail brush dipped in remover.
- Issue: Smile line is jagged or uneven after freehand application.
Solution: This is where your detail brush and nail polish remover become your best friends. Dip the brush in remover, blot excess, and carefully “erase” imperfections along the bottom edge of your white tip until the curve is smooth and symmetrical. Don’t be afraid to take your time and refine.
Key Takeaways
- Preparation is Key: Proper shaping, cuticle care, buffing, and cleansing create the ideal canvas for a lasting manicure.
- Thin Coats Always: Apply multiple thin layers instead of one thick one for faster drying, smoother application, and better durability.
- Master Your Method: Choose between freehand, guide stickers, or a stamper for your white tips, and practice to perfect your chosen technique.
- Refine with Precision: A detail brush and nail polish remover are essential for perfecting the smile line and cleaning up any mistakes.
- Don’t Skip the Top Coat: It seals, protects, adds shine, and significantly extends the life of your French tips.
- Patience and Practice: French tips require a steady hand and a bit of patience. Don’t get discouraged; practice leads to perfection.
Frequently Asked Questions
Q: Can I do French tips with gel polish?
A: Absolutely! The steps are very similar, but you’ll need gel-specific polishes (base, sheer color, white, top coat) and a UV/LED lamp for curing each layer. Gel offers superior durability and shine.
Q: How long do French tips typically last?
A: With traditional lacquer, 5-7 days is a good average, depending on your nail health and activity level. With gel polish, they can last 2-3 weeks without chipping.
Q: My white tips are turning yellow. How can I prevent this?
A: Yellowing can be caused by UV exposure, certain chemicals, or even smoking. Ensure you use a good quality non-yellowing top coat, and consider a top coat with UV inhibitors. If you work with harsh chemicals, wear gloves.
Q: What if I don’t have a detail brush for cleanup?
A: A small, stiff-bristled art brush (like a fine liner or angled brush) can work. Alternatively, wrap a thin layer of cotton around a wooden cuticle stick and dip it in remover for precise cleanup.
What’s Next?
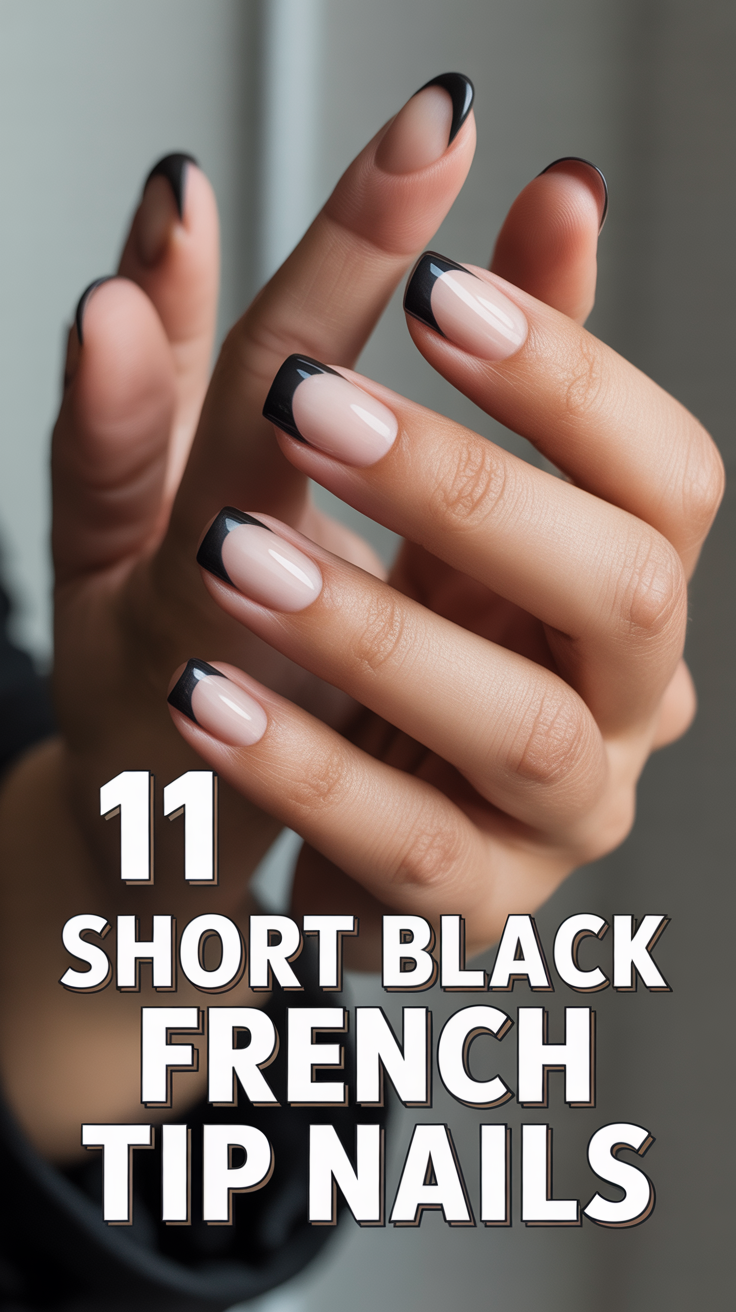
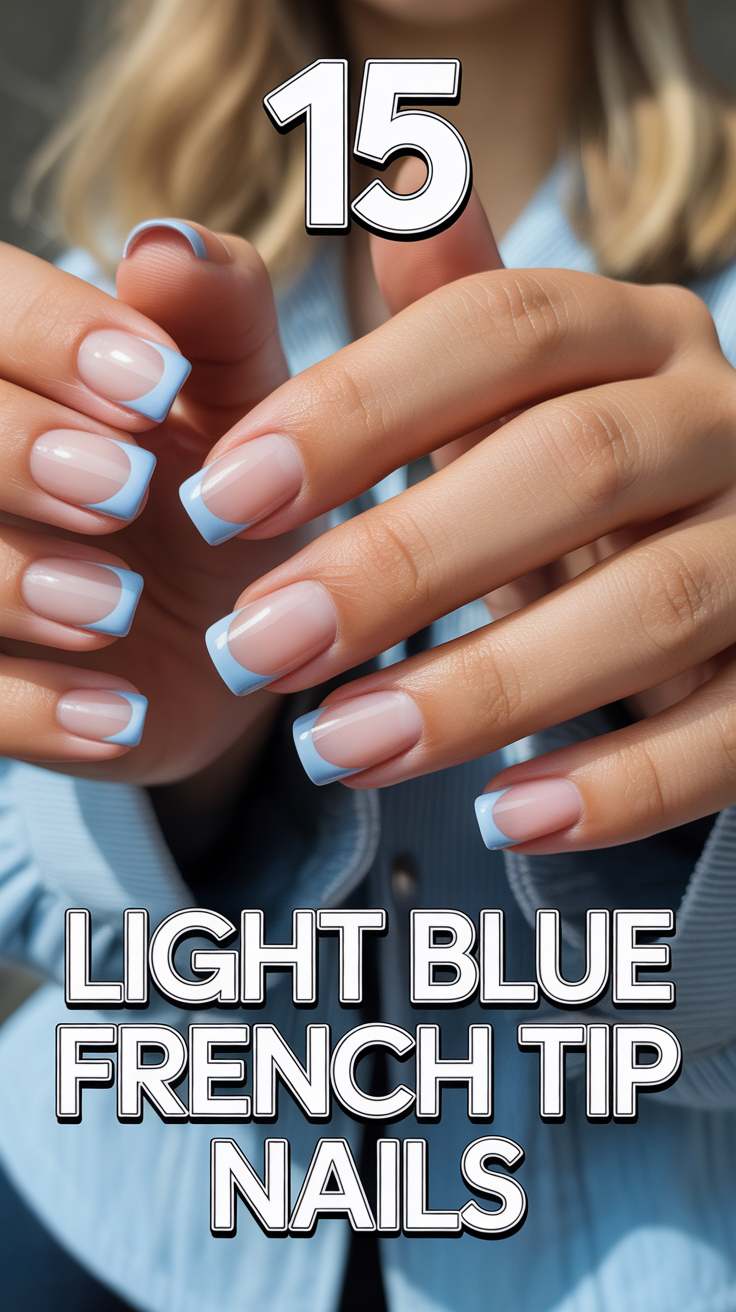
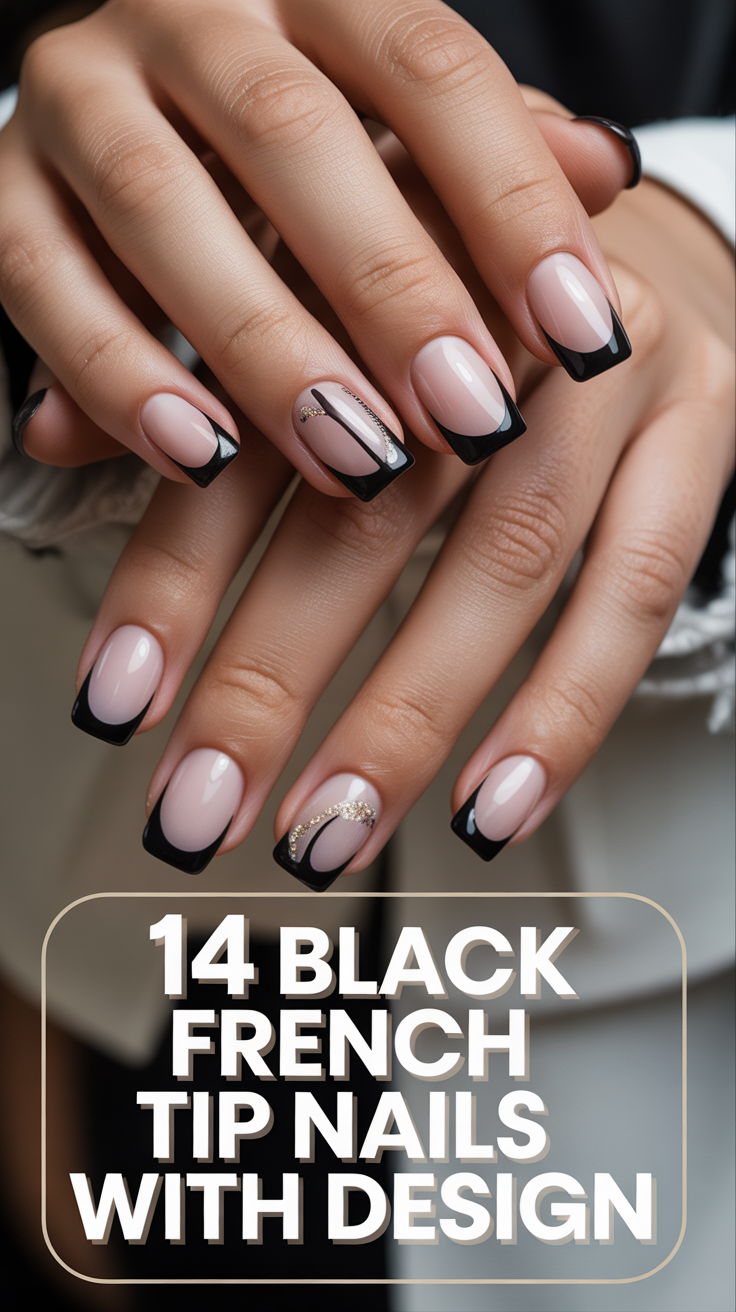
Congratulations on mastering the art of French tips! This classic manicure is a versatile skill that opens up a world of possibilities. Now that you’ve honed your precision and patience, consider exploring variations on the traditional French tip. Experiment with different colors for the tip (a “reverse” French with a black tip, or a glitter tip for a festive look), or try adding subtle nail art to your French manicure, such as tiny rhinestones or delicate floral designs on the accent nail. You could also delve into other timeless nail styles like ombré nails or even learn how to create your own nail extensions for a completely different look.
The journey of nail artistry is continuous, with endless techniques and styles to discover. Don’t hesitate to experiment with different polishes, tools, and designs. Most importantly, enjoy the process of self-expression and the satisfaction of beautifully manicured nails. Your hands are a canvas; keep exploring and creating! Why not try out your new French tip skills today?