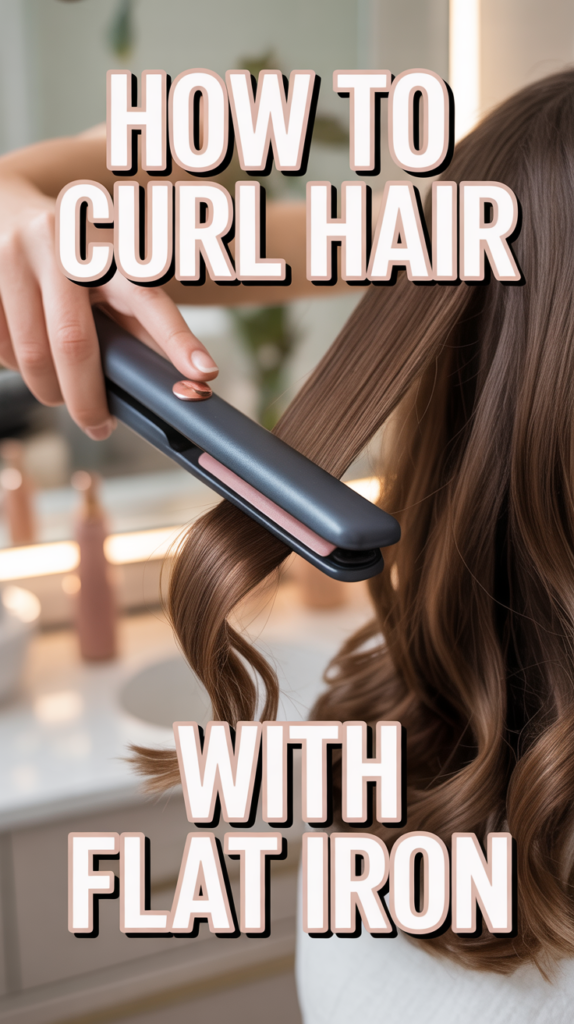
🌀 How To Curl Hair With Flat Iron
💄 The Everyday Glamour Routine
You do not need to spend hundreds of dollars at Sephora to achieve a flawless, airbrushed finish. Professional makeup artists secretly rely on these 5 incredible, highly-rated viral drug store dupes and tools to create stunning looks that last all day.
✨ e.l.f. Power Grip Primer
The undisputed holy grail of primers that broke the internet. The unique gel-based formula literally 'grips' onto your foundation, blurring pores and completely preventing your makeup from melting off, creasing, or fading for up to 14 hours.
💧 Real Techniques Miracle Complexion Sponges
Stop applying liquid foundation with brushes that leave streaks. When used slightly damp, these ultra-soft, latex-free sponges seamlessly bounce liquid products into your skin for an incredibly natural, dewy, 'no-makeup' finish.
🖤 Maybelline Sky High Lengthening Mascara
You don't need expensive lash extensions. This wildly popular formula features a flexible tower brush that bends to volumize and extend every single tiny lash from root to tip without flaking, smudging, or weighing your eyes down.
🌟 L'Oreal True Match Lumi Glotion
The ultimate secret for that radiant 'glass skin' look. Use it alone for a sheer, healthy tint on no-makeup days, or mix a tiny drop into your foundation to instantly add an incredibly expensive-looking, natural luminosity to your face.
🌋 Revlon Oil-Absorbing Volcanic Roller
The modern replacement for messy blotting papers. Made from real volcanic stone, this tiny tool fits perfectly in your purse. Simply roll it across your T-zone to instantly absorb excess shine without messing up the makeup underneath.
Welcome to the ultimate guide on transforming your trusty flat iron from a straightening tool into a versatile curling wand! For years, the flat iron has been a staple in hair care routines, primarily celebrated for its ability to create sleek, straight styles. However, its true potential extends far beyond simply smoothing strands. With the right technique, a flat iron can effortlessly create a myriad of beautiful curls and waves, from bouncy spirals to relaxed beachy texture, giving you salon-quality results right at home.
Many assume that curling requires a dedicated curling iron, but the truth is, a flat iron offers unique advantages. Its dual-plate design allows for a different kind of manipulation, often resulting in more natural-looking, less uniform curls that boast a modern, effortless vibe. Whether you’re a beginner looking to master a new skill or someone seeking to expand their hair styling repertoire, this comprehensive guide will walk you through every step. We’ll cover everything from selecting the right tools and preparing your hair to mastering the curling motion and perfecting your finished look. By the end of this article, you’ll be equipped with the knowledge and confidence to create stunning curls and waves, unlocking a whole new world of styling possibilities with the very tool you already own. Let’s dive in and revolutionize your hair game!
What You’ll Need
Before you embark on your curling journey, gathering the right tools and products is essential for both effectiveness and hair health. Having everything at hand will make the process smoother and more enjoyable, ensuring you achieve the best possible results while protecting your precious locks.
- High-Quality Flat Iron: This is, of course, your star player. Look for a flat iron with smooth, rounded edges and plates that glide easily through hair without snagging. Ceramic, tourmaline, or titanium plates are excellent choices, known for even heat distribution and reducing frizz. A 1-inch to 1.25-inch plate size is generally the most versatile for creating various curl types. Ensure it has adjustable temperature settings.
- Heat Protectant Spray: Non-negotiable! Heat styling can cause significant damage if hair isn’t adequately protected. A good heat protectant spray creates a barrier between your hair and the heat, minimizing breakage, dryness, and dullness. Apply it generously before any heat styling.
- Hair Clips or Clamps: Essential for sectioning your hair. These allow you to isolate the hair you’re working on, making the process more organized and ensuring every strand gets attention. Duckbill clips or claw clips work wonderfully.
- Fine-Tooth Comb or Paddle Brush: For detangling your hair thoroughly before you begin and for creating clean, precise sections. A smooth, knot-free base is crucial for even curls.
- Light-Hold Hairspray: To set your curls and ensure they last throughout the day. Opt for a flexible or light-hold spray that won’t make your hair stiff or crunchy, allowing for natural movement.
- Heat-Resistant Mat or Surface: For the safety of your countertops and surfaces. A heat-resistant mat provides a safe place to rest your hot flat iron between sections or during breaks.
- Optional: Texturizing Spray or Shine Serum: A texturizing spray can add volume and a more “undone” look to your finished curls, especially for beach waves. A shine serum can add a glossy finish and tame any flyaways.
Investing in quality tools and products, especially a good heat protectant, will not only yield better styling results but also maintain the long-term health and vibrancy of your hair.
Step-by-Step Instructions
Mastering the art of curling with a flat iron requires patience and practice, but by following these detailed steps, you’ll be creating beautiful, lasting curls in no time. Precision in each movement is key to achieving a polished and consistent look.
- Start with Clean, Dry, and Detangled Hair:Before you even think about heat, ensure your hair is completely dry. Curling damp hair with a flat iron can cause severe damage due to the rapid heating of water within the hair shaft. Wash and condition your hair, then air dry or blow dry it thoroughly. Once dry, use a comb or paddle brush to gently remove all tangles. A smooth, knot-free canvas is crucial for the flat iron to glide effortlessly, preventing snags and uneven curls.
- Apply Heat Protectant Liberally:This step is non-negotiable for maintaining the health of your hair. Spray a high-quality heat protectant evenly throughout your entire head of hair, from roots to ends. Ensure every strand is coated, as this product creates a protective barrier against the intense heat of the flat iron. Allow it a moment to dry before proceeding.
- Pre-Heat Your Flat Iron to the Correct Temperature:Set your flat iron to an appropriate temperature for your hair type. This is critical to prevent damage while still achieving effective curls.
- Fine, Thin, or Damaged Hair: Lower settings, typically between 250°F – 300°F (120°C – 150°C).
- Normal, Medium Hair: Mid-range settings, around 300°F – 375°F (150°C – 190°C).
- Thick, Coarse, or Resistant Hair: Higher settings, generally 375°F – 410°F (190°C – 210°C).
Never exceed 410°F (210°C), as this can cause irreversible damage to any hair type. Allow the iron a few minutes to reach the desired temperature.
- Section Your Hair:Proper sectioning is vital for control and consistency. Use your hair clips to divide your hair into manageable sections. A common method is to divide your hair into three main horizontal layers:
- Bottom Layer: Section off the hair from your ears down, clipping the rest of your hair up and out of the way.
- Middle Layer: Release the next section of hair, from your ears up to your temples, and clip the top layer.
- Top Layer: This will be the final section, typically from the crown of your head.
Working with smaller, consistent sections (about 1-2 inches wide) will ensure even heat distribution and more defined curls. Begin with the bottom layer and work your way up.
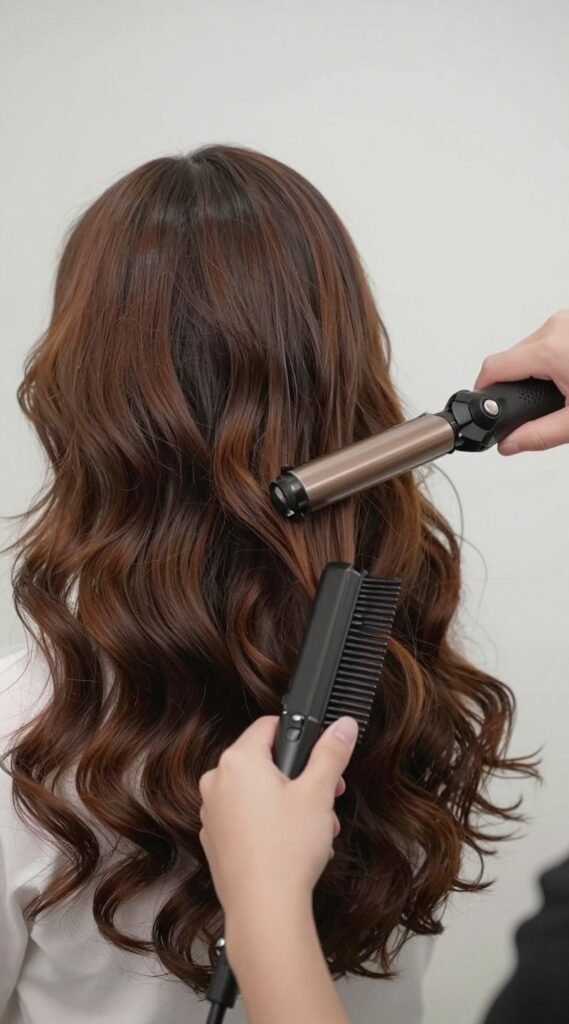
- Take a Small Section for Curling:Within your first working section, pick up a smaller, manageable piece of hair, typically 1 to 1.5 inches wide. The size of the section will dictate the tightness of your curl – smaller sections create tighter curls, while larger sections yield looser waves. Comb this small section smooth to ensure there are no knots.
- Clamp the Flat Iron Near the Roots (or Mid-Shaft):Open your flat iron and clamp it onto the chosen section of hair. The placement of the clamp largely determines where the curl begins.
- For curls starting closer to the root, clamp about 1-2 inches from your scalp.
- For a more relaxed, beachy wave that starts lower, clamp further down, around the mid-shaft of your hair.
Ensure you don’t clamp too tightly, which can create a crease. The hair should be held firmly but not flattened.
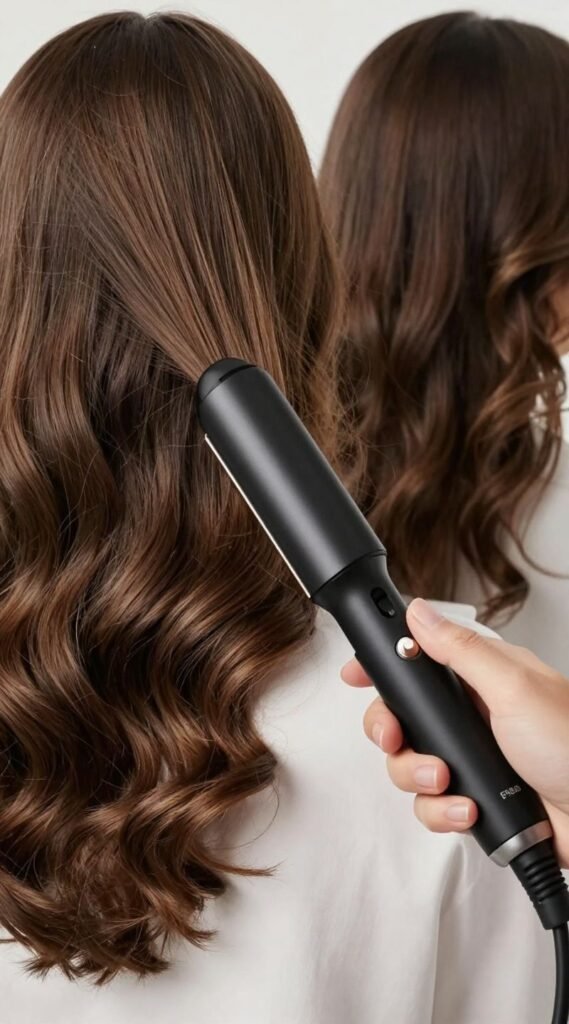
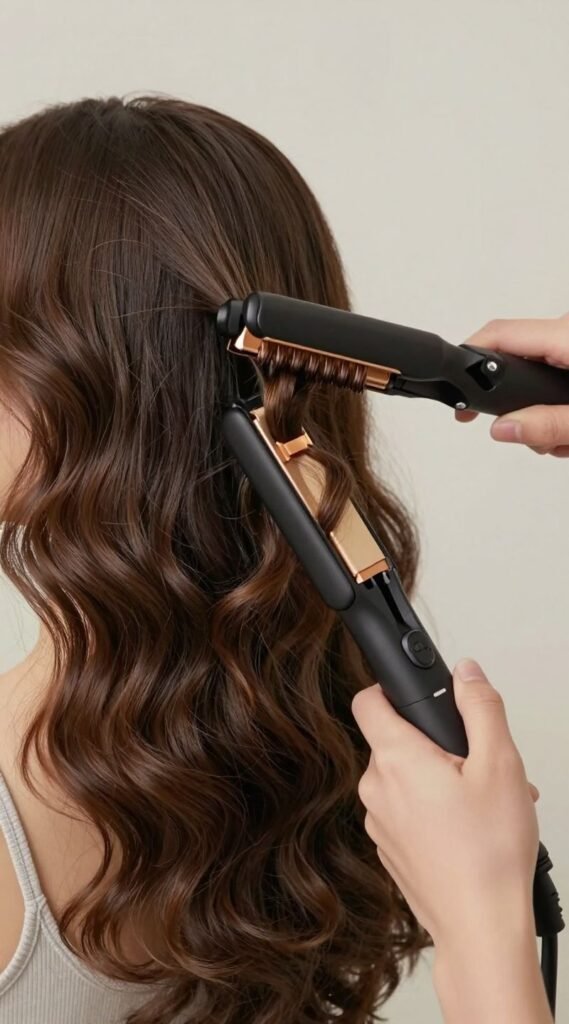
- Rotate the Flat Iron:This is the core movement. Once clamped, rotate the flat iron 180 degrees (a half turn) away from your face. This outward rotation is generally most flattering, opening up your face and creating a natural-looking bounce. For a different effect, you can alternate directions or curl towards your face for more volume. Hold the flat iron in this rotated position.
- Glide the Flat Iron Down the Hair Shaft:With the flat iron rotated, gently and steadily glide it downwards through the entire length of the hair section, all the way to the ends. Maintain consistent pressure and speed.
- For Tighter Curls: Glide slowly, allowing more heat to penetrate the hair, and keep the rotation consistent.
- For Looser Waves: Glide a bit faster, or slightly loosen your grip as you move down, which creates a softer bend.
The rounded edges of your flat iron will guide the hair into a beautiful curl as it moves. Do not stop or pause the iron, as this can create crimps or hot spots.
- Release and Let the Curl Cool:Once you reach the end of the hair section, release the flat iron. Allow the freshly formed curl to drop gently and cool completely. Do not touch or manipulate the curl while it’s warm! Heat sets the shape, but cooling locks it in. Touching it too soon will cause the curl to fall flat.
- Repeat for All Sections:Continue this process, working systematically through your hair. Move from the bottom layers to the top, and from the back of your head towards the front. For the sections framing your face, always remember to curl away from your face for the most flattering result.
- Allow All Curls to Cool Completely:Once all your hair is curled, resist the urge to immediately run your fingers through it. Let all the curls cool down for at least 5-10 minutes. This cooling period is crucial for the curls to set and achieve maximum longevity.
- Gently Separate and Style:Once the curls are cool, it’s time to style them.
- For Defined Curls: Gently separate the curls with your fingers, pulling them apart into smaller, more natural-looking strands.
- For Looser Waves or Beachy Look: Lightly brush through the curls with a wide-tooth comb or even just your fingers. You can also flip your head upside down and gently shake them out for added volume.
Avoid over-brushing, which can completely undo your hard work.
- Set with Hairspray:Finish your look with a light mist of flexible-hold hairspray. Hold the can about 10-12 inches away from your head and spray evenly. This will help hold your curls in place without making them stiff or crunchy. If desired, you can add a touch of shine serum to the ends for extra luster.
With practice, these steps will become second nature, allowing you to create beautiful, long-lasting curls with ease.
Pro Tips
Elevate your flat iron curling game with these expert tips designed to give you better, longer-lasting results and protect your hair in the process.
- Choose the Right Flat Iron: Not all flat irons are created equal for curling. Look for one with rounded edges, as sharp, square edges can create creases or snags. A plate size of 1 to 1.25 inches is generally the most versatile for various curl types. Plates made of ceramic, tourmaline, or titanium offer even heat distribution, reduce frizz, and allow for a smooth glide without pulling. Invest in a quality tool with adjustable temperature settings for optimal control.
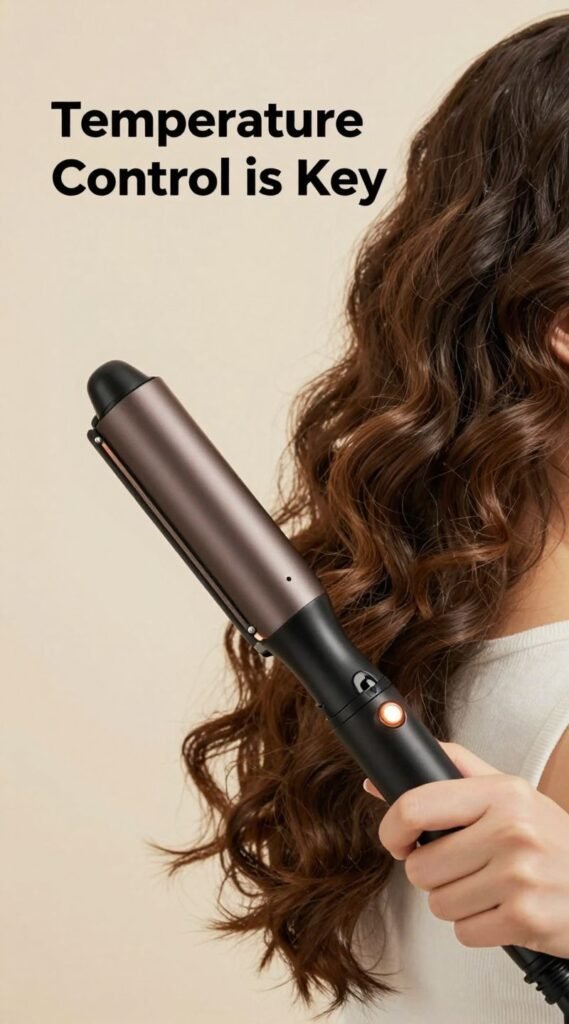
- Temperature Control is Key: Using the correct heat setting is paramount for both effective curling and preventing heat damage.
- Lower temperatures (250-300°F / 120-150°C) are ideal for fine, thin, or color-treated hair.
- Medium temperatures (300-375°F / 150-190°C) work well for normal, healthy hair.
- Higher temperatures (375-410°F / 190-210°C) should be reserved for very thick, coarse, or resistant hair.
Always start with the lowest effective temperature and increase only if necessary. Excessive heat is the primary cause of hair damage.
- Sectioning is Non-Negotiable: Proper and consistent sectioning is the secret to uniform curls and an efficient styling process. Take your time to create clean, even sections using clips. Working with small, manageable sections (1-inch to 1.5-inch wide) ensures that each strand receives adequate heat and pressure, resulting in a more defined and long-lasting curl. Trying to curl too much hair at once will lead to inconsistent results and can damage your hair.
- Master the Wrist Flick and Angle: The magic of flat iron curls lies in the wrist movement. Instead of simply clamping and pulling, learn to rotate your wrist 180 degrees (a half turn) as you clamp the iron. The direction of this rotation (away from the face is usually best) and the angle at which you hold the iron will determine the curl’s shape. Practice this motion without heat first. For a more relaxed wave, hold the iron more horizontally; for tighter curls, hold it more vertically.
- Let Curls Cool Completely: This might be the most overlooked yet crucial tip for curl longevity. Heat creates the curl’s shape, but the cooling process is what locks it in. After releasing a curl, allow it to cool undisturbed for several minutes. You can even gently cup the warm curl in your hand to help it cool in its shape. Touching or brushing out warm curls will cause them to fall flat almost immediately. Once all curls are cool, then you can gently separate them with your fingers or a wide-tooth comb.
Common Mistakes to Avoid
Even with the best instructions, it’s easy to fall into common traps that can hinder your curling efforts or, worse, damage your hair. Being aware of these pitfalls will help you achieve beautiful, healthy curls every time.
- Skipping Heat Protectant: This is arguably the biggest mistake. Direct heat from a flat iron without a protective barrier can strip your hair of moisture, leading to dryness, brittleness, split ends, and irreversible damage. Always apply a generous amount of heat protectant before any heat styling.
- Using Too High Heat: Just because your flat iron goes up to 450°F doesn’t mean you should use that setting. Excessive heat can literally fry your hair, causing permanent damage, loss of elasticity, and a dull appearance. Always start with the lowest effective temperature for your hair type and increase only if absolutely necessary.
- Taking Too Large Sections: Trying to curl large sections of hair at once is a recipe for disaster. The heat won’t penetrate evenly, resulting in inconsistent, poorly formed curls that quickly fall out. It also increases the likelihood of snagging and damaging your hair. Stick to small, manageable sections (1 to 1.5 inches wide) for best results.
- Rushing the Process or Stopping the Iron: Speed and consistency are important, but rushing can lead to uneven curls or creases. More importantly, stopping or pausing the flat iron mid-strand creates a concentrated hot spot, which can severely damage that specific section of hair and leave an unsightly crimp. Maintain a smooth, continuous glide from root (or mid-shaft) to tip.
- Brushing Out Curls Too Soon: Patience is a virtue when it comes to curling. If you brush or even touch your curls while they are still warm, you risk unraveling them prematurely. The heat sets the curl, but the cooling process locks it in. Allow your entire head of curls to cool completely (5-10 minutes) before gently separating them with your fingers or a wide-tooth comb.
- Curling Towards Your Face Around the Front: While alternating directions can create a more natural look, consistently curling the front sections of hair towards your face can make your hair look flat and close off your features. For a more flattering, open, and voluminous look, always curl the sections framing your face away from your face.
FAQ
Here are answers to some of the most common questions about curling hair with a flat iron, providing further clarity and confidence for your styling journey.

- What’s the best flat iron size for curling?A 1-inch to 1.25-inch flat iron is generally considered the most versatile and ideal for curling. Its size allows for enough surface area to create various curl types, from tighter spirals to looser waves, while still being maneuverable enough for different hair lengths. Smaller irons (0.5-0.75 inches) are great for very short hair or achieving very tight curls, while larger irons (1.5 inches or more) are best for creating very loose, voluminous waves on longer hair.
- How do I make my flat iron curls last longer?Several factors contribute to curl longevity:
- Proper Hair Prep: Start with clean, dry hair. Using a texturizing spray or mousse before curling can add grip.
- Heat Protectant: While primarily for protection, some heat protectants also offer a light hold.
- Correct Temperature: Using the appropriate heat setting for your hair type ensures the curl is properly formed.
- Let Them Cool: This is CRUCIAL. Allow each curl to cool completely before touching or separating it. You can even pin up each curl with a clip while it cools.
- Light Hairspray: Finish with a flexible-hold hairspray to set the style without making it stiff.
- Don’t Over-Brush: Gently separate curls with fingers or a wide-tooth comb, not a paddle brush.
- Can I curl short hair with a flat iron?Absolutely! Curling short hair with a flat iron is not only possible but can create beautiful texture and volume. The key is to use a smaller flat iron (0.5-inch to 0.75-inch), which allows for better control over shorter strands. Take very small sections and be mindful of your fingers and scalp due to the proximity of the heat. The technique remains the same: clamp, rotate, and glide. It can add incredible body and movement to bobs, lobs, and even pixie cuts.
- Should I curl towards or away from my face?For the most universally flattering and natural look, it’s generally recommended to curl the sections of hair around your face away from your face. This opens up your features, creates a soft sweep, and gives a more polished, salon-like finish. For the rest of your head, you can alternate directions (curling some sections away and some towards your face) to create a more undone, voluminous, and natural texture, preventing a “perfect ringlet” look. Experiment to see what you prefer!
✨ The Ultimate Skin & Hair Care Kit
The best makeup in the world cannot hide poorly treated skin or damaged hair. If you want to glow from the inside out, these 5 science-backed formulations and trusted tools are the absolute essential core of any functional, results-driven beauty regimen.
🐌 COSRX Snail Mucin 96% Repair Essence
The Korean skincare secret that completely revolutionized Western beauty routines. Applying this deeply hydrating, lightweight essence absolutely transforms dull, textured skin overnight into a plump, hydrated, and insanely smooth canvas.
🧪 Paula's Choice 2% BHA Liquid Exfoliant
Stop aggressively scrubbing your face. This gentle, leave-on chemical exfoliant sinks deep into pores to dissolve blackheads, visibly shrink enlarged pore size, and effectively erase stubborn acne breakouts without leaving your skin red or irritated.
🩹 Mighty Patch Original Hydrocolloid Stickers
The ultimate emergency fix. When you feel a massive blemish forming, do not pop it! Stick one of these medical-grade patches on overnight and watch it completely absorb all the impurities while protecting the skin from scarring.
💨 Revlon One-Step Volumizer Hot Air Brush
Achieve a massive bouncy, salon-quality blowout at home in literally half the time. This ingenious tool dries, brushes, and heavily volumizes your hair all at once, completely saving your arms from the exhausting juggle of a round brush and heavy dryer.
💧 Olaplex No. 7 Bonding Hair Oil
If you use heat tools or color your hair, this is non-negotiable. This highly concentrated, weightless styling oil instantly tames frizz, dramatically increases shine, and actually repairs broken hair bonds while providing up to 450°F heat protection.
Conclusion
You’ve now unlocked the full potential of your flat iron, transforming it from a single-purpose tool into a versatile styling powerhouse. Mastering the art of curling with a flat iron is a game-changer, offering you the flexibility to create a variety of stunning looks, from soft, romantic waves to bouncy, defined curls, all from the comfort of your home. Remember, like any new skill, it requires patience and practice. Don’t be discouraged if your first few attempts aren’t perfect; with each curl, your technique will improve, and your confidence will grow.
By prioritizing hair health with heat protectant, understanding temperature control, and following the detailed steps and pro tips provided, you’re well on your way to achieving salon-quality results. Experiment with different section sizes, rotation angles, and finishing products to discover your signature flat iron curl. Embrace the versatility, enjoy the process, and get ready to turn heads with your beautifully styled hair. Happy curling!