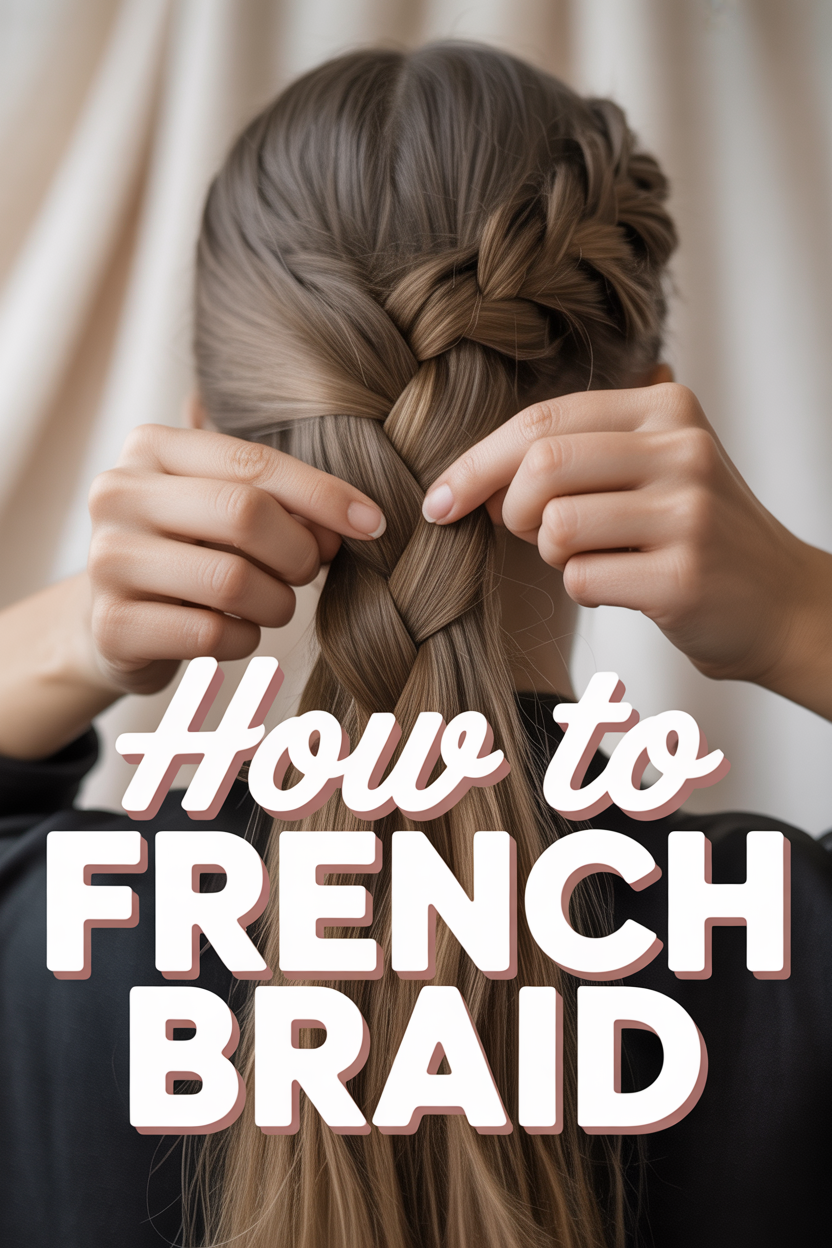
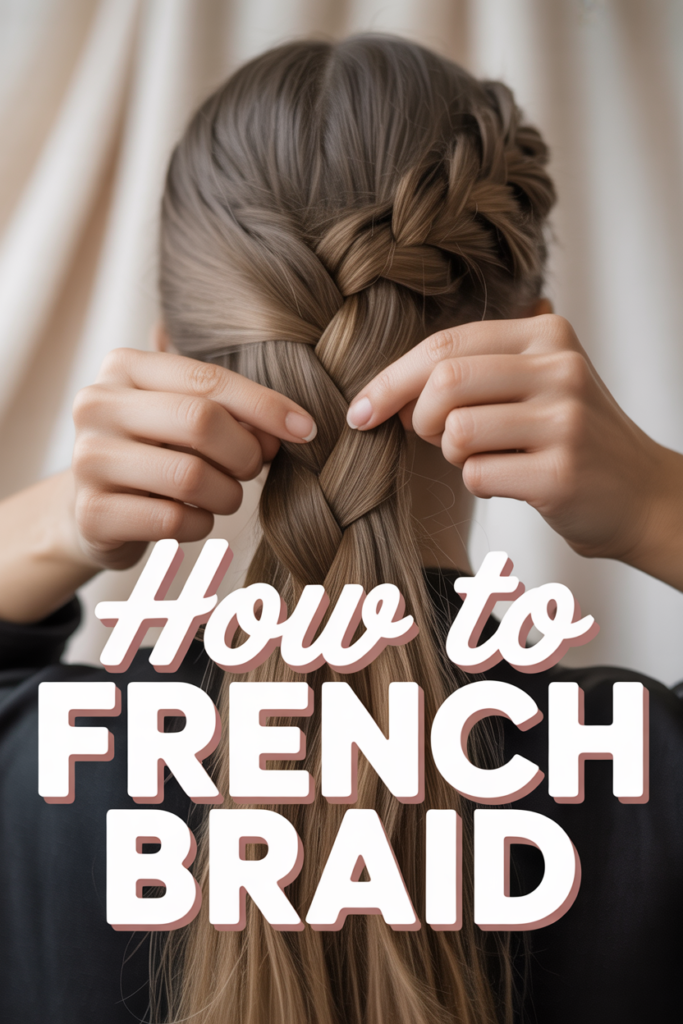
🧡 How To French Braid
💄 The Everyday Glamour Routine
You do not need to spend hundreds of dollars at Sephora to achieve a flawless, airbrushed finish. Professional makeup artists secretly rely on these 5 incredible, highly-rated viral drug store dupes and tools to create stunning looks that last all day.
✨ e.l.f. Power Grip Primer
The undisputed holy grail of primers that broke the internet. The unique gel-based formula literally 'grips' onto your foundation, blurring pores and completely preventing your makeup from melting off, creasing, or fading for up to 14 hours.
💧 Real Techniques Miracle Complexion Sponges
Stop applying liquid foundation with brushes that leave streaks. When used slightly damp, these ultra-soft, latex-free sponges seamlessly bounce liquid products into your skin for an incredibly natural, dewy, 'no-makeup' finish.
🖤 Maybelline Sky High Lengthening Mascara
You don't need expensive lash extensions. This wildly popular formula features a flexible tower brush that bends to volumize and extend every single tiny lash from root to tip without flaking, smudging, or weighing your eyes down.
🌟 L'Oreal True Match Lumi Glotion
The ultimate secret for that radiant 'glass skin' look. Use it alone for a sheer, healthy tint on no-makeup days, or mix a tiny drop into your foundation to instantly add an incredibly expensive-looking, natural luminosity to your face.
🌋 Revlon Oil-Absorbing Volcanic Roller
The modern replacement for messy blotting papers. Made from real volcanic stone, this tiny tool fits perfectly in your purse. Simply roll it across your T-zone to instantly absorb excess shine without messing up the makeup underneath.
The French braid is a timeless, elegant, and incredibly versatile hairstyle that has graced heads for centuries. Whether you’re aiming for a sophisticated updo, a practical way to keep hair out of your face during a workout, or a charming everyday look, mastering the French braid is a skill that offers endless possibilities. This comprehensive guide will break down the process into easy-to-follow steps, empowering you to create beautiful, intricate braids with confidence and ease.
Quick Overview
This guide will walk you through the process of creating a classic French braid, from preparing your hair to securing the finished style. You’ll learn the fundamental techniques of sectioning, incorporating new hair, and maintaining tension, enabling you to achieve a polished and secure braid.
Time needed: 15-30 minutes (initial attempts may take longer)
Difficulty: Intermediate (becomes Beginner with practice)
What you’ll need: Hairbrush or comb, hair elastic, optional styling product (e.g., leave-in conditioner, texturizing spray, hairspray).
Step-by-Step Instructions
Step 1: Prepare Your Hair
Begin with clean, dry or slightly damp hair that has been thoroughly detangled. Knots and tangles are the enemy of a smooth braid, making it difficult to section and incorporate hair evenly. Use a wide-tooth comb or a detangling brush to work through any snags, starting from the ends and moving up to the roots. For best results, consider applying a small amount of leave-in conditioner or a styling cream to add slip and reduce frizz, especially if your hair is prone to flyaways. Ensure your hair is smooth and manageable before proceeding.
Pro tip: If your hair is very fine or slippery, a light spritz of texturizing spray or dry shampoo at the roots can add grip and make the braiding process easier, helping the braid hold its shape better.
Step 2: Section the Crown
Using the handle of a rat-tail comb or your index fingers, create a clean, horizontal part across the top of your head, from one temple to the other. Gather this section of hair at the crown, ensuring it’s about 2-3 inches deep and wide enough to form your initial braid. This first section is crucial as it dictates the starting point and overall direction of your French braid. Hold this section firmly with one hand, lifting it slightly away from your scalp to prepare for the initial weave. The cleaner this section, the neater your braid will begin.
Step 3: Begin the Braid
Divide the gathered section of hair from Step 2 into three equally sized smaller strands. Label them mentally as left, middle, and right strands.
- Take the right strand and cross it over the middle strand. The original right strand is now in the middle position.
- Next, take the left strand and cross it over the new middle strand. The original left strand is now in the middle position.
You have now completed one full ‘pass’ of a standard three-strand braid at the very top of your head. This establishes the foundation of your French braid. Maintain firm but comfortable tension as you work to keep the braid close to the scalp.
Pro tip: The key to a neat braid is consistent tension. Practice holding the strands firmly without pulling too hard. Your fingers should feel the hair taut as you cross them over.
Step 4: Incorporate Hair from the Sides
This is the defining step of a French braid. After completing the initial standard braid pass (where your left strand is now in the middle position), you will begin adding hair from the sides of your head into the outer strands before crossing them over.
- First, focus on the right side. Before crossing the current right strand over the middle, gather a small, clean section of loose hair from the right side of your head, adjacent to the right strand.
- Add this new section of loose hair to the existing right strand, combining them into one thicker strand.
- Now, cross this newly combined, thicker right strand over the middle strand.
- Next, move to the left side. Gather a small, clean section of loose hair from the left side of your head, adjacent to the left strand.
- Add this new section of loose hair to the existing left strand, combining them into one thicker strand.
- Finally, cross this newly combined, thicker left strand over the middle strand.
Each time you add hair, aim for sections that are roughly the same size to ensure an even and symmetrical braid.
Step 5: Continue Adding and Braiding
Repeat Step 4, working your way down the back of your head.
- With each pass, take the outermost strand (first right, then left).
- Before crossing it over the middle, gather a new, small section of loose hair from the corresponding side of your head.
- Add this new hair to the outermost strand.
- Then, cross the combined, thicker outermost strand over the middle strand.
Continue this pattern, alternating between adding hair from the right and left sides, until you have incorporated all the loose hair from your scalp. Keep your hands close to your head and maintain even tension throughout. The angle at which you gather new sections of hair will determine how tightly the braid hugs your scalp and the overall direction of the braid.
Pro tip: Use your pinky finger to help isolate and gather new sections of hair. This can be particularly helpful when braiding your own hair, as it allows for more precision without releasing the main strands.
Step 6: Transition to a Standard Braid
Once you have reached the nape of your neck and there is no more loose hair to incorporate from the sides, you will transition into a standard three-strand braid. At this point, you should have three distinct strands of hair remaining. Continue braiding these three strands normally, crossing the right over the middle, then the left over the middle, and so on, until you reach the desired length. The length of this standard braid will determine how much of the “tail” of your French braid hangs down.
Step 7: Secure the Braid
When you have braided to your desired length, or when you are about 1-2 inches from the ends of your hair, secure the braid with a strong hair elastic. Choose an elastic that matches your hair color for a discreet look, or a decorative one for added flair. Wrap the elastic tightly enough to hold the braid securely without causing discomfort or pulling on your hair too much. Double-check that all three strands are firmly caught by the elastic.
Step 8: Refine and Finish
After securing your braid, take a moment to refine the style.
- Gently tug on the loops of the braid (starting from the bottom and working your way up) to loosen them slightly. This technique, often called “pancaking” or “pulling apart,” can make the braid appear thicker, softer, and more voluminous. Be careful not to pull too hard, or the braid might unravel.
- Smooth down any flyaways around your face and along the sides of your head using a fine-tooth comb and a light mist of hairspray.
- Check the overall symmetry and neatness of your braid in a mirror, adjusting any sections as needed.
Your elegant French braid is now complete!
Common Mistakes to Avoid
When learning to French braid, it’s easy to fall into a few common traps. Being aware of these pitfalls can significantly speed up your learning process and improve the quality of your braids.
-
Uneven Sectioning:
Why it’s problematic: Taking inconsistent amounts of hair for each new section results in a lopsided, bumpy, or unevenly textured braid. Some parts might look thin and sparse, while others are bulky and untidy.
Correct approach: Strive for consistency. Use the tip of your comb or your pinky finger to consistently gather small, equal-sized sections of hair from the sides before incorporating them into your main strands. Practice makes perfect in developing an eye for even sections.
-
Inconsistent Tension:
Why it’s problematic: If you braid too loosely, the braid will sag, fall apart easily, and look messy. If you braid too tightly, it can cause discomfort, pull on your scalp, and create a stiff, unnatural look.
Correct approach: Maintain a firm but gentle grip on your strands. The hair should feel taut between your fingers, but not painfully so. Consistent tension ensures the braid lies flat against the scalp and holds its shape throughout the day. It’s a balance that comes with practice.
-
Losing Strands or Dropping Sections:
Why it’s problematic: As you add new hair and cross strands, it’s common for beginners to accidentally drop one of the three main strands or fail to fully incorporate new hair, leaving loose pieces sticking out. This compromises the integrity and neatness of the braid.
Correct approach: Keep your fingers close to your scalp and use your thumb and forefinger to firmly pinch the working strands while your other fingers gather new hair. Before crossing a strand, ensure all the hair you intended to add is fully merged with that strand. If you feel a strand slipping, pause, regroup, and regain your hold before continuing.
-
Starting Too Far Back or Too Low:
Why it’s problematic: If your initial section is too far back on your head or too low on the crown, the braid won’t sit properly against your scalp and might look awkward or have a gap at the top.
Correct approach: Start your initial section at the very top of your crown, directly above your forehead, ensuring it’s a clean, horizontal part from temple to temple. This allows the braid to hug the curve of your head naturally from the beginning.
Troubleshooting
Even with careful instruction, you might encounter a few hiccups. Here are some common issues and quick solutions:
-
My arms get tired before I finish!
Solution: This is very common, especially when braiding your own hair. Take short breaks as needed to shake out your arms. Try braiding in front of a mirror (or two mirrors for the back view) so you’re not constantly straining to see. As you practice, your arm muscles will get stronger, and your technique will become more efficient, reducing the time and effort required.
-
The back of my braid looks messy/bumpy.
Solution: The back of the head is often the trickiest part, especially for self-braiding. This usually indicates uneven tension or inconsistent sectioning. Try using a hand mirror to periodically check your progress at the back. Focus on feeling the hair and maintaining consistent tension with your fingers. Ensure you’re pulling new sections of hair straight up or straight across, rather than at awkward angles, which can create bumps.
-
My braid is unraveling or falling apart quickly.
Solution: This points to a lack of sufficient tension or overly slippery hair. Ensure you’re holding the strands firmly throughout the braiding process, especially when incorporating new hair. If your hair is very smooth, try applying a texturizing spray or dry shampoo before you start to give it more grip. You can also try braiding slightly tighter initially, then gently “pancaking” (pulling apart) the loops for volume once it’s secured.
Key Takeaways
- Preparation is Key: Always start with thoroughly detangled hair, possibly with a styling product for grip and smoothness.
- Consistent Sectioning: Aim for small, equal-sized sections of hair when adding to the outer strands for a symmetrical braid.
- Maintain Even Tension: A firm but comfortable grip is crucial for a neat, secure braid that doesn’t sag or cause discomfort.
- Practice Makes Perfect: French braiding is a skill that improves significantly with repetition. Don’t get discouraged by initial attempts.
- Use Your Fingers: Your pinky finger can be a great tool for isolating new sections, and your thumb and forefinger for maintaining a strong grip on the working strands.
- Refine the Finish: Gently tugging on the braid loops can add volume and a softer, more professional look.
Frequently Asked Questions
Here are answers to some common questions about French braiding:
Q: Can I French braid my own hair?
A: Absolutely! While it might seem daunting at first, many people successfully French braid their own hair. It requires practice, patience, and often braiding by feel rather than by sight, especially at the back of the head. Using two mirrors (one in front, one behind) can be very helpful.
Q: What hair length is best for a French braid?
A: French braids work best on hair that is at least shoulder-length. This length allows for enough hair to be incorporated into the braid from the crown down to the nape of the neck. Longer hair offers more braiding possibilities and can create more dramatic looks.
Q: What hair types work best for French braids?
A: French braids can be done on almost all hair types, from straight to curly, fine to thick. Hair with some natural texture or a bit of “grip” (like second-day hair) often holds a braid better than freshly washed, very slippery hair. For very fine hair, using texturizing products can add volume and hold. For curly hair, braiding while slightly damp can help manage frizz.
Q: How long does a French braid typically last?
A: A well-executed French braid can last anywhere from a few hours to a full day, or even overnight for a “next-day waves” look. The longevity depends on your hair type, how tightly it was braided, and your activity level. Using hairspray or styling products can help extend its wear.
What’s Next?
Congratulations on mastering the classic French braid! This foundational skill opens up a world of possibilities for your hair styling. Now that you’ve got the basics down, why not explore some variations?
- French Braid Pigtails: Apply the same technique to create two braids, starting from a center part.
- Dutch Braid (Reverse French Braid): Instead of crossing strands over the middle, cross them under for a braid that sits on top of your head, rather than being woven into it.
- French Braid Updo: Once you’ve braided down the back, coil the remaining tail into a bun and secure it for an elegant updo.
- Side French Braid: Start your braid closer to your temple and curve it around the side of your head.
Keep practicing, experiment with different looks, and don’t be afraid to get creative. The more you braid, the more intuitive and effortless it will become. Grab your comb and hair elastic, and start braiding today!