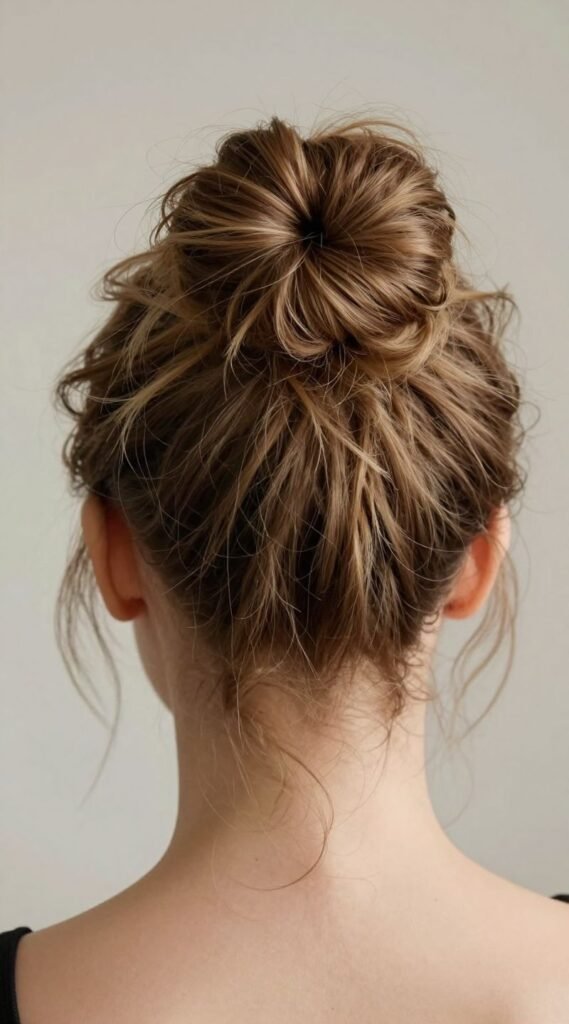
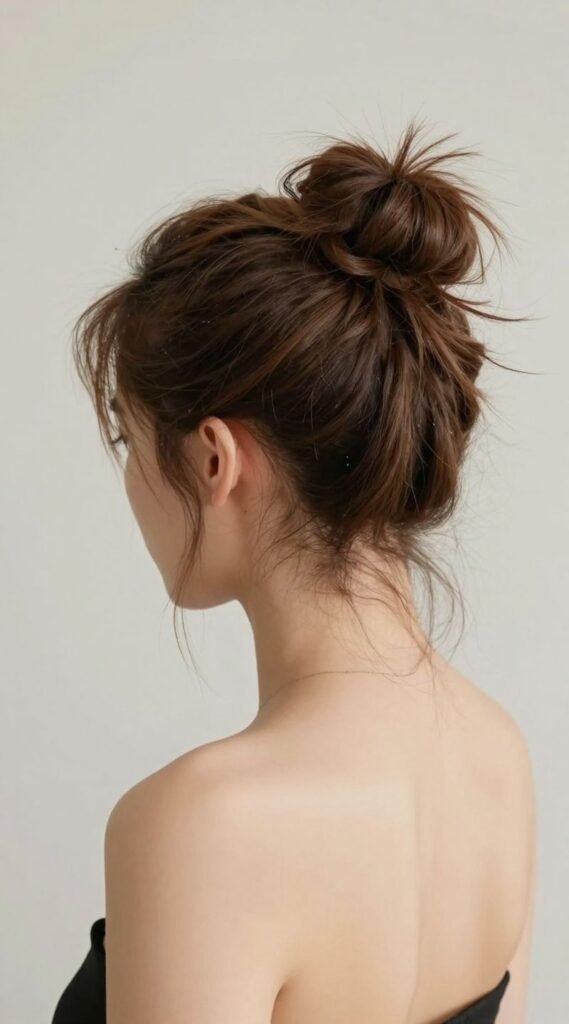
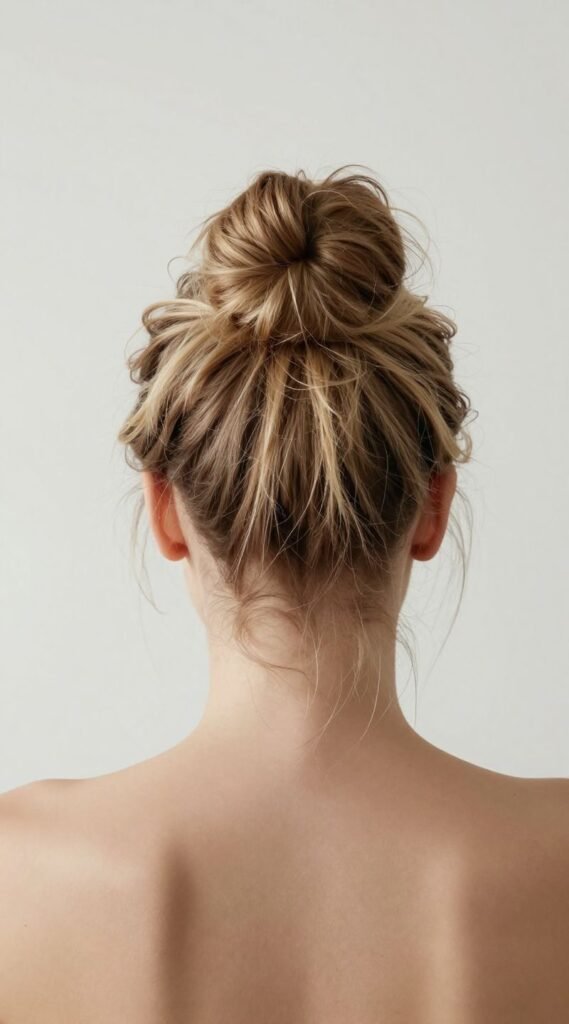
✨ How To Do A Messy Bun
💄 The Everyday Glamour Routine
You do not need to spend hundreds of dollars at Sephora to achieve a flawless, airbrushed finish. Professional makeup artists secretly rely on these 5 incredible, highly-rated viral drug store dupes and tools to create stunning looks that last all day.
✨ e.l.f. Power Grip Primer
The undisputed holy grail of primers that broke the internet. The unique gel-based formula literally 'grips' onto your foundation, blurring pores and completely preventing your makeup from melting off, creasing, or fading for up to 14 hours.
💧 Real Techniques Miracle Complexion Sponges
Stop applying liquid foundation with brushes that leave streaks. When used slightly damp, these ultra-soft, latex-free sponges seamlessly bounce liquid products into your skin for an incredibly natural, dewy, 'no-makeup' finish.
🖤 Maybelline Sky High Lengthening Mascara
You don't need expensive lash extensions. This wildly popular formula features a flexible tower brush that bends to volumize and extend every single tiny lash from root to tip without flaking, smudging, or weighing your eyes down.
🌟 L'Oreal True Match Lumi Glotion
The ultimate secret for that radiant 'glass skin' look. Use it alone for a sheer, healthy tint on no-makeup days, or mix a tiny drop into your foundation to instantly add an incredibly expensive-looking, natural luminosity to your face.
🌋 Revlon Oil-Absorbing Volcanic Roller
The modern replacement for messy blotting papers. Made from real volcanic stone, this tiny tool fits perfectly in your purse. Simply roll it across your T-zone to instantly absorb excess shine without messing up the makeup underneath.
Welcome to the ultimate guide on mastering the art of the messy bun – a hairstyle that epitomizes effortless chic, versatility, and understated elegance. Far from being a mere haphazard gathering of hair, a truly well-executed messy bun is a carefully constructed look that appears perfectly undone. It’s a style that transcends occasions, equally at home at a high-fashion event as it is on a casual Sunday morning. In this comprehensive article, we’ll demystify the process, breaking down each step to help you achieve that coveted “just rolled out of bed, but make it fashion” aesthetic. You’ll learn not only the precise mechanics of creating a messy bun but also the nuanced techniques, product recommendations, and expert tips that elevate it from a simple updo to a statement of style. Whether you have long, short, thick, or fine hair, this guide is designed to empower you with the knowledge and confidence to create a beautiful, perfectly imperfect messy bun every single time. Get ready to transform your hair routine and embrace the beauty of artfully disheveled elegance.

What You’ll Need
Before embarking on your messy bun journey, gathering the right tools and products is crucial. While the essence of a messy bun lies in its seemingly effortless nature, a little preparation goes a long way in achieving the desired look and ensuring it lasts. Here’s a detailed list of what you’ll need and why each item is important:

- Hair Tie(s):
- Elastic Hair Ties: These are your primary tool for securing the base of your bun. Opt for snag-free, fabric-covered elastic ties to prevent damage and minimize creases. Have a couple on hand – one for the initial ponytail and another for securing the bun itself, if needed.
- Scrunchies (Optional): For a softer, more voluminous look, especially if you have thicker hair or want a less formal vibe, a scrunchie can be a fantastic alternative to an elastic. They tend to be gentler on the hair and add a touch of retro charm.
- Bobby Pins:
- Standard Bobby Pins: These are indispensable for securing loose strands, tucking in ends, and reinforcing the shape of your bun. Choose pins that match your hair color for discreet hold. A pack of 20-30 is a good idea, as you might need more than you think, especially when first learning.
- U-Shaped Hairpins (Optional): Also known as hair forks, these are excellent for securing larger sections of hair or adding extra stability to the bun without creating as much tension as bobby pins.
- Dry Shampoo:
- Purpose: Even if your hair is freshly washed, dry shampoo isn’t just for absorbing oil. It adds incredible texture, grip, and volume, making your hair easier to work with and helping the bun hold its shape. It creates a “lived-in” feel that is perfect for a messy bun.
- Application: Focus on the roots and mid-lengths.
- Texturizing Spray / Sea Salt Spray:
- Purpose: This is a game-changer for adding grit, body, and definition to your hair, especially if it’s fine or very silky. It enhances that perfectly undone look and provides the necessary friction for strands to stay put.
- Application: Spray lightly throughout the lengths of your hair, particularly before you start gathering it.
- Hairspray:
- Purpose: A flexible-hold hairspray is essential for setting your finished messy bun, taming flyaways, and ensuring longevity without making your hair stiff or crunchy.
- Type: Opt for a light-to-medium hold spray that allows for natural movement.
- Brush or Wide-Tooth Comb (Optional):
- Purpose: While a messy bun often starts with slightly tangled hair for texture, a quick brush-through can help detangle and smooth out any major knots before you begin, especially if you have very long or thick hair. A wide-tooth comb is great for adding gentle volume at the roots.
- Technique: If using a brush, brush your hair upside down for added volume.
- Mirror:
- Purpose: A good mirror is essential for seeing what you’re doing, especially when adjusting the back of your bun and pulling out face-framing pieces. A handheld mirror can be helpful for checking the back.
- Hair Accessories (Optional):
- Purpose: Headbands, scarves, decorative pins, or clips can add a personal touch and elevate your messy bun for different occasions.
Having these items ready will streamline the process and ensure you have everything at your fingertips to create your perfect messy bun with confidence and ease.
Step-by-Step Instructions
Creating the perfect messy bun is an art, but it’s an art that anyone can master with a little practice and the right technique. Follow these detailed steps to achieve that coveted effortlessly chic look.
- Start with the Right Hair Texture:The foundation of a great messy bun often begins with hair that isn’t freshly washed. Day-old hair typically has more grip, texture, and natural volume, making it easier to style and hold a bun. If your hair is too clean and slippery, it might be difficult to get the bun to stay put or achieve that desired “undone” look. If you must start with freshly washed hair, don’t fret – the next step will help you add the necessary texture.
- Prep Your Hair for Texture and Volume:This step is crucial for adding the necessary grip and volume, especially if your hair is fine, silky, or freshly washed. Begin by sectioning your hair. Spray a generous amount of dry shampoo at the roots and mid-lengths, focusing on the crown area. Allow it to sit for a minute or two to absorb any oils and create a matte finish. Then, gently massage it into your scalp with your fingertips to build volume. Next, spritz a texturizing spray or sea salt spray throughout the mid-lengths and ends of your hair. Scrunch your hair lightly with your hands to activate the product and enhance its natural texture. This combination will give your hair that “lived-in” feel and make it much easier to manipulate into a bun that holds its shape.
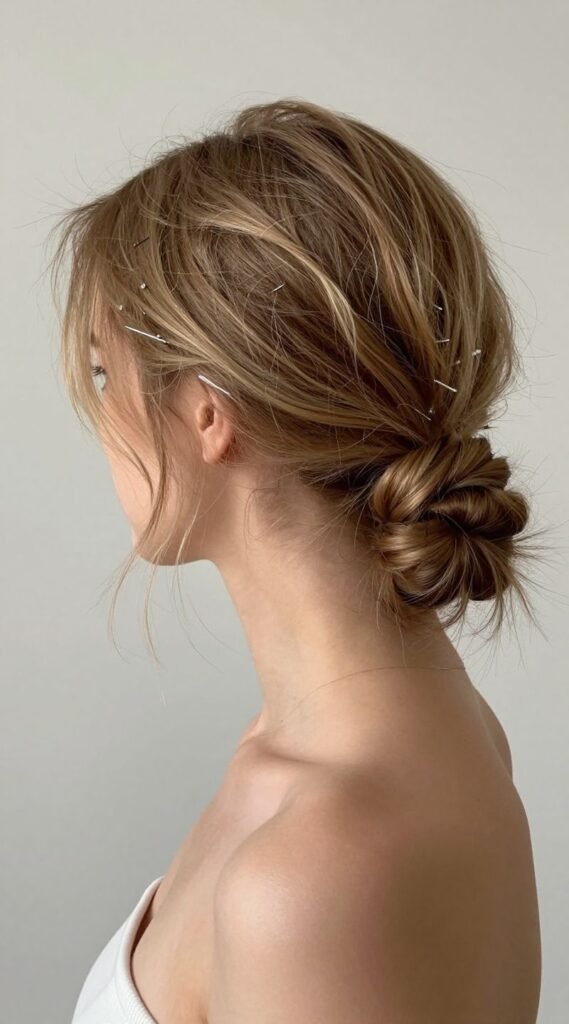
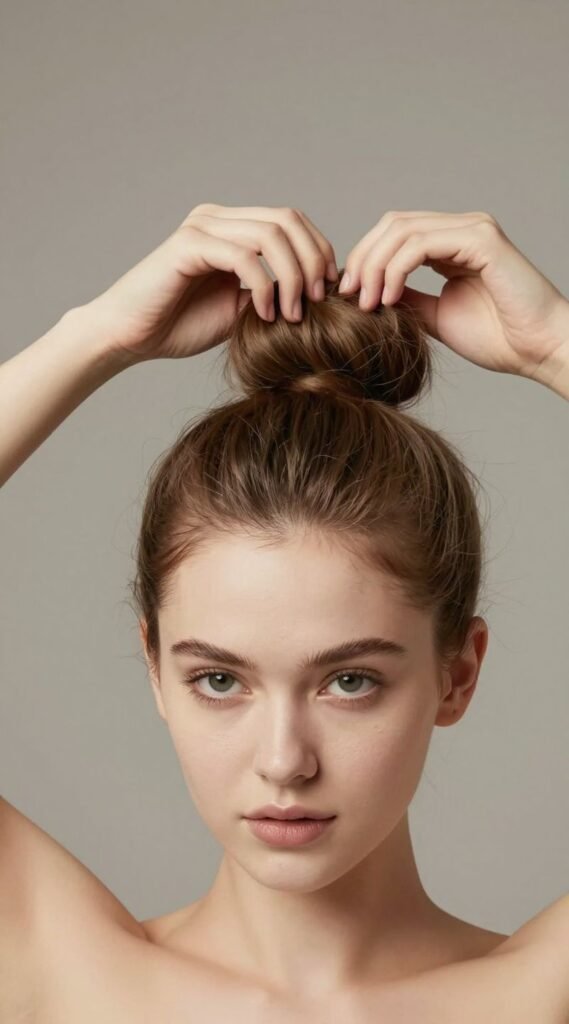
- Determine Your Bun Placement:The placement of your bun significantly impacts the overall look. Decide whether you want a high bun (atop your head), a mid-height bun (at the crown or just below), or a low bun (at the nape of your neck). For a classic messy bun, a mid-height placement often works best as it offers a good balance of casualness and visibility. Use your fingers to roughly gather your hair into a ponytail at your desired height. Don’t worry about perfection at this stage; just get a feel for the placement.
- Gather Your Hair into a Loose Ponytail:Once you’ve decided on the placement, use your fingers (not a brush, unless you want it super smooth) to gather all your hair into a loose ponytail at that chosen height. The key here is to keep it loose. Avoid pulling your hair too tightly against your scalp, as this will create a sleek, formal look rather than a messy one. Allow some natural bumps and loose strands around your hairline and temples. If you want extra volume at the crown, gently push your hair forward at the base of the ponytail before securing it.
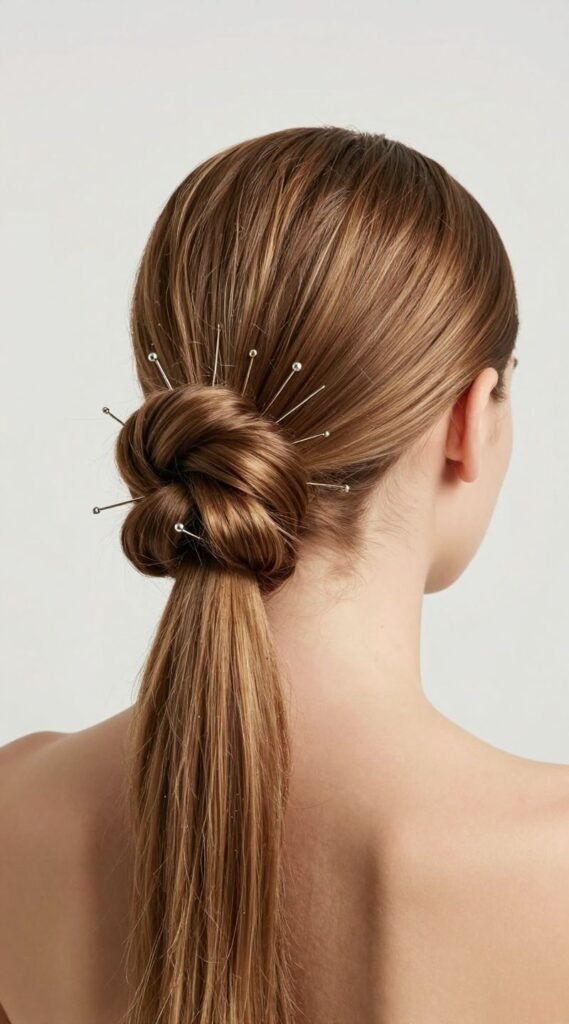
- Secure the Ponytail (First Loop of Hair Tie):Take your chosen hair tie (elastic or scrunchie). Wrap it around the base of your gathered hair once, as if you were creating a regular ponytail. On the second wrap, pull your hair only halfway through, creating a loop. The ends of your hair should be sticking out at the bottom of this loop. This forms the initial base and shape of your bun. The size of this loop will determine the initial volume of your bun, so adjust as desired.
- Create the Bun Shape:Now, take the remaining loose ends of your hair that are hanging out from the loop. You have a few options here, depending on your hair length and the desired messiness:
- Option A (Twist and Wrap): For a slightly more structured messy bun, gently twist the loose ends of your hair into a rope. Then, wrap this twisted section around the base of the half-pulled-through loop. You can wrap it once, twice, or multiple times, depending on your hair length, to create a fuller bun.
- Option B (Criss-Cross and Pin): For a more “undone” look, you can skip the twisting. Simply take sections of the loose ends and criss-cross them over and under the initial loop, securing them with bobby pins as you go.
- Option C (Knot and Secure): For truly effortless, shorter hair, you can even tie the loose ends into a small, loose knot around the base of the loop.
- Secure the Bun with the Hair Tie (Second Loop) or Bobby Pins:Once you’ve created your desired bun shape with the loose ends, take your hair tie (if you used one for the initial loop) and wrap it around the entire bun structure. This will secure everything in place. You might need to wrap it two or three times depending on the thickness of your hair and the size of your bun. Alternatively, if you opted for the criss-cross method, you might primarily rely on bobby pins here. Ensure the hair tie feels snug but not painfully tight.
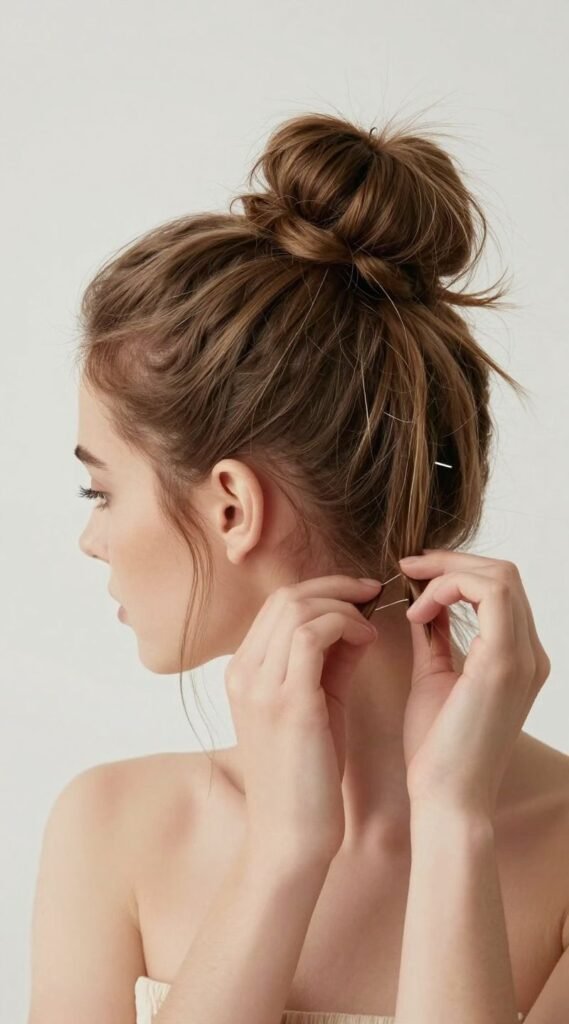
- Mess It Up (The Art of Undoing):This is where the “messy” magic happens! Gently tug at various sections of the bun to loosen it and create a softer, more voluminous appearance. Pull out small strands around the bun itself to give it texture and dimension. Don’t be afraid to experiment. Use your fingers to lightly pull out a few face-framing pieces around your temples, ears, and nape of your neck. This softens the look and adds to the effortless vibe. The goal is to make it look intentionally disheveled, not sloppy.
- Reinforce with Bobby Pins:Once you’re happy with the shape and messiness, use bobby pins to secure any overly loose strands or areas that feel like they might fall out. Insert the bobby pins discreetly, pushing them into the base of the bun and catching some hair from the scalp for extra hold. Focus on areas where the bun feels unstable or where you want to tuck in an unruly end. Use as many or as few as needed to feel secure.
- Set with Hairspray:Finish your messy bun with a light mist of flexible-hold hairspray. Hold the can about 10-12 inches away from your head and spray evenly over the entire bun, as well as any flyaways around your hairline. This will help hold the style in place without making it look stiff or crunchy. If you want a bit more hold, you can gently pat down any remaining flyaways with your fingers after spraying.
- Final Adjustments:Take a final look in the mirror from all angles. Adjust any pieces that don’t look quite right. You can add a decorative clip or headband if desired. Remember, the beauty of a messy bun is its imperfection, so don’t overthink it. The more you practice, the more intuitive the process will become, and the better you’ll get at creating a bun that perfectly suits your style and hair type.
Pro Tips
Elevate your messy bun game with these expert tips that go beyond the basic steps, helping you achieve a truly polished yet undone look every time.
- Embrace Your Hair Texture:Don’t fight your natural hair texture – work with it! If you have naturally wavy or curly hair, your messy bun will inherently have more volume and texture. Enhance this by applying a curl-defining cream or mousse before you start. If you have straight hair, focus on using dry shampoo and texturizing spray more generously to build that crucial grit and volume. For fine hair, backcombing the ponytail before twisting can add significant fullness. The more you understand and leverage your hair’s natural tendencies, the easier it will be to create a beautiful, effortless bun.
- The “Don’t Look” Technique:Often, the best messy buns are created when you’re not trying too hard. Many stylists swear by the “don’t look in the mirror” technique for the initial gathering and twisting. Stand with your back to the mirror, gather your hair, and create the bun by feel. Then, turn around and make minor adjustments. The pressure of trying to make it “perfect” while watching can lead to overthinking and a stiff result. Embrace the spontaneity; sometimes the most beautiful buns happen when you’re just going for it.
- Strategic Face-Framing Pieces:The magic of a messy bun often lies in the artfully pulled-out face-framing pieces. Don’t just randomly pull out strands. Think about which pieces would naturally fall if your hair were down. Often, these are the shorter layers around your face or the baby hairs at your temples. Gently pull out a few thin wisps, and if desired, curl them lightly with a curling iron for a softer, more romantic effect. This softens the entire look and makes it appear more intentional and less severe.
- Adapt for Hair Length and Thickness:The technique needs slight modifications based on your hair.
- For Long/Thick Hair: You might need to twist your hair more times or wrap it around the base multiple times to contain its volume. Use extra bobby pins for reinforcement. Consider using a stronger elastic or a scrunchie for better hold.
- For Short/Fine Hair: Focus heavily on product application (dry shampoo, texturizing spray) to build volume and grip. You might create a smaller, tighter initial loop, then wrap the shorter ends around it, securing frequently with small bobby pins. A sock bun or donut bun tool can also be a secret weapon for creating the illusion of more hair.
- Refresh a Day-Old Bun:A messy bun is excellent for extending your hairstyle. To refresh a day-old bun, first, gently loosen any areas that feel too tight or have flattened. Re-spray with texturizing spray or dry shampoo to reactivate volume and absorb any new oil. Pull out a few fresh face-framing pieces and perhaps spritz them with water before re-scrunching. Re-pin any loose sections and finish with a light mist of hairspray. This can give your bun a whole new lease on life without having to start from scratch.
Common Mistakes to Avoid
While the messy bun prides itself on its “effortless” appeal, there are several pitfalls that can transform it from chic to sloppy. Being aware of these common mistakes will help you refine your technique and achieve a consistently stylish result.
- Making It Too Neat or Too Tight:This is perhaps the most common mistake. The goal is “messy,” not “perfectly coiled.” Pulling your hair too tightly into a sleek ponytail before forming the bun will result in a severe, formal look that lacks the desired softness and casualness. Similarly, over-twisting and tightly wrapping the hair can make the bun appear too compact and structured. Remember to keep the initial gathering loose and allow for natural bumps and texture around the scalp.
- Forgetting About Texture Products:Especially if you have fine, silky, or freshly washed hair, skipping dry shampoo or texturizing spray is a recipe for a flat, slippery bun that won’t hold. These products are crucial for adding grip, volume, and that desirable “lived-in” feel. Without them, your bun might unravel quickly or look limp and lifeless.
- Using the Wrong Type of Hair Tie:A thin, rubber-band-like hair tie can tug at your hair, cause breakage, and often isn’t strong enough to hold a messy bun securely without feeling too tight. Opt for fabric-covered elastic ties or scrunchies. These are gentler on your hair, provide better grip, and are less likely to leave a harsh crease.
- Over-Securing with Too Many Bobby Pins:While bobby pins are essential, using too many can make your bun look stiff, heavy, and even create uncomfortable pressure points. It can also make the bun look “forced” rather than naturally falling into place. Aim for strategic placement: use pins to secure genuinely loose sections or to reinforce the base, rather than trying to pin down every single strand. Less is often more for that truly effortless look.
- Ignoring Hair Around the Nape and Temples:A messy bun looks most natural when it’s not pulled back too harshly from the entire hairline. Forgetting to gently pull out a few wisps around the nape of your neck, temples, and ears can make the style appear too severe and unflattering. These soft, face-framing pieces are key to the “undone” aesthetic and help to soften your features.
- Over-Spraying with Hairspray:While hairspray is important for hold, using too much, especially a strong-hold formula, can make your hair stiff, crunchy, and unnatural-looking. It defeats the purpose of an “effortless” style. Opt for a flexible or medium-hold hairspray and apply it in a light mist from a distance. The goal is to set the style, not to cement it into place.
FAQ
Q1: How do I make my messy bun last all day without falling out?
A: Longevity starts with proper preparation. Ensure you’ve applied dry shampoo or texturizing spray to give your hair grip. When forming the bun, make sure the initial ponytail is snug enough to hold but not too tight. Use a good quality, strong elastic hair tie. Crucially, don’t be shy with bobby pins; strategically place them around the base of the bun, pushing them into the scalp hair to anchor it securely. Finish with a flexible-hold hairspray. For extra security, especially if you have very long or heavy hair, you can use a U-shaped hairpin (hair fork) in addition to bobby pins, as they provide strong, discreet hold.
Q2: Can I do a messy bun with short hair?
A: Absolutely! While it might be a smaller bun, it’s definitely achievable and can look incredibly chic. The key is to maximize texture and volume with dry shampoo and texturizing spray. You might need to gather your hair into a low ponytail or half-up ponytail first. Instead of wrapping, you might just twist the shorter ends into a small knot or loop and secure it very tightly with several small bobby pins. Don’t worry about getting all the hair into the bun; embrace the shorter pieces that fall out – that’s part of the messy charm for shorter hair. A small scrunchie can also help give the illusion of more volume.
Q3: My messy bun always looks too “perfect” or too “sloppy.” How do I find the right balance?
A: Finding the balance is about intentional imperfection. If it looks too perfect, you’re likely pulling your hair too tightly or trying to smooth every strand. Loosen your grip, use your fingers instead of a brush to gather hair, and gently tug at sections of the bun to create volume and texture. Pull out a few face-framing pieces. If it looks too sloppy, you might be pulling out too many strands or not securing the base enough. Ensure the core of your bun is stable with a good hair tie and a few well-placed bobby pins, then strategically loosen only specific sections. Practice is key; experiment with how much you pull and tug until you find your sweet spot. Remember, the “messy” is curated, not chaotic.
Q4: What’s the best way to get volume at the crown for my messy bun?
A: There are a few effective techniques for achieving crown volume. First, before gathering your hair, spray dry shampoo or a volumizing powder at the roots of your crown and gently massage it in. Second, when you gather your hair for the ponytail, don’t pull it straight back. Instead, gather it slightly higher than your desired bun placement, then gently push the hair forward at the crown before securing the ponytail. This creates a soft hump. You can also lightly backcomb (tease) the hair at the crown before gathering it. Once the bun is formed, gently tug upwards on the hair at the crown, just above the bun, to lift and loosen it further.
✨ The Ultimate Skin & Hair Care Kit
The best makeup in the world cannot hide poorly treated skin or damaged hair. If you want to glow from the inside out, these 5 science-backed formulations and trusted tools are the absolute essential core of any functional, results-driven beauty regimen.
🐌 COSRX Snail Mucin 96% Repair Essence
The Korean skincare secret that completely revolutionized Western beauty routines. Applying this deeply hydrating, lightweight essence absolutely transforms dull, textured skin overnight into a plump, hydrated, and insanely smooth canvas.
🧪 Paula's Choice 2% BHA Liquid Exfoliant
Stop aggressively scrubbing your face. This gentle, leave-on chemical exfoliant sinks deep into pores to dissolve blackheads, visibly shrink enlarged pore size, and effectively erase stubborn acne breakouts without leaving your skin red or irritated.
🩹 Mighty Patch Original Hydrocolloid Stickers
The ultimate emergency fix. When you feel a massive blemish forming, do not pop it! Stick one of these medical-grade patches on overnight and watch it completely absorb all the impurities while protecting the skin from scarring.
💨 Revlon One-Step Volumizer Hot Air Brush
Achieve a massive bouncy, salon-quality blowout at home in literally half the time. This ingenious tool dries, brushes, and heavily volumizes your hair all at once, completely saving your arms from the exhausting juggle of a round brush and heavy dryer.
💧 Olaplex No. 7 Bonding Hair Oil
If you use heat tools or color your hair, this is non-negotiable. This highly concentrated, weightless styling oil instantly tames frizz, dramatically increases shine, and actually repairs broken hair bonds while providing up to 450°F heat protection.
Conclusion
Congratulations, you’ve now unlocked the secrets to creating the perfectly imperfect messy bun! This versatile hairstyle is more than just a quick fix; it’s a testament to effortless beauty, capable of transitioning seamlessly from a sophisticated office look to a relaxed weekend vibe or even an elegant evening out. By understanding the importance of proper hair preparation, strategic placement, and the art of intentional undoing, you’re well-equipped to master this iconic style.
Remember, the beauty of the messy bun lies in its individuality. There’s no single “right” way to do it, and the most captivating buns are often those that reflect your unique hair type and personal flair. Don’t be afraid to experiment with different placements, varying levels of “messiness,” and a range of products to discover what works best for you. Embrace the journey of learning and practicing; each attempt will bring you closer to perfecting your signature messy bun.
So, gather your tools, take a deep breath, and approach your hair with a spirit of creative freedom. With the detailed steps and expert tips provided in this guide, you now have all the knowledge to confidently achieve that coveted effortless chic look. Go forth and rock your beautifully undone, perfectly styled messy bun!