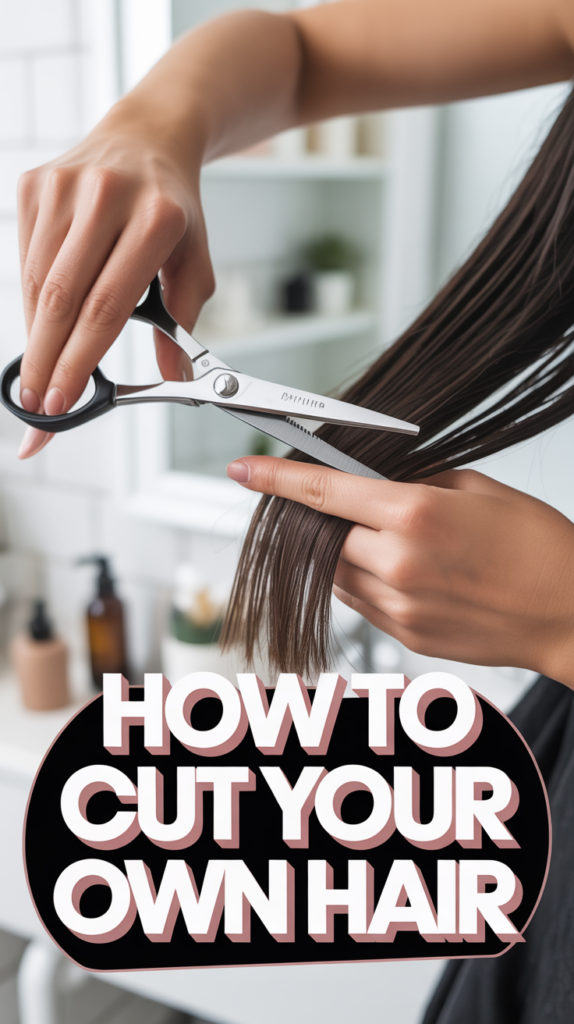
✂️ How To Cut Your Own Hair
💄 The Everyday Glamour Routine
You do not need to spend hundreds of dollars at Sephora to achieve a flawless, airbrushed finish. Professional makeup artists secretly rely on these 5 incredible, highly-rated viral drug store dupes and tools to create stunning looks that last all day.
✨ e.l.f. Power Grip Primer
The undisputed holy grail of primers that broke the internet. The unique gel-based formula literally 'grips' onto your foundation, blurring pores and completely preventing your makeup from melting off, creasing, or fading for up to 14 hours.
💧 Real Techniques Miracle Complexion Sponges
Stop applying liquid foundation with brushes that leave streaks. When used slightly damp, these ultra-soft, latex-free sponges seamlessly bounce liquid products into your skin for an incredibly natural, dewy, 'no-makeup' finish.
🖤 Maybelline Sky High Lengthening Mascara
You don't need expensive lash extensions. This wildly popular formula features a flexible tower brush that bends to volumize and extend every single tiny lash from root to tip without flaking, smudging, or weighing your eyes down.
🌟 L'Oreal True Match Lumi Glotion
The ultimate secret for that radiant 'glass skin' look. Use it alone for a sheer, healthy tint on no-makeup days, or mix a tiny drop into your foundation to instantly add an incredibly expensive-looking, natural luminosity to your face.
🌋 Revlon Oil-Absorbing Volcanic Roller
The modern replacement for messy blotting papers. Made from real volcanic stone, this tiny tool fits perfectly in your purse. Simply roll it across your T-zone to instantly absorb excess shine without messing up the makeup underneath.
The thought of cutting your own hair can be daunting. Visions of uneven fringes, lopsided bobs, or accidental bald patches might dance in your head, deterring you from ever picking up a pair of shears outside a salon. However, with the right knowledge, tools, and a healthy dose of patience, mastering the art of the DIY haircut is not only achievable but incredibly empowering. Imagine saving time and money, enjoying the convenience of a quick trim whenever you need it, and gaining a deeper understanding of your own hair’s unique texture and fall. This comprehensive guide is designed to demystify the process, breaking it down into manageable steps that anyone can follow. We’ll equip you with the essential tools, walk you through various cutting techniques for different styles, share expert tips to elevate your results, and help you navigate common pitfalls. Whether you’re looking to maintain a long style, create layers, or simply tidy up your ends, prepare to unlock a new level of self-sufficiency and confidence in your hair care routine.
What You’ll Need
Before you embark on your haircutting journey, gathering the right tools is paramount. Using inappropriate instruments can lead to damaged hair, uneven cuts, and frustration. Invest in quality items; they are the foundation for a successful DIY haircut.
- Sharp Hair Shears: This is the most crucial item. Do NOT use kitchen scissors or craft scissors. Hair shears are specifically designed with sharp, precise blades to cut hair cleanly, preventing split ends and damage. Look for stainless steel shears, ideally 5.5 to 6.5 inches long.
- Fine-Tooth Comb: Essential for detangling, sectioning, and guiding your hair straight before cutting. A rat-tail comb with a long, thin handle is excellent for precise sectioning.
- Hair Clips or Sectioning Clips: You’ll need several (4-6) to keep sections of hair neatly out of the way, ensuring you only cut the hair you intend to.
- Spray Bottle: To dampen your hair. Most cutting techniques require hair to be damp (not soaking wet) for better control and precision.
- Two Mirrors: A large wall mirror (or bathroom mirror) and a smaller handheld mirror. This setup allows you to see the back of your head and check for symmetry from all angles.
- Towel or Hair Cutting Cape: To protect your clothes from falling hair. A dedicated cape is ideal, but an old towel draped over your shoulders works just as well.
- Hair Ties or Bands: Useful for specific techniques like the ponytail method for layers or trimming long hair.
- Good Lighting: Natural light is best, but ensure your workspace is brightly lit to minimize shadows and help you see clearly.
- Clippers (Optional): If you plan on cutting shorter styles, especially for men or fades, a good set of clippers with various guard sizes will be necessary.
- Vacuum Cleaner: For easy cleanup after you’re done.
- Patience and Time: Rushing leads to mistakes. Allocate ample time and approach the task with a calm, focused mindset.
Step-by-Step Instructions
This section will guide you through general haircutting principles and then delve into specific techniques for common styles. Remember to always start with clean, detangled hair.
General Preparation & Principles
- Wash and Detangle Your Hair: Start with freshly washed and conditioned hair. Gently comb through to remove all tangles.
- Dampen Your Hair: Using your spray bottle, lightly dampen your hair. It should be moist but not dripping wet. Damp hair is easier to control and cut precisely, though some curly hair types are best cut dry (see Pro Tips).
- Set Up Your Workspace: Position your mirrors so you have a clear view of the front, sides, and back of your head. Drape your towel or cape over your shoulders.
- Understand Basic Cutting Techniques:
- Blunt Cutting: Holding hair straight and cutting horizontally across. Best for blunt bobs or straight trims.
- Point Cutting: Holding shears vertically and snipping into the ends of the hair. This creates a softer, more textured edge and helps blend layers.
- Slide Cutting: Gently sliding open shears down the length of the hair to remove bulk and create movement. Best left for experienced stylists.
- Hold Your Shears Correctly: Place your ring finger through the smaller finger hole and your thumb through the larger one. Your pinky finger rests on the finger rest (if present). This grip provides stability and control.
Technique 1: Trimming Long Hair or Creating Subtle Layers (Ponytail Method)
This method is excellent for maintaining length, removing split ends, or adding subtle face-framing layers.
- Choose Your Ponytail Position:
- High Ponytail (on top of your head, near the forehead): Creates significant face-framing layers and a V-shape at the back when let down.
- Medium Ponytail (at the crown): Offers a more subtle layering effect.
- Low Ponytail (at the nape of your neck): Primarily for trimming length or creating a very slight U-shape.
- Secure the Ponytail: Lean your head forward slightly and comb all your hair smoothly into the chosen ponytail position. Ensure there are no bumps or loose strands. Secure it tightly with a hair tie.
- Position the Second Hair Tie: Place a second hair tie a few inches down from the first, towards the ends of the ponytail. This will act as your cutting guide. Adjust it to where you want the shortest layer (for high/medium ponytails) or the overall length (for low ponytails) to fall. For a simple trim, place it just above the split ends.
- Prepare to Cut: Hold the ponytail firmly between your index and middle fingers, just below the second hair tie. Ensure the hair is taut and straight.
- Make the Cut:
- For a blunt trim: Use your shears to cut straight across, just below your fingers and the second hair tie.
- For a softer edge or to incorporate point cutting: Hold the shears vertically and snip into the ends, rather than cutting straight across.
- Check and Refine: Remove the hair ties and let your hair down. Shake it out and dry it completely (if you cut it damp). Check for symmetry and any missed spots. You can go back in with point cutting to soften any harsh lines or refine layers.
Technique 2: The Blunt Cut or One-Length Trim
Ideal for creating a sharp, clean line or simply trimming dead ends evenly.
- Section Your Hair: Create a horizontal part across the back of your head, from ear to ear, just below your crown. Clip the top section out of the way. This leaves the bottom section free.
- Take Your First Guide Section: From the bottom section, take a small, horizontal sub-section (about 1 inch thick) across the nape of your neck. Comb it down smoothly.
- Determine Length: Hold the hair taut between your index and middle fingers, positioning your fingers where you want the hair to end. Ensure your fingers are parallel to the floor for a straight cut.
- Make the Cut: Use your shears to cut straight across, just below your fingers. This is your guide length.
- Work Upwards: Unclip the next horizontal section of hair. Bring it down and comb it smoothly, incorporating a small amount of the previously cut hair (your guide) into this new section.
- Continue Cutting: Using the guide hair, cut the new section to the same length. Repeat this process, working your way up the head in horizontal sections, always incorporating a small amount of the previous guide section.
- Address the Sides: Once the back is done, bring the side sections forward. Use the back hair as a guide to ensure the sides blend seamlessly. You can hold the hair out from your head at a 45-degree angle for a slight A-line effect, or straight down for a blunt, uniform length.
- Final Check: Once dry, check for evenness by running your fingers through your hair and looking in both mirrors. Make small adjustments with point cutting if needed.
Technique 3: Face-Framing Layers
To add softness and shape around your face without committing to full layers.
- Isolate the Face-Framing Section: Part your hair as you normally would. Take a triangular section of hair from your hairline, extending back to the top of your head, on each side of your face. Clip the rest of your hair back.
- Determine Length: Comb one of the face-framing sections straight down. Decide where you want the shortest layer to fall (e.g., chin, collarbone).
- Create Your Guide: Take a small, vertical sub-section from the front of your face-framing hair. Hold it straight down, and make a small snip at your desired shortest length. This is your guide.
- Angle the Cut: Now, take the entire face-framing section. Hold it out from your head at a slight angle, away from your face (e.g., 45 degrees). This creates a softer, graduated layer.
- Point Cut Downwards: Using your guide, point cut downwards into the hair, gradually lengthening as you move away from your face. Instead of cutting straight across, use small, vertical snips to create a soft, blended edge.
- Repeat on the Other Side: Ensure you mirror the angle and technique precisely to maintain symmetry.
- Blend (Optional): If you want to blend the face-framing layers into the rest of your hair, take a small section from the newly cut layers and a small section from the longer hair behind it. Hold them together and point cut where they meet to create a seamless transition.
Technique 4: Short Hair or Men’s Cuts (Clippers & Shears)
Requires more precision and often a blend of clipper and scissor work.
- Clipper Work (Sides and Back):
- Choose Your Guard: Start with a longer guard (e.g., #3 or #4) than you think you need, especially for your first time. You can always go shorter.
- Establish the Baseline: Begin at the nape of the neck or above the ears, moving the clippers upwards against the direction of hair growth. Use a scooping motion to avoid creating a harsh line.
- Work Around the Head: Continue around the sides and back, maintaining an even length.
- Fading (Optional): If attempting a fade, start with a shorter guard at the very bottom and gradually move to longer guards as you go up, blending the transitions with a flicking motion.
- Blending (Clipper Over Comb):
- For a smoother transition between clipper-cut sides and longer top hair, use the clipper-over-comb technique. Hold a comb parallel to the head, lifting hair away from the scalp. Run the clippers over the comb, cutting the hair that extends beyond the comb’s teeth.
- Scissor Work (Top of the Head):
- Section the Top: Part the hair on top from the sides and back.
- Create a Guide: Take a small, vertical section of hair at the front of the top section. Lift it straight up (90 degrees from the scalp). Decide on your desired length and cut it using blunt or point cutting. This is your guide.
- Work Backwards: Take subsequent vertical sections, combining them with a small piece of your guide hair. Lift each section straight up and cut it to the guide length, working your way to the crown.
- Check for Evenness: Pull sections of hair from side to side to ensure the length is consistent.
- Refining the Edges and Neckline:
- Neckline: Use the clippers without a guard (or a very short guard) to clean up the nape of the neck. Create a clean, straight, or slightly rounded line.
- Sideburns: Trim sideburns to your desired length and shape.
- Around the Ears: Carefully use the tips of your shears or clippers to trim hair around the ears, being mindful of the ear itself.
- Dry and Finalize: Dry the hair and check all angles with your mirrors. Use point cutting to soften any harsh lines or remove bulk.
Pro Tips
Elevate your DIY haircut with these expert insights:
- Start Small: Always cut less than you think you need. You can always remove more hair, but you can’t put it back. When in doubt, err on the side of caution.
- Work with Damp, Not Wet, Hair: Hair shrinks as it dries. Cutting hair when it’s too wet can lead to an unexpectedly shorter result once dry. Aim for damp, manageable hair for most styles. However, for very curly hair, it’s often best to cut it dry, curl by curl, to see how it naturally falls and avoid “shrinkage shock.”
- Invest in Quality Shears: Dull or household scissors will fray and damage your hair, leading to split ends and an unhealthy appearance. Sharp, dedicated hair shears ensure a clean, precise cut.
- Sectioning is Your Best Friend: Proper sectioning provides control, prevents you from accidentally cutting the wrong hair, and helps ensure an even result. Don’t skip this crucial step, no matter how simple the cut.
- Take Breaks and Check Frequently: Step away from the mirror for a few minutes if you feel fatigued or unsure. Regularly check your progress from different angles and once your hair is dry. Hair looks different wet versus dry, and when styled versus its natural fall.
- Point Cut for Softer Edges: Instead of always cutting straight across (blunt cutting), use point cutting (holding shears vertically and snipping into the ends) to soften harsh lines, blend layers, and add texture. This technique is more forgiving and produces a more natural look.
Common Mistakes to Avoid
Being aware of common pitfalls can save you from a haircut disaster.
- Using the Wrong Shears: As emphasized, household scissors will tear and damage your hair, leading to split ends and a ragged appearance. Always use sharp, professional hair shears.
- Cutting Hair Dry (Unless Intended for Curly Hair): Most hair types should be cut damp. Dry hair is harder to control, can spring up unexpectedly, and often leads to uneven results. For curly hair, however, dry cutting is often preferred to see the natural curl pattern.
- Cutting Too Much at Once: The most common and irreversible mistake. Always take small sections and cut in tiny increments. You can always go shorter, but you can’t add length back.
- Not Sectioning Properly: Trying to cut large, unsectioned portions of hair is a recipe for disaster. It leads to unevenness, missed spots, and a lack of control.
- Ignoring Your Hair’s Natural Fall: Hair has a natural growth pattern and direction. Forcing it into an unnatural position while cutting can lead to an uneven look once it’s dry and styled naturally.
- Poor Lighting: Attempting to cut your hair in dim or uneven lighting can cause you to miss sections, misjudge angles, and result in an uneven cut. Ensure your workspace is brightly and evenly lit.
- Rushing the Process: Haircutting requires patience and a steady hand. Rushing will inevitably lead to mistakes. Allocate ample time and approach the task calmly.
- Expecting Salon Perfection on Your First Try: Manage your expectations. While you can achieve great results, don’t expect a perfectly sculpted, salon-quality cut on your very first attempt. Practice makes perfect.
FAQ
How often should I trim my hair?
The frequency depends on your hair type, growth rate, and desired style. For maintaining healthy ends and preventing split ends, a trim every 6-8 weeks is generally recommended for most hair types. If you’re growing your hair out, you might extend this to 10-12 weeks. For short, precise styles, you might need a trim every 3-4 weeks to maintain the shape.
Can I cut curly hair the same way as straight hair?
Generally, no. Curly hair should often be cut dry, curl by curl, in its natural state. This allows you to see how each curl falls and prevents the “shrinkage shock” that can occur when cutting wet curly hair. Cutting wet curly hair can lead to an unexpectedly much shorter result once it dries and curls up. Straight hair is typically cut damp for better control and precision.
What’s the best way to get rid of split ends?
The most effective way to get rid of split ends is to trim them off regularly. Split ends cannot be repaired, only removed. Point cutting into the ends during your trim can also help to prevent new splits by creating a softer, less blunt edge that is less prone to fraying.
Is it better to cut hair wet or dry?
For most hair types (straight, wavy, slightly curly), it’s generally better to cut hair when it’s damp. Damp hair is more elastic, easier to section, and provides more control, leading to a more precise cut. However, for very curly or coily hair, cutting it dry allows you to see the true length and shape of the curls, avoiding surprises due to shrinkage.
✨ The Ultimate Skin & Hair Care Kit
The best makeup in the world cannot hide poorly treated skin or damaged hair. If you want to glow from the inside out, these 5 science-backed formulations and trusted tools are the absolute essential core of any functional, results-driven beauty regimen.
🐌 COSRX Snail Mucin 96% Repair Essence
The Korean skincare secret that completely revolutionized Western beauty routines. Applying this deeply hydrating, lightweight essence absolutely transforms dull, textured skin overnight into a plump, hydrated, and insanely smooth canvas.
🧪 Paula's Choice 2% BHA Liquid Exfoliant
Stop aggressively scrubbing your face. This gentle, leave-on chemical exfoliant sinks deep into pores to dissolve blackheads, visibly shrink enlarged pore size, and effectively erase stubborn acne breakouts without leaving your skin red or irritated.
🩹 Mighty Patch Original Hydrocolloid Stickers
The ultimate emergency fix. When you feel a massive blemish forming, do not pop it! Stick one of these medical-grade patches on overnight and watch it completely absorb all the impurities while protecting the skin from scarring.
💨 Revlon One-Step Volumizer Hot Air Brush
Achieve a massive bouncy, salon-quality blowout at home in literally half the time. This ingenious tool dries, brushes, and heavily volumizes your hair all at once, completely saving your arms from the exhausting juggle of a round brush and heavy dryer.
💧 Olaplex No. 7 Bonding Hair Oil
If you use heat tools or color your hair, this is non-negotiable. This highly concentrated, weightless styling oil instantly tames frizz, dramatically increases shine, and actually repairs broken hair bonds while providing up to 450°F heat protection.
Conclusion
Cutting your own hair is a skill that, with practice and the right guidance, can become a valuable addition to your self-care routine. It offers unparalleled convenience, significant cost savings, and a unique sense of accomplishment. Remember, the journey begins with preparation: gathering the correct tools, understanding the basic techniques, and approaching the task with patience and a clear mind. Don’t be afraid to start small, taking off only a little at a time, and always prioritize precision over speed. While your first attempt might not be salon-perfect, each subsequent cut will build your confidence and refine your technique. Embrace the learning process, enjoy the freedom of maintaining your own style, and soon you’ll be wielding those shears like a pro. Happy cutting!