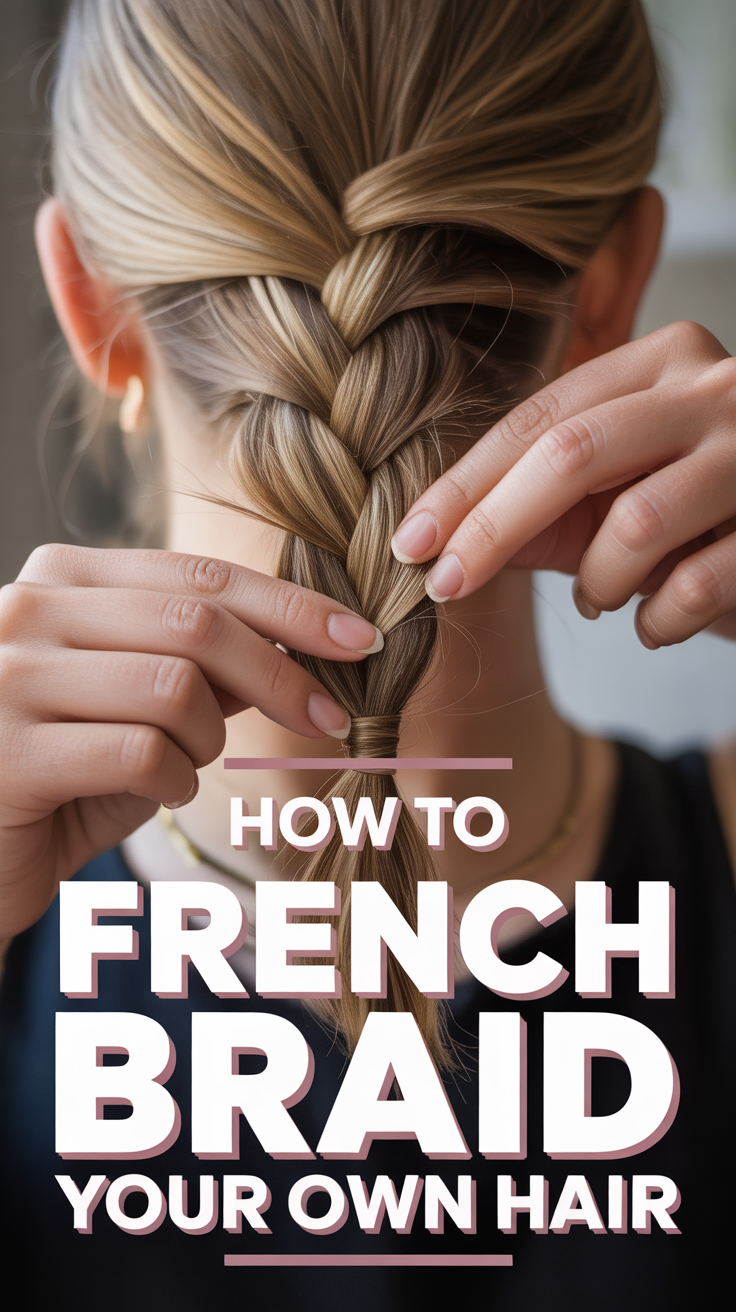
✨ How To French Braid Your Own Hair
The French braid is a timeless, elegant, and incredibly versatile hairstyle that can elevate any look, from casual daytime chic to sophisticated evening glamour. While it might appear intricate and challenging, especially when attempting to braid your own hair, mastering this skill is surprisingly achievable with patience, practice, and the right guidance. Imagine effortlessly creating a polished, secure style that keeps your hair neatly tucked away, whether you’re heading to the gym, a professional meeting, or a special event.
This comprehensive guide is designed to demystify the art of French braiding your own hair. We’ll break down each step into clear, actionable instructions, ensuring you understand not just what to do, but why you’re doing it. You’ll learn how to prepare your hair, create the foundational structure, seamlessly incorporate new sections, and finish with a beautiful, lasting braid. Beyond the basic steps, we’ll share expert pro tips to refine your technique, highlight common pitfalls to avoid, and answer frequently asked questions to address any concerns. By the end of this article, you’ll be equipped with the knowledge and confidence to transform your hair into a stunning French braid, adding a valuable skill to your beauty repertoire.

What You’ll Need
Before you embark on your French braiding journey, gather these essential tools. Having everything within reach will make the process smoother and more enjoyable, preventing interruptions and frustration.
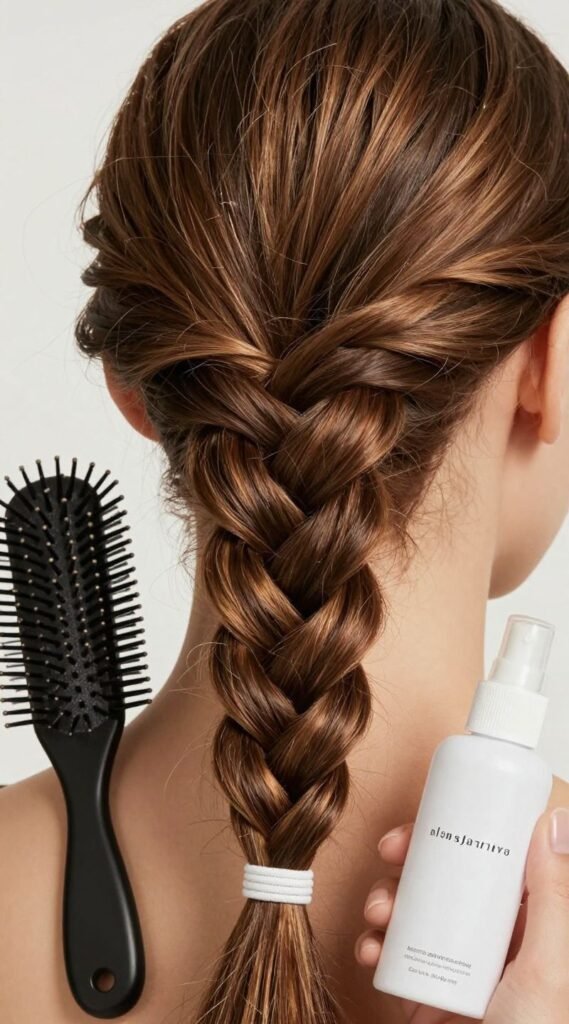
- Hairbrush or Wide-Tooth Comb: Essential for detangling your hair thoroughly. A brush is good for overall smoothing, while a wide-tooth comb is excellent for working through knots without causing damage.
- Fine-Tooth Comb or Rat-Tail Comb: Crucial for precise sectioning. The pointed end of a rat-tail comb allows for clean, straight partings, which are vital for a neat French braid.
- Hair Ties or Elastics: You’ll need at least one, possibly two, to secure your finished braid. Opt for snag-free elastics that won’t pull or damage your hair.
- Spray Bottle with Water (Optional but Recommended): Lightly dampening your hair can make it easier to manage, reduce flyaways, and provide better grip, especially if your hair is very fine or slippery.
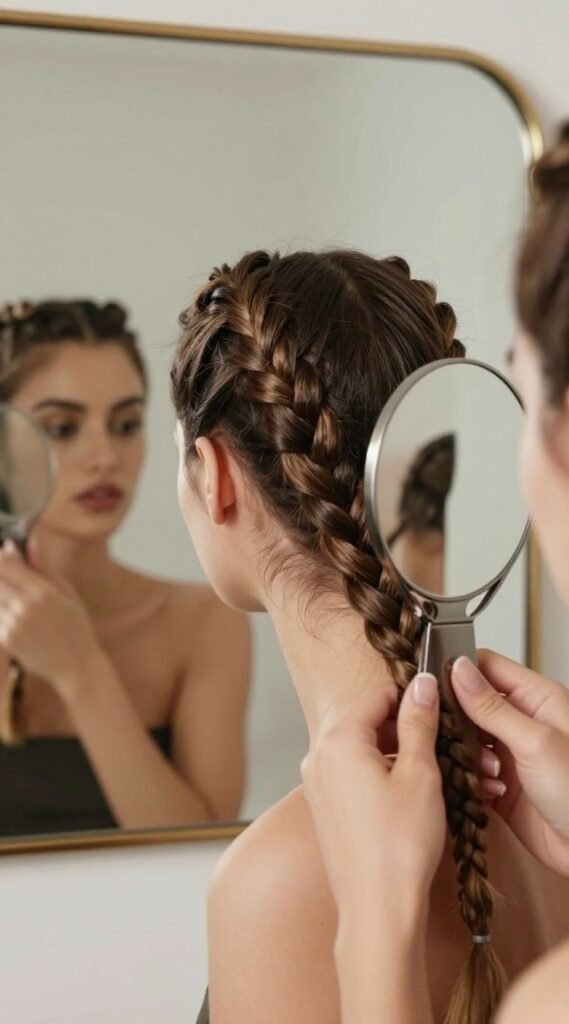
- Two Mirrors (Optional but Recommended): A front mirror and a handheld mirror will allow you to see the back of your head, which is incredibly helpful for monitoring your progress and ensuring symmetry.
- Hair Clips or Sectioning Clips (Optional): Useful for temporarily holding sections of hair out of the way, especially when you’re just starting out and need to focus on one section at a time.
- Styling Product (Optional): A light hold gel, mousse, or texturizing spray can provide extra grip, control flyaways, and add a bit of texture, making the braiding process easier and the final result more polished.
Step-by-Step Instructions
Mastering the French braid on yourself requires a methodical approach. Follow these detailed steps carefully, and remember that practice is key to developing muscle memory and achieving a flawless braid.
Preparation is Key
-
Detangle Your Hair Thoroughly:
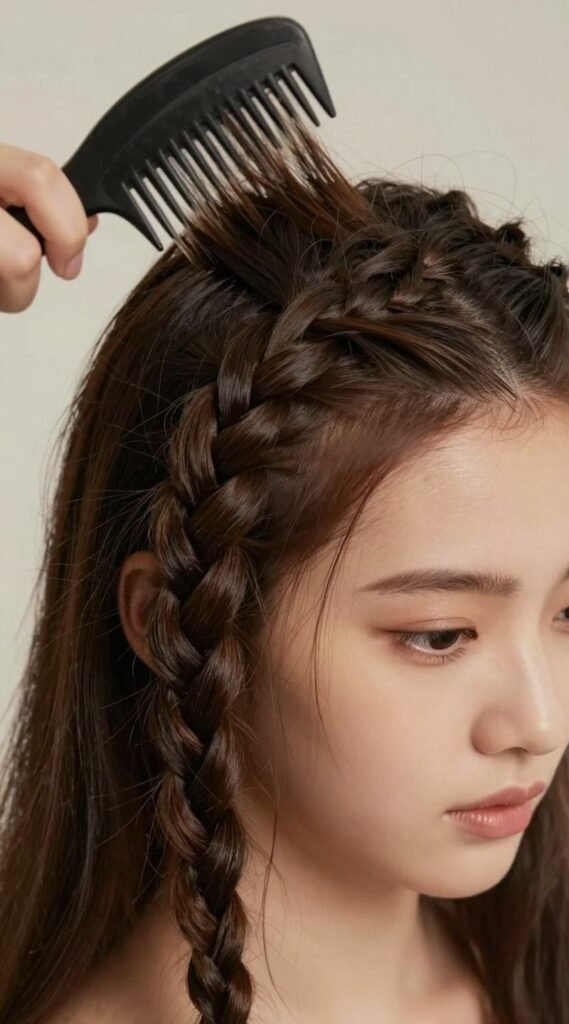
Before doing anything else, ensure your hair is completely free of tangles. Use a hairbrush or a wide-tooth comb, starting from the ends and working your way up to the roots. Any knots will make sectioning and braiding incredibly difficult and painful. Smooth, detangled hair is the foundation of a beautiful braid.
-
Choose Your Parting and Dampen (Optional):
Decide where you want your French braid to begin. Most commonly, it starts at the crown of your head, either with a central part or no part at all, pulling all hair straight back. If you prefer a side French braid, create a side part. If your hair is very silky or prone to flyaways, lightly mist it with water from a spray bottle. This adds a bit of grip and helps keep strands cohesive.
-
Apply Styling Product (Optional):
If using, apply a small amount of light hold gel, mousse, or texturizing spray evenly through the top section of your hair where you’ll begin braiding. This helps to tame flyaways, add texture, and improve manageability.
Starting the Braid (The Initial Three Strands)
-
Create Your First Section:
Using your fine-tooth or rat-tail comb, section off a triangular or rectangular piece of hair from the very top of your head, right where you want the braid to begin. This section should be about 2-3 inches wide, depending on your hair thickness and desired braid size. Ensure this section is clean and even, as it forms the base of your braid.
-
Divide the First Section into Three Strands:
Take this initial section of hair and divide it evenly into three smaller, equal strands. Let’s call them the left strand (L), middle strand (M), and right strand (R). Hold these three strands firmly between your fingers, ensuring they don’t get tangled.
-
Perform the First Crossover (Basic Braid):
Begin a standard three-strand braid:
- Take the right strand (R) and cross it over the middle strand (M). The original right strand is now in the middle position.
- Next, take the left strand (L) and cross it over the new middle strand (M). The original left strand is now in the middle position.
You have now completed one full basic braid stitch. This establishes the pattern and tension for the rest of your French braid.
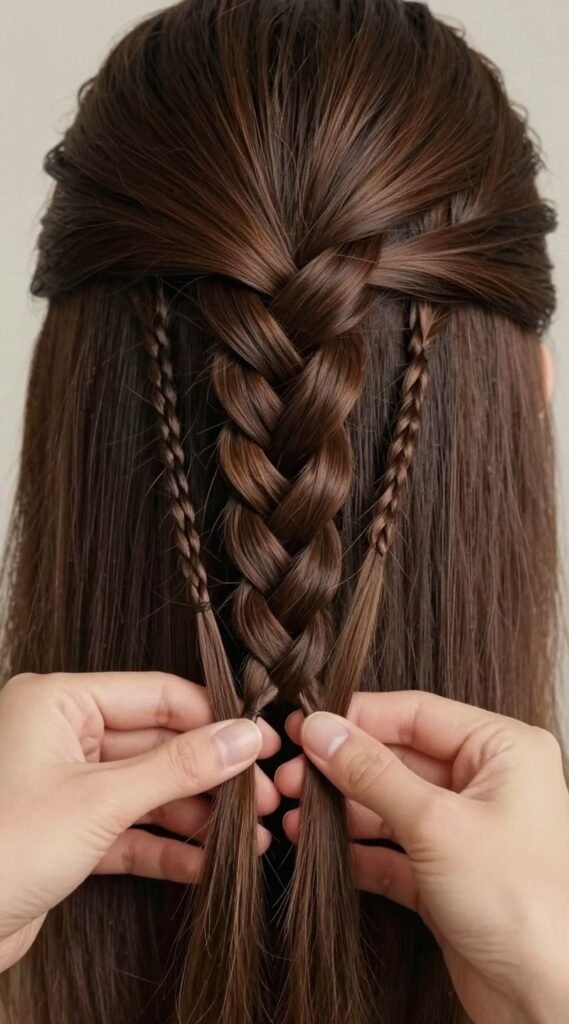
Incorporating New Hair (The French Braid Technique)
This is where the “French” part of the braid comes in. You will continuously add new sections of hair from the sides as you braid downwards.
-
Add Hair to the Right Strand:
Before crossing the right strand over again, you need to gather new hair. Use your free hand (the one not holding the strands) to pick up a small, even section of loose hair from the right side of your head, adjacent to your existing right strand. The amount of hair you add should be consistent with the size of your initial three strands – usually about 1/2 to 1 inch thick. This new section of hair should run parallel to your existing right strand.
-
Combine and Cross Over (Right Side):
Combine this newly gathered section of hair with your existing right strand (R). Ensure they are fully integrated. Now, take this combined, thicker right strand and cross it over the middle strand (M). The new combined right strand is now your new middle strand.
-
Add Hair to the Left Strand:
Repeat the process on the left side. With your free hand, gather a small, even section of loose hair from the left side of your head, adjacent to your existing left strand. Try to make this section roughly the same size as the one you added on the right. Consistency in section size is crucial for a symmetrical braid.
-
Combine and Cross Over (Left Side):
Combine this newly gathered section of hair with your existing left strand (L). Ensure they are fully integrated. Now, take this combined, thicker left strand and cross it over the new middle strand (M). This new combined left strand is now your new middle strand.
-
Continue the Pattern:
You have now completed one full French braid cycle. Continue this pattern, alternating sides:
- Right Side: Gather a new section of loose hair from the right, add it to the current right strand, then cross the combined strand over the middle.
- Left Side: Gather a new section of loose hair from the left, add it to the current left strand, then cross the combined strand over the middle.
Focus on maintaining consistent tension with each cross-over. This is vital for a tight, neat braid. Try to keep your hands close to your head as you gather hair, which helps keep the braid snug against your scalp.
-
Work Your Way Down the Head:
As you continue braiding, you’ll notice the braid moving down the back of your head. Keep adding hair from the sides until you run out of loose hair to incorporate. This usually happens around the nape of your neck, or slightly lower, depending on how far you want your French braid to extend.
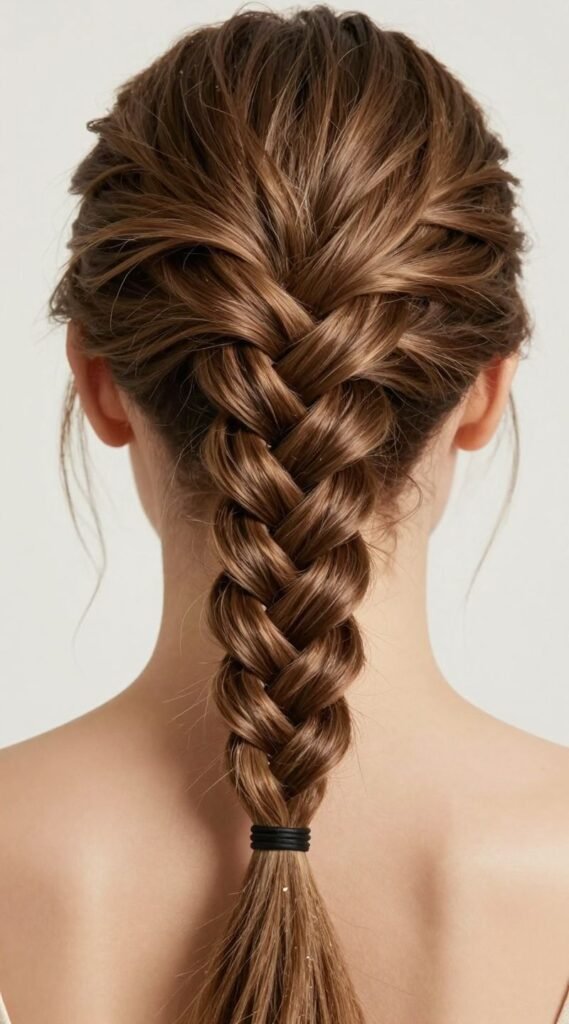
Finishing the Braid
-
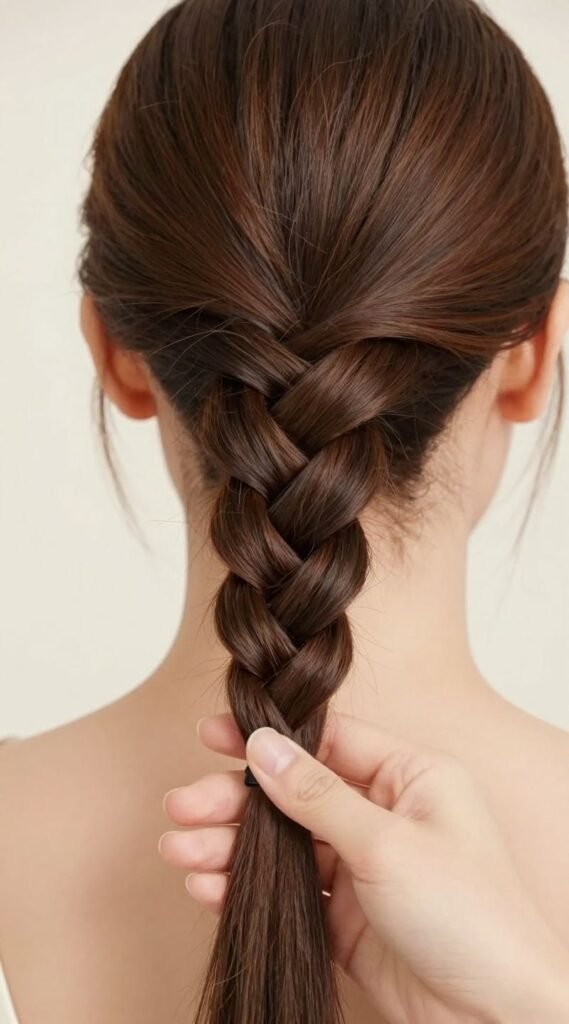
Transition to a Regular Braid:
Once you have incorporated all of the loose hair from the sides, you will be left with three distinct strands of hair at the nape of your neck. At this point, simply continue with a standard three-strand braid (right over middle, left over middle) down the remaining length of your hair. Maintain the same tension you used for the French braid section to ensure a smooth transition.
-
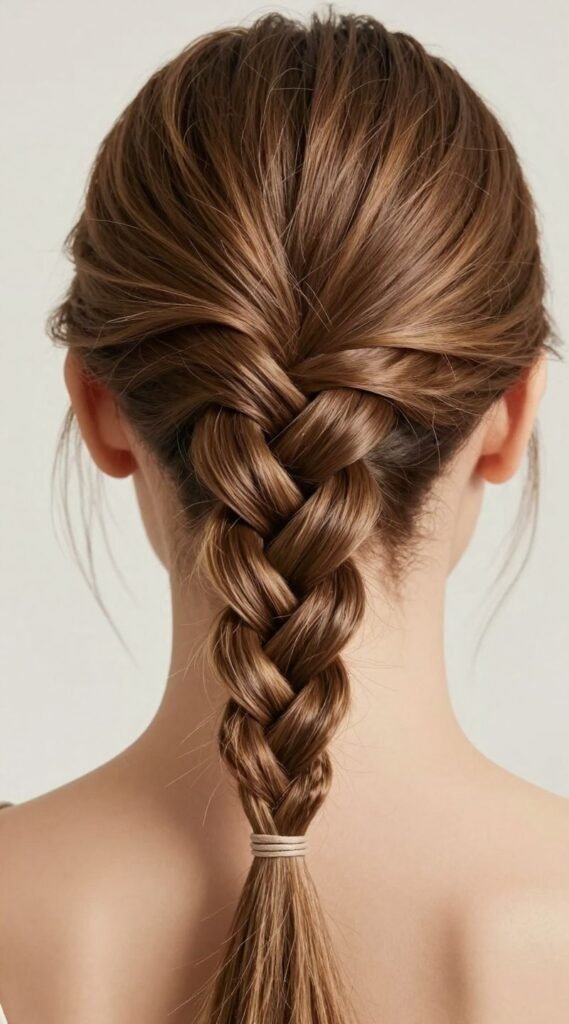
Secure the Braid:
Braid until you reach your desired length, leaving a few inches at the end if you wish. Secure the end of the braid tightly with a hair tie or elastic. Double-wrap it if necessary to ensure it holds securely throughout the day.
-
Final Touches (Optional):
Once secured, you can gently tug at the loops of the braid to loosen it slightly and create a fuller, softer look. Start from the bottom and work your way up, being careful not to pull too much and unravel the braid. You can also use a small amount of hairspray to set the style and tame any remaining flyaways, especially around the face and the top of the braid.
Pro Tips
Elevate your French braiding game with these expert insights, designed to help you achieve a more polished, long-lasting, and comfortable result.
-
Practice, Practice, Practice:
The first few attempts might feel awkward and look messy, and that’s perfectly normal! French braiding your own hair requires developing muscle memory and hand coordination. Don’t get discouraged. The more you practice, the more intuitive the movements will become, and the neater your braids will appear. Try practicing in front of a mirror, or even without one once you get the hang of the feel.
-
Use Two Mirrors for Visibility:
While you’ll be doing most of the work by feel, having a large wall mirror in front of you and a handheld mirror to view the back of your head is invaluable. This allows you to monitor your sectioning, ensure evenness, and check the overall symmetry of your braid, especially in the initial stages of learning.
-
Maintain Consistent Tension:
This is arguably the most critical factor for a neat and secure French braid. From the moment you start the first three strands until you finish the regular braid, strive to keep an even, firm tension on all three strands. If tension is too loose, the braid will sag and unravel; if it’s too tight, it can be uncomfortable and cause headaches. Find a comfortable, firm grip that works for you.
-
Small, Even Sections are Key:
When incorporating new hair, always aim for small, consistent sections. Large, uneven sections will result in a bulky, lopsided, and less elegant braid. Using a rat-tail comb to precisely section off new hair from the sides will significantly improve the overall appearance and neatness of your braid.
-
Keep Your Hands Close to Your Head:
As you braid and add new sections, try to keep your hands and fingers as close to your scalp as possible. This helps to keep the braid tight against your head, preventing gaps and ensuring a smooth, sleek finish. If your hands lift too far away, the braid tends to loosen and become messy near the scalp.
Common Mistakes to Avoid
Even experienced braiders can sometimes fall prey to these common errors. Being aware of them can help you troubleshoot and improve your technique.
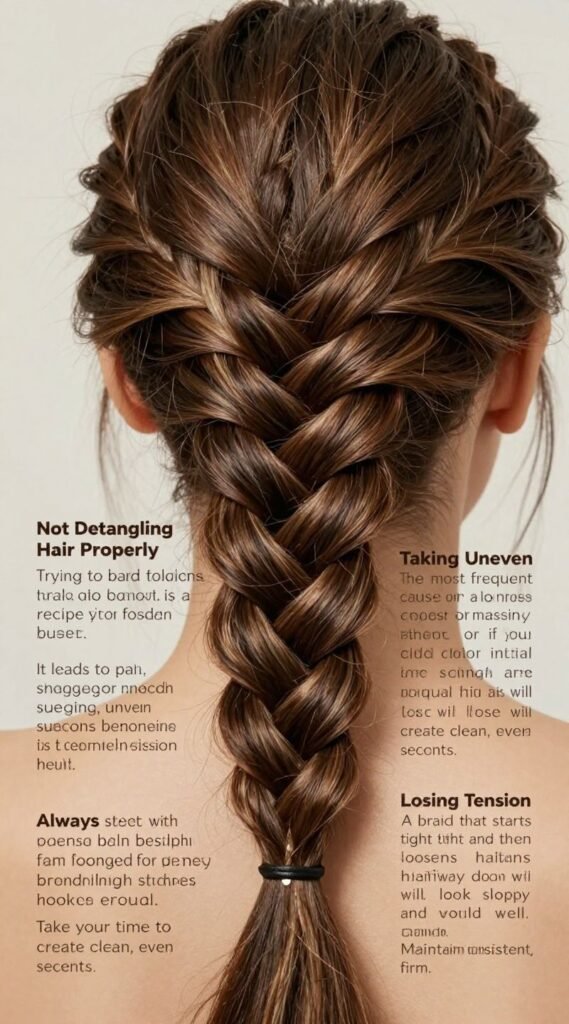
- Not Detangling Hair Properly: Trying to braid tangled hair is a recipe for disaster. It leads to pain, snagging, uneven sections, and a messy final result. Always start with thoroughly brushed and knot-free hair.
- Taking Uneven Sections: The most frequent cause of a lopsided or messy French braid is inconsistent sectioning. If you add more hair to one side than the other, or if your initial three strands are unequal, the braid will lose its symmetry and neatness. Take your time to create clean, even sections.
- Losing Tension: A braid that starts tight and then loosens halfway down will look sloppy and won’t hold well. Maintain consistent, firm tension throughout the entire braiding process, from the first crossover to the final securement.
- Starting the Braid Too Low: If your initial section of hair is taken too far down your head, you’ll have a lot of loose hair above the braid, which can look messy and defeat the purpose of a French braid. Start your initial section high on the crown for a neat, scalp-hugging braid.
- Pulling Hair from Too Far Down the Head: When incorporating new hair, make sure you’re pulling from the loose hair directly adjacent to the strand you’re adding to, and only from the section that’s above the current braid line. Reaching too far down or around the head can create bumps and an uneven texture in the braid.
- Over-Dampening Hair: While a light mist can help, soaking your hair can make it difficult to grip and manage, and it will take a long time to dry within the braid, potentially causing discomfort or even a musty smell. A light dampness is sufficient.
FAQ
Here are some frequently asked questions that often arise when learning to French braid your own hair.

-
How long does it typically take to learn to French braid your own hair?
Learning to French braid your own hair can vary greatly from person to person. For some, it might click within a few attempts over a couple of days. For others, it could take a few weeks of consistent practice. The key is persistence and patience. Don’t expect perfection on your first try.
-
Can I French braid my hair if it’s layered or relatively short?
Yes, you can! While longer, one-length hair is generally easier to braid, French braids can work on layered hair or hair that’s at least shoulder-length. For layers, you might find more flyaways, which can be managed with styling products like gel or hairspray. For shorter hair, ensure you start your sections higher and take smaller pieces to keep all strands incorporated.
-
How can I make my French braid last longer?
To maximize the longevity of your French braid, start with clean, dry (or slightly damp) hair. Apply a texturizing spray or light hold mousse before braiding for better grip. Braid firmly and consistently. Once finished, a spritz of strong-hold hairspray will help set the style and tame flyaways. You can also sleep on a silk pillowcase to reduce friction and frizz overnight.
-
What if my arms get tired while braiding?
Arm fatigue is common when you’re first learning, as you’re holding your arms up for an extended period in an unfamiliar position. Take breaks if needed. As your technique improves and you become faster, your braiding time will decrease, and your arm muscles will adapt. Practicing in shorter bursts can also help build endurance.
Conclusion
Congratulations! You’ve now been equipped with a comprehensive, step-by-step guide to mastering the art of French braiding your own hair. From the initial preparation to the final securing, every detail has been laid out to empower you on this creative journey. Remember, the beauty of a French braid lies not just in its elegant appearance, but in the confidence and self-sufficiency it instills once you’ve learned to create it yourself.
Don’t be discouraged by initial challenges. Every expert braider started as a beginner, and their skill developed through consistent practice and a willingness to learn from each attempt. Embrace the process, be patient with yourself, and celebrate every small improvement. Soon, you’ll find yourself effortlessly weaving intricate designs that perfectly complement your style.
So, grab your comb, find a mirror, and begin your braiding adventure. With dedication, you’ll soon be able to create stunning French braids with ease, adding a timeless and beautiful skill to your personal style repertoire. Happy braiding!