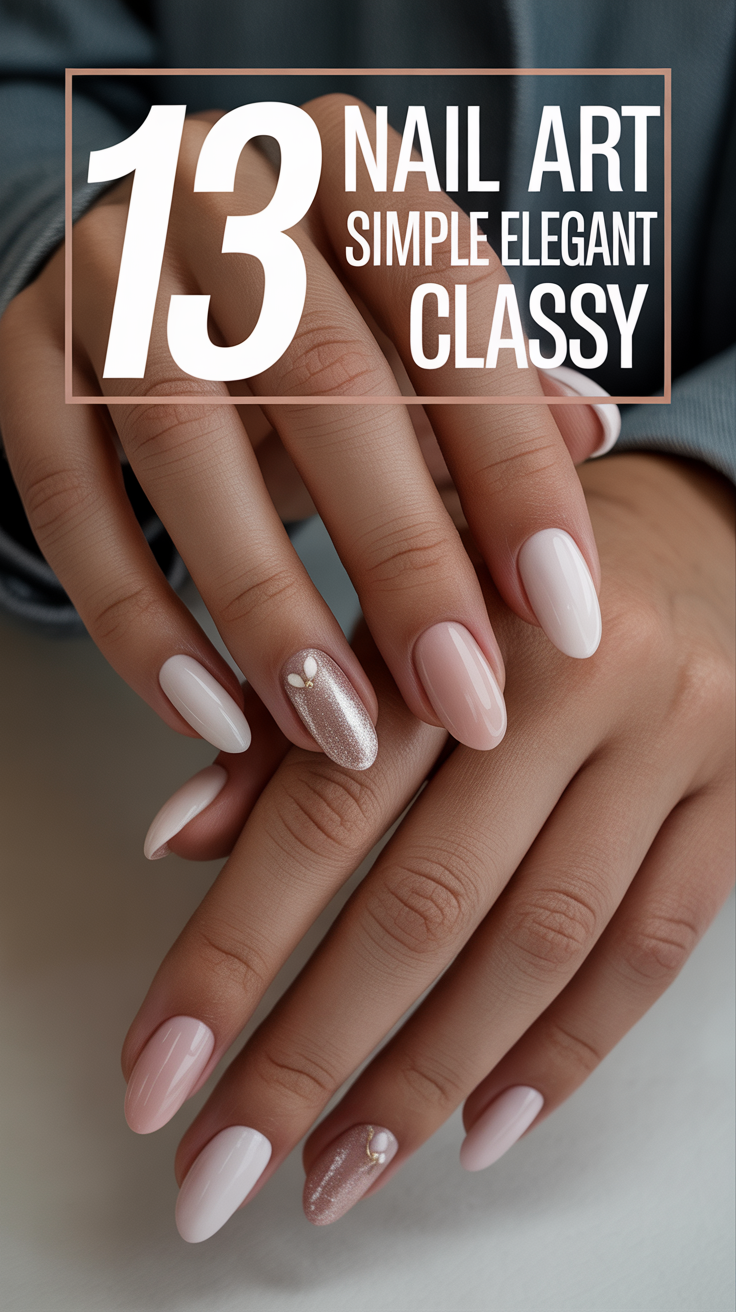
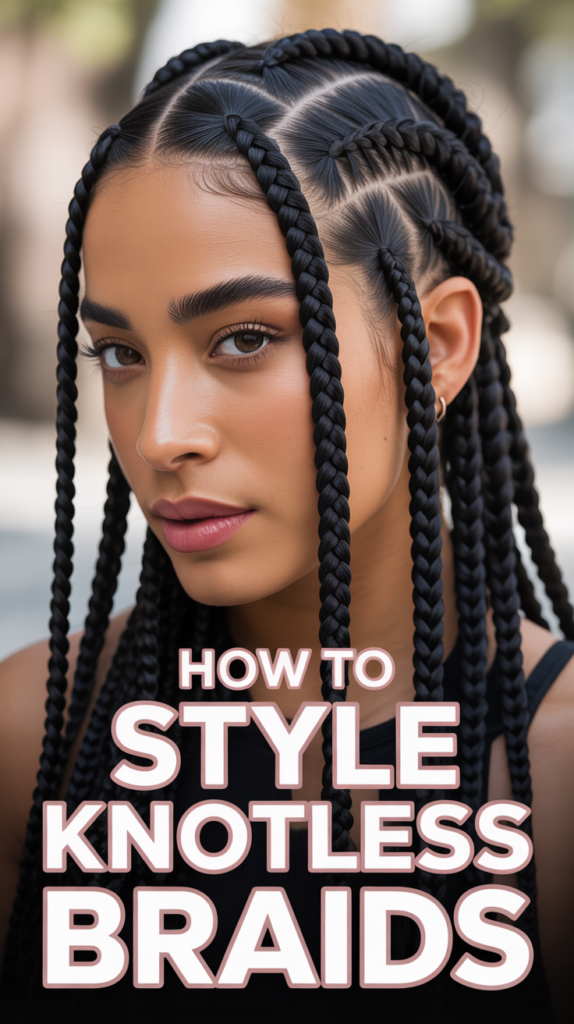
✨ How To Style Knotless Braids
Knotless braids have revolutionized protective styling, offering a lightweight, tension-free alternative to traditional box braids. Their seamless appearance and gentle installation make them a favorite, but their true magic lies in their incredible versatility. Far from being a static style, knotless braids are a canvas for endless creativity, allowing you to transform your look from casual chic to red-carpet ready with just a few simple techniques. Whether you’ve just gotten your braids installed or you’re looking to refresh your styling repertoire, understanding how to manipulate these beautiful strands can unlock a world of fashion possibilities.
In this comprehensive guide, we’ll take you through everything you need to know about styling your knotless braids. We’ll start with the essential tools, then dive into detailed, step-by-step instructions for a variety of popular and elegant looks. You’ll discover expert tips to ensure your styles are not only stunning but also long-lasting and protective. We’ll also highlight common mistakes to avoid, helping you maintain the health and beauty of your braids. By the end of this article, you’ll be equipped with the knowledge and confidence to experiment with different styles, express your unique personality, and maximize the longevity and appeal of your knotless braids. Get ready to elevate your braid game and turn heads with every twist and turn!
What You’ll Need
Before you embark on your styling journey, gather these essential tools and products. Having everything on hand will make the process smoother and ensure your styles are secure and polished.
- Hair Ties/Elastic Bands: Opt for soft, snag-free ties that won’t pull or damage your braids. Clear elastic bands are great for discreet hold.
- Bobby Pins: A variety of sizes and colors (to match your hair) will be indispensable for securing loose braids, tucking ends, and adding extra hold.
- Hair Spray (Light to Medium Hold): To tame flyaways and set your styles without making them stiff or sticky.
- Edge Control/Styling Gel: Essential for smoothing your edges and creating sleek, polished looks around your hairline.
- Hair Clips/Clamps: Useful for sectioning off braids while you work, keeping them out of the way.
- Satin Scarf or Bonnet: For sleeping, to protect your style and prevent frizz and friction.
- Mousse (Optional): For added shine and to help define curls if you’re styling with heat or rod sets.
- Hair Oil/Sheen Spray: To keep your braids moisturized and looking healthy and vibrant.
- Accessories (Optional): Headbands, hair rings, cuffs, decorative pins, or scarves to personalize your look.
- Wide-Tooth Comb or Your Fingers: For gently separating braids if needed, though most styling involves gathering rather than combing.
Step-by-Step Instructions
Knotless braids offer incredible versatility. Here, we’ll walk you through several popular styles, from simple everyday looks to more elaborate options, providing detailed steps for each. Remember to be gentle with your braids to maintain their integrity and prevent unnecessary tension.
General Preparation for All Styles:
- Assess Your Braids: Before styling, ensure your braids are clean and moisturized. If they feel dry, lightly mist with a leave-in conditioner or apply a small amount of hair oil to the length.
- Refresh Your Edges: Use a small amount of edge control and an edge brush to smooth down your baby hairs for a polished finish, regardless of the style.
- Work Gently: Always handle your braids with care to avoid pulling or adding undue tension to your scalp.
Style 1: The Classic High Ponytail or Bun
This timeless style is perfect for any occasion, offering a sleek and sophisticated look that keeps your braids off your neck.
- Gather Your Braids: Tilt your head back slightly and gently gather all your braids towards the crown of your head. Use your fingers to ensure a smooth gather, avoiding excessive pulling on individual braids.
- Secure the Ponytail: Once all braids are gathered at your desired height, use a strong but soft hair tie to secure them tightly. Wrap the tie around the base of the ponytail 2-3 times until it feels secure without being too tight.
- Smooth the Base: Use a bit of edge control or styling gel around the perimeter of your hairline and the base of the ponytail to smooth down any flyaways.
- For a High Bun:
- Once your ponytail is secure, take the entire length of the ponytail.
- Begin to coil the braids around the base of the ponytail in a circular motion.
- As you coil, tuck the ends of the braids underneath the bun or secure them with bobby pins.
- Adjust the shape and size of the bun to your liking, using bobby pins as needed to secure any loose sections or create a fuller look.
- Final Touches: Mist with a light hairspray for extra hold and shine.
Style 2: Elegant Half-Up, Half-Down
This style beautifully showcases the length of your braids while keeping some off your face, perfect for both casual outings and more formal events.
- Section Your Hair: Using your fingers or the tail of a comb, create a clean horizontal part from ear to ear, across the crown of your head. This will separate the top section of braids from the bottom.
- Gather the Top Section: Gently gather the braids in the top section. You can choose to tie them in a simple ponytail, a half-bun, or even a small braid.
- Secure the Top: Use a hair tie to secure the gathered top section. For a sleeker look, you can twist the section before securing it.
- For a Half-Bun: Follow the bun instructions from Style 1, but only with the top section of braids.
- Smooth and Define: Apply edge control around your hairline. If desired, you can add a decorative hair tie, scrunchie, or hair clip to the base of the half-up section.
- Let Down the Rest: Allow the remaining braids to fall freely down your back. You can gently separate them with your fingers for more volume.
Style 3: Braided Crown or Headband Braid
A sophisticated and intricate style that looks complex but is surprisingly achievable, perfect for special occasions or when you want to keep all braids off your face.
- Prepare Your Braids: Ensure your braids are tangle-free. You might want to moisturize them lightly for better manageability.
- Create a Side Part (Optional): You can either part your hair down the middle or create a deep side part, depending on the look you prefer for the crown.
- Start Braiding:
- Take a section of braids from one side of your head, near your temple.
- Begin to loosely braid these braids together, incorporating more braids from along your hairline as you go, similar to creating a French braid or Dutch braid. The goal is to create a braid that wraps around your head like a headband.
- Alternatively, you can create two simple braids on each side of your head, starting from just behind your ears.
- Form the Crown:
- If doing one continuous braid, continue braiding around your hairline until you reach the opposite side of your head.
- If doing two simple braids, bring one braid across the top of your head towards the opposite ear, and then bring the second braid across to meet it.
- Secure the Ends: Once the braid(s) have formed a crown or headband shape, tuck the ends underneath the main braid or use bobby pins to secure them discreetly. Ensure all loose ends are neatly tucked away.
- Adjust and Finish: Gently pull on sections of the crown braid to create a fuller, softer look if desired. Use bobby pins to secure any loose braids or provide extra support. Finish with a light hairspray.
Style 4: Playful Space Buns
A fun, youthful, and trendy style that’s perfect for festivals, casual outings, or just adding a touch of whimsy to your look.
- Create a Center Part: Use your fingers or a comb to create a clean, straight part down the middle of your head, from your forehead to the nape of your neck. This will divide your braids into two equal sections.
- Section One Side: Take all the braids from one side of the part and gather them into a high ponytail on that side of your head. The height is up to you – higher for a more dramatic look, or slightly lower for a subtler vibe.
- Form the First Bun:
- Once the ponytail is secure with a hair tie, begin to coil the length of the braids around the base of the ponytail.
- As you coil, tuck the ends underneath the bun and secure with bobby pins. You can make it a tight, neat bun or a looser, messier one.
- Repeat on the Other Side: Take the braids from the second section and gather them into a matching high ponytail on the opposite side of your head.
- Form the Second Bun: Coil and secure the second bun, ensuring it matches the first in terms of size, height, and tightness.
- Symmetry and Finish: Adjust both buns to ensure they are symmetrical. Use edge control to smooth your hairline, and finish with a light hairspray to keep everything in place.
Style 5: Sophisticated Side Sweep with Accessorizing
This elegant style is perfect for showcasing length and adding a touch of glamour, especially when paired with a statement accessory.
- Deep Side Part: Create a deep side part on one side of your head. This will allow the majority of your braids to fall to one shoulder.
- Gather and Sweep: Gently gather all the braids from the smaller section (the side with less hair) and bring them across the back of your head, sweeping them towards the larger section.
- Secure in Place: Use bobby pins to discreetly secure the swept-over braids against your scalp, just behind your ear or along your hairline on the side you’re sweeping towards. Ensure the pins are hidden within the braids.
- Let Fall Freely: Allow the rest of your braids to cascade over your shoulder on the side with the most hair. You can gently separate them with your fingers for more volume.
- Accessorize (Optional): This style is perfect for adding a decorative hair clip, a jeweled pin, or a string of hair rings to the swept-over section for an extra touch of sophistication.
- Smooth Edges: Apply edge control for a sleek finish around your hairline.
Style 6: The Low Braided Bun
A polished and professional look, ideal for work, formal events, or when you want a neat, understated elegance.
- Gather at the Nape: Gently gather all your braids together at the nape of your neck. Ensure the gathering is smooth and free of bumps on your scalp.
- Secure a Low Ponytail: Use a hair tie to secure the braids into a low ponytail. Make sure it’s tight enough to hold but not uncomfortable.
- Braid the Ponytail (Optional but Recommended): For extra security and a sleeker bun, you can loosely braid the entire ponytail into one large braid.
- Coil into a Bun: Take the secured low ponytail (or the single large braid) and begin to coil it tightly around the base of the ponytail.
- Secure the Bun: As you coil, tuck the ends underneath the bun and use several bobby pins to secure it firmly against your scalp. Ensure the bun feels stable and neat.
- Smooth and Polish: Use edge control to smooth down any flyaways around your hairline and the nape of your neck. A light mist of hairspray will help hold the style.
Pro Tips
To ensure your knotless braids always look their best and your styling efforts pay off, keep these expert tips in mind:
- Moisturize Regularly: Knotless braids, like any protective style, benefit from consistent moisture. Lightly mist your scalp and braids with a leave-in conditioner or a diluted oil spray every few days. This keeps your natural hair and the extensions hydrated, preventing dryness and breakage.
- Protect Your Edges: Your edges are delicate. When styling, be mindful not to pull too tightly. Always use edge control to smooth and define, but avoid excessive product buildup. When sleeping, wear a satin scarf or bonnet that covers your edges to prevent friction and frizz.
- Don’t Over-Tighten: While you want your styles to be secure, avoid pulling your braids so tight that they cause discomfort or tension on your scalp. This can lead to headaches, breakage, and even traction alopecia. If a style feels too tight, loosen it immediately.
- Utilize Bobby Pins Effectively: Bobby pins are your best friend for securing styles. Instead of just pushing them in, insert them against the scalp and then flip them so the wavy side faces your scalp. This creates a stronger grip. Use pins that match your hair color for discreet hold.
- Accessorize Thoughtfully: Hair accessories can elevate any style, but choose them wisely. Opt for lightweight accessories that won’t pull or snag your braids. Decorative hair ties, cuffs, and headbands can add personality without causing damage.
- Refresh with Mousse: If your braids are looking a bit frizzy or dull, a light layer of setting mousse can work wonders. Apply it sparingly to the length of your braids, smoothing it down for added shine and definition. This is particularly helpful for refreshing styles after a few days.
Common Mistakes to Avoid
While knotless braids are a dream for styling, certain practices can undermine their longevity and the health of your natural hair. Be aware of these common pitfalls:
- Excessive Tension: The primary benefit of knotless braids is their reduced tension. Over-tightening your styles with hair ties or bobby pins can negate this benefit, leading to scalp irritation, pain, and potentially traction alopecia. Always ensure your styles feel comfortable.
- Ignoring Scalp Care: Just because your hair is braided doesn’t mean your scalp can be neglected. Failing to moisturize and cleanse your scalp regularly can lead to dryness, itchiness, and product buildup, which can affect the health of your natural hair underneath.
- Using Heavy Products: While moisture is key, using heavy oils, greases, or styling products can lead to buildup, weigh down your braids, and make them appear dull. Opt for lightweight oils, leave-in sprays, and water-based mousses.
- Sleeping Without Protection: Sleeping directly on cotton pillowcases can cause friction, leading to frizz, snags, and premature wear on your braids. Always wrap your braids in a satin scarf or wear a satin bonnet to preserve your style and reduce damage.
- Pulling Out Loose Braids: If a braid comes loose, resist the urge to pull it out. This can cause damage to your natural hair. Instead, gently re-braid it if possible, or consult your stylist for a quick repair.
- Over-Manipulating Your Hair: Constantly changing styles or excessively pulling at your braids can weaken their base and lead to frizz. While versatility is great, give your scalp and braids a break between complex styles.
FAQ
Here are answers to some frequently asked questions about styling knotless braids:
Q1: How long can I keep my knotless braids in before restyling?
A1: Knotless braids typically last between 6 to 8 weeks, depending on your hair type, maintenance routine, and how fast your hair grows. While you can change the style of your braids daily, it’s generally recommended to not keep the installation for longer than 8 weeks to prevent excessive new growth from causing tangles and matting at the roots, and to give your scalp a break.
Q2: Can I use heat tools on my knotless braids?
A2: It depends on the type of braiding hair used. If synthetic hair was used, direct high heat can melt or damage the braids. However, if human hair extensions were incorporated, or if the synthetic hair is specifically designed to be heat-friendly (always check the product label), you might be able to use low heat for very specific styles like curling the ends. Always use a heat protectant and test on a small, inconspicuous section first. For most knotless styles, heat-free methods like perm rods for curling are safer and equally effective.
Q3: How do I keep my knotless braids from getting frizzy, especially when styling?
A3: Frizz is a common concern. To minimize it: 1. Moisturize: Keep your braids and scalp hydrated with a light leave-in spray or oil. Dry hair tends to frizz more. 2. Protect at Night: Always sleep with a satin scarf or bonnet. 3. Gentle Handling: Avoid excessive pulling or rough manipulation when styling. 4. Mousse: A light, alcohol-free setting mousse can help smooth down frizz and add shine when applied to the length of the braids.
Q4: What’s the best way to clean my knotless braids without causing frizz or disturbing the style?
A4: To clean your braids, focus on the scalp. You can use a diluted shampoo or a braid spray cleaner applied directly to your scalp with an applicator bottle. Gently massage your scalp with your fingertips, then rinse thoroughly. For the braids themselves, a light co-wash or braid refresher spray can be used. Pat braids dry with a microfiber towel and allow them to air dry completely to prevent mildew. Avoid scrubbing the braids vigorously, as this can cause frizz and loosen the installation.
Conclusion
Knotless braids are more than just a protective style; they are an invitation to explore a multitude of looks that reflect your personality and lifestyle. From the effortless elegance of a high bun to the playful charm of space buns or the sophisticated allure of a braided crown, the styling possibilities are truly endless. By understanding the foundational steps, equipping yourself with the right tools, and heeding our expert tips and common mistakes to avoid, you can confidently transform your knotless braids into a fresh, head-turning statement every day.
Remember, the key to successful styling lies in gentle handling, consistent moisture, and a willingness to experiment. Don’t be afraid to try new things, mix and match techniques, and add your personal flair with accessories. Your knotless braids are a testament to beauty and versatility—embrace them, style them with confidence, and let your creativity shine. Now go forth and conquer the world, one beautifully styled braid at a time!