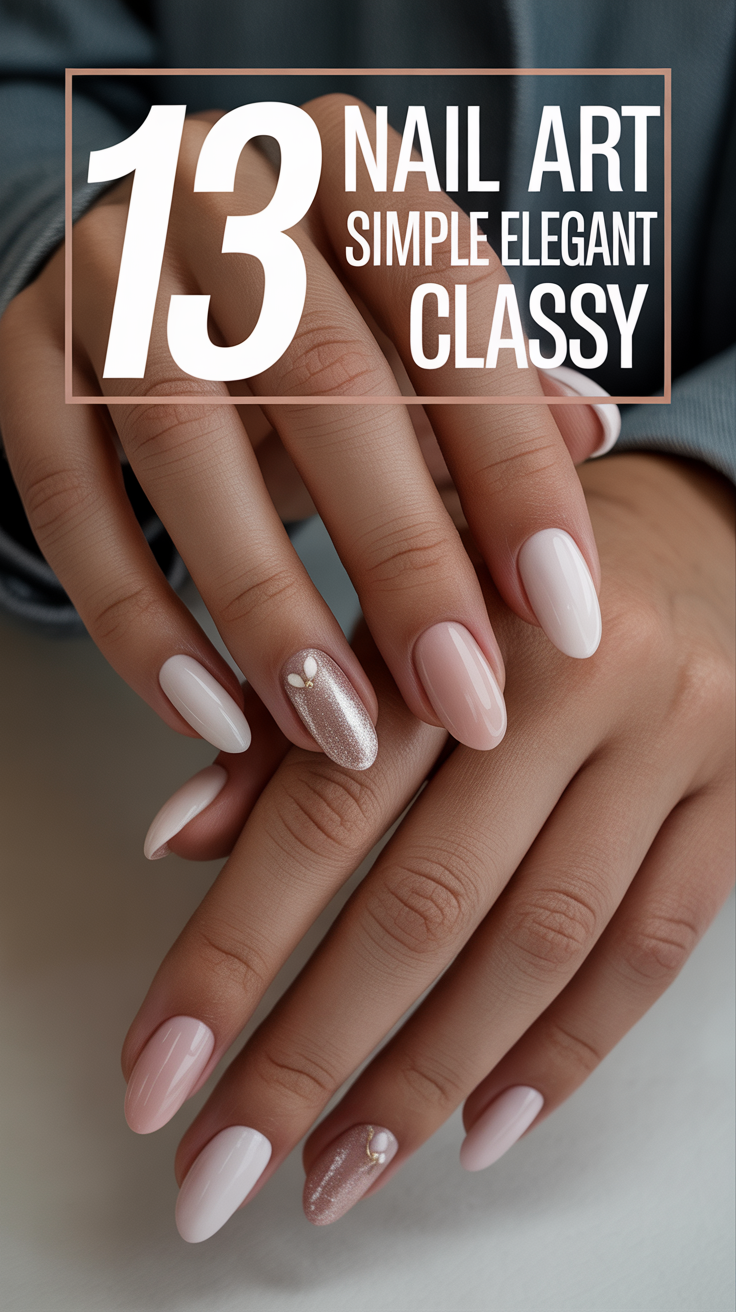
💅 13 Nail Art Simple Elegant Classy
Listen up, nail fanatics! Tired of scrolling through endless feeds of glitter bombs and intricate masterpieces that would take a full day (and a small loan) to replicate? Yeah, me too. Sometimes, a girl just wants to look chic without sacrificing her sanity. We’re talking about that ‘I woke up like this, but my nails are still flawless’ vibe. Get ready, because we’re diving into the world of simple, elegant, and unapologetically classy nail art that even your clumsy self can pull off.

1. Sheer Nude Perfection
Okay, let’s kick things off with the ultimate ‘your nails but better’ look. A whisper of sheer nude polish just makes everything look polished, literally. It’s like the little black dress of nail colors – always appropriate, always chic, and never tries too hard.
Pro Tip: Opt for a shade that barely tints your natural nail, making it look incredibly healthy and well-maintained. A good, glossy top coat is non-negotiable here, darling. It adds that extra layer of sophistication.
This works because it’s the epitome of effortless elegance, screaming, “Yes, I have my life together, why do you ask?”
2. Barely-There French Tip
French tips got a glow-up, and they’re definitely not your grandma’s anymore. We’re talking a super thin, almost invisible white line on a sheer or light pink base. It’s subtle, refined, and incredibly modern, proving that sometimes less really is more.
Pro Tip: Use a very fine brush or a nail art pen for precision. The thinner the line, the classier the vibe. We’re aiming for a barely-there whisper, not a bold statement that screams “I just left the salon in 2003.”
This look works perfectly because it takes a timeless classic and reimagines it for the minimalist era, making you look effortlessly put-together.
3. Single Dot Accent
Alright, for those of us whose artistic skills peak at stick figures, this is your jam. We’re talking one tiny, perfectly placed dot on one or two nails. It could be near the cuticle, in the center, or sassily off to the side. Gold or black dots on a nude base are always a win, darling.
Pro Tip: A bobby pin or a proper dotting tool will be your absolute best friend here. Dip, dot, done. Seriously, don’t overthink it; trust the process (and your surprisingly steady hand).
Why it works? It’s minimal effort, maximum impact. It’s a subtle wink to creativity without screaming for attention.
4. Delicate Gold Stripe
Because, let’s be honest, everything is better with a touch of gold, right? Imagine a super thin, vertical or horizontal gold stripe on a solid color like creamy white, deep navy, or a sophisticated taupe. It adds just enough bling without going full disco ball, thank goodness.
Pro Tip: Nail striping tape is your absolute secret weapon for perfectly straight lines. Apply it, paint over it, then carefully peel it off. Voila, instant perfection without the shaky hand syndrome.
This little trick instantly elevates any manicure to high-fashion status, making you look like you just stepped off a runway (or at least, out of a very chic coffee shop).
5. Reverse French Mani (Cuticle Line)
Alright, let’s flip the script on tradition, literally. Instead of the tip, we’re talking a thin line of color that elegantly follows the curve of your cuticle. It’s unexpected, modern, and oh-so-chic. Try a metallic on a matte base for extra points; it’s a game-changer.
Pro Tip: Use a small, curved brush or a nail art brush to trace that cuticle line. Take your sweet time, because slow and steady absolutely wins the race to chicness here. No rushing allowed!
Why this works? It’s a subtle twist on a classic that feels incredibly sophisticated and unique, making everyone wonder where you got your nails done.
6. Negative Space Geometry
Time to play a little peek-a-boo with your natural nail, darling. This look features a minimalist design using geometric shapes – think triangles, half-moons, or super thin lines – where part of your natural nail peeks through. It’s artistic without being over-the-top, which is always a bonus.
Pro Tip: Grab some painter’s tape or specific nail stencils to create those impossibly sharp, clean lines. Patience is absolutely key when letting polish dry between layers, otherwise, you’ll just have a smudgy mess. No one wants that.
This look works because it’s modern, a little edgy, and effortlessly cool, proving you don’t need full coverage to make a statement.
7. Matte Finish Magic
Alright, let’s ditch the shine for a moment and embrace the sophisticated, velvety suede look. Any solid color manicure instantly gets an upgrade with a matte top coat. Deep reds, forest greens, or even classic black suddenly look incredibly luxurious and expensive.
Pro Tip: Apply your regular glossy polish, let it dry completely, then finish with that magical matte top coat. Just be a little careful with oils and lotions; matte polishes can show smudges more easily than their glossy cousins.
This works because the unexpected texture adds an immediate element of high-end fashion, making your nails look utterly chic without trying too hard.
8. Minimalist Marble Swirl
Who says you need a full-on art degree to get a fancy look? We’re talking faux marble that looks fancy, not fussy. A subtle swirl of white or grey on a nude or light base, mimicking natural stone. Keep it super minimal, maybe just one accent nail per hand, because we’re aiming for elegance, not a countertop.
Pro Tip: Apply a wet coat of your base color, then drop tiny dots of your accent color onto it. Use a toothpick or a fine brush to gently swirl them together. Remember, less is definitely more here for that sophisticated vibe.
This works because it offers an artistic touch that still feels grounded and utterly elegant, proving you can be fancy without being over-the-top.
9. Vertical Color Block
Sometimes, a subtle statement with a clean line is all you need. Picture two complementary colors divided by a crisp vertical line. Think a chic nude paired with a thin stripe of deep burgundy, or a soft grey next to a delicate pale pink. It’s understated but incredibly impactful.
Pro Tip: Seriously, invest in some striping tape to get that perfectly straight division. Let the first color dry completely – I mean, completely – before applying the tape and your second color. Patience, grasshopper.
This look works because it’s visually interesting without being busy, and bonus points: it actually helps to subtly elongate your nails. Win-win!
10. Tiny Pearl Embellishment
Who doesn’t love a touch of ladylike charm? We’re talking one or two tiny pearls (or pearl-like studs, let’s be real) strategically placed on an accent nail. Think near the cuticle or at the base of the tip for that subtle, expensive-looking pop. It’s giving “old money” vibes without the actual old money.
Pro Tip: Use a tiny dab of nail glue or even a clear top coat to adhere those precious pearls. A wax pencil or precision tweezers will be your best friend for picking up and placing them exactly where you want them. No fumbling allowed!
This works because it adds a luxurious, vintage-inspired feel without being remotely gaudy. It’s just pure, understated elegance.
11. Glossy Ombre Nude
Get ready for a dreamy blend that’s softer than a cloud and chicer than your favorite cashmere sweater. This is a seamless gradient from a lighter nude at the cuticle to a slightly deeper nude at the tip. It’s subtle, sophisticated, and makes your nails look impossibly long and graceful.
Pro Tip: Grab a makeup sponge – yes, the kind you use for foundation – to dab on the colors, blending them gently. Definitely practice on paper first to get the hang of that perfect gradient. Trust me, your nails will thank you.
This works because it creates an illusion of length and a super polished, blended finish that just screams “I paid good money for this” (even if you totally DIYed it).
12. Half-Moon Mani (Solid Color)
Let’s give a chic nod to vintage glamour, but make it undeniably modern. For this look, you paint the entire nail except for that lovely half-moon area at the base, leaving it natural or a contrasting nude. It’s a classic with a fresh twist, proving some things just never go out of style.
Pro Tip: Grab some small, round reinforcement stickers (you know, for loose-leaf paper) and use them as a stencil to get that absolutely perfect curve. Apply your polish, let it dry, then carefully peel them off. Voilà, precision!
Why this works? It’s elegant, unexpected, and subtly shows off a healthy nail bed, which is always a bonus for feeling put-together.
13. Subtle Glitter Fade
Okay, for those