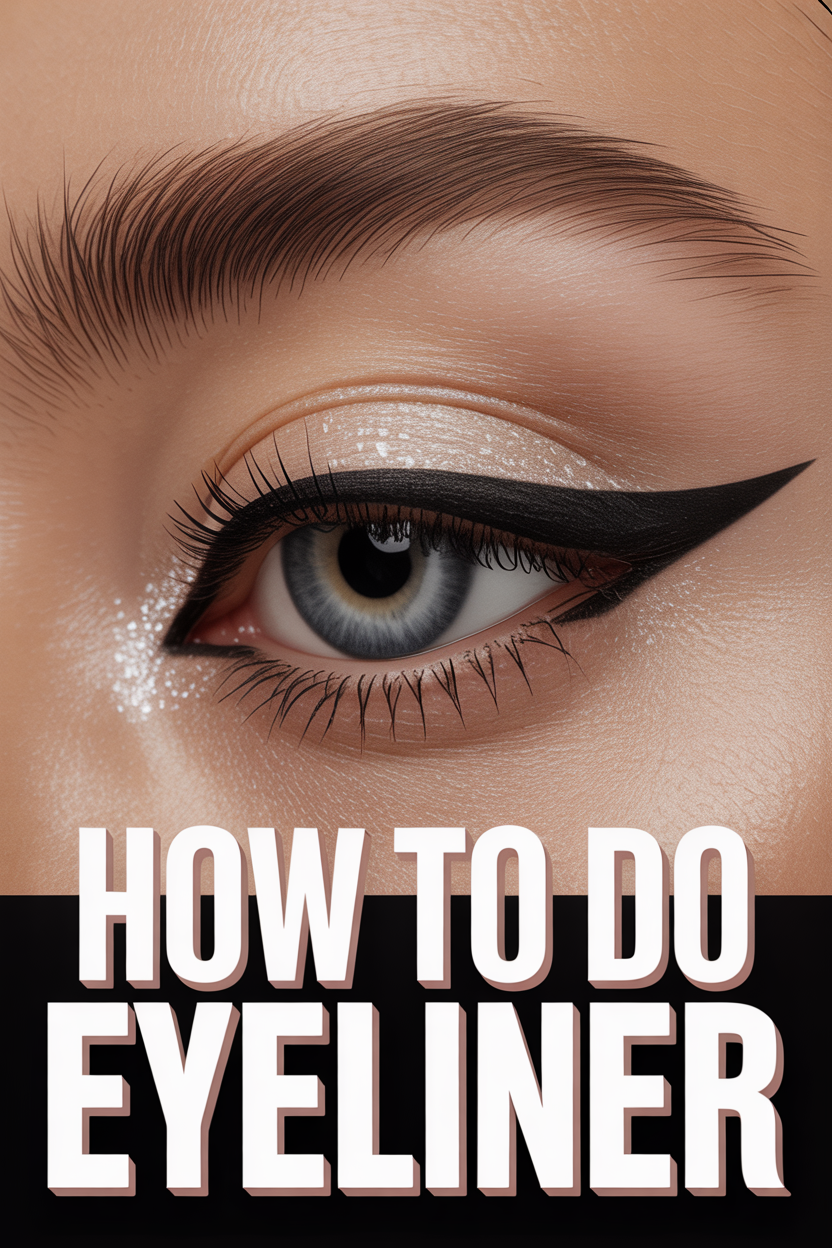
✨ How To Do Eyeliner
💄 The Everyday Glamour Routine
You do not need to spend hundreds of dollars at Sephora to achieve a flawless, airbrushed finish. Professional makeup artists secretly rely on these 5 incredible, highly-rated viral drug store dupes and tools to create stunning looks that last all day.
✨ e.l.f. Power Grip Primer
The undisputed holy grail of primers that broke the internet. The unique gel-based formula literally 'grips' onto your foundation, blurring pores and completely preventing your makeup from melting off, creasing, or fading for up to 14 hours.
💧 Real Techniques Miracle Complexion Sponges
Stop applying liquid foundation with brushes that leave streaks. When used slightly damp, these ultra-soft, latex-free sponges seamlessly bounce liquid products into your skin for an incredibly natural, dewy, 'no-makeup' finish.
🖤 Maybelline Sky High Lengthening Mascara
You don't need expensive lash extensions. This wildly popular formula features a flexible tower brush that bends to volumize and extend every single tiny lash from root to tip without flaking, smudging, or weighing your eyes down.
🌟 L'Oreal True Match Lumi Glotion
The ultimate secret for that radiant 'glass skin' look. Use it alone for a sheer, healthy tint on no-makeup days, or mix a tiny drop into your foundation to instantly add an incredibly expensive-looking, natural luminosity to your face.
🌋 Revlon Oil-Absorbing Volcanic Roller
The modern replacement for messy blotting papers. Made from real volcanic stone, this tiny tool fits perfectly in your purse. Simply roll it across your T-zone to instantly absorb excess shine without messing up the makeup underneath.
Eyeliner is more than just a line on your eyelid; it’s a powerful tool for transformation, capable of enhancing your natural eye shape, creating dramatic flair, and adding a touch of sophisticated allure to any look. From subtle definition to a bold, captivating wing, mastering eyeliner can elevate your makeup game, boosting your confidence and allowing for endless creative expression. If the thought of a perfectly symmetrical line or a flawless flick has always seemed daunting, fear not. This comprehensive guide will demystify the art of eyeliner, providing you with the practical steps and insider tips to achieve stunning results every time.
Quick Overview
This guide will walk you through the essential techniques and considerations for applying eyeliner, empowering you to create a range of looks from simple daily definition to an elegant winged design. You’ll learn how to choose the right products, maintain a steady hand, and troubleshoot common challenges, ultimately building the skills to confidently define your eyes.
- Time needed: 15-30 minutes for initial practice sessions; 5-10 minutes for daily application once skilled.
- Difficulty: Beginner
- What you’ll need: Your chosen eyeliner (pencil, gel, or liquid), a well-lit mirror, cotton swabs, makeup remover (micellar water or oil-based), optional eye primer, and mascara.
Step-by-Step Instructions
Step 1: Gather Your Arsenal & Prep Your Canvas
Before you even think about drawing a line, setting yourself up for success is crucial. This involves selecting the right tools and preparing your eyelids.
- Choose Your Eyeliner Type:
- Pencil Eyeliner: Ideal for beginners due to its ease of control. Great for smudged looks, tightlining, and a softer definition. Comes in traditional sharpenable pencils and retractable twist-up versions.
- Gel Eyeliner: Offers a creamy texture that glides smoothly and provides intense color payoff. Applied with an angled or fine-tip brush, it allows for both sharp lines and smudged effects. Requires a bit more practice for precision.
- Liquid Eyeliner: Delivers the sharpest, most precise lines and dramatic looks, perfect for winged eyeliner. Available in felt-tip pens (easiest for beginners) or traditional brush-and-pot formulas (requires a very steady hand).
- Prime Your Eyelids: Just like painting a canvas, priming your eyelids creates a smooth base, helps your eyeliner adhere better, prevents smudging, and ensures longevity. Apply a thin layer of eyeshadow primer evenly across your lid, from lash line to brow bone, and let it set for a minute. If you don’t have a dedicated primer, a light dusting of translucent powder can also help absorb excess oil.
Pro tip: Start with a pencil or felt-tip liquid liner if you’re a complete beginner. They offer more control and are less intimidating than a brush-and-pot liquid or gel liner.
Step 2: Master Your Grip & Posture for Stability
A steady hand is paramount for precise eyeliner application. How you hold your tool and position your body can make all the difference.
- Find Your Anchor: Rest your elbow on a stable surface, like a table or vanity. This provides a crucial anchor point, minimizing tremors.
- Hold Your Eyeliner Correctly:
- Pencil: Hold it like a pen, close to the tip, for maximum control.
- Liquid Pen: Grip it firmly but comfortably, similar to how you’d hold a marker.
- Gel/Liquid with Brush: Hold the brush handle close to the ferrule (the metal part) for better precision. Rest your pinky finger lightly on your cheek for added stability.
- Position Your Mirror: Place your mirror slightly below eye level. Looking down into the mirror allows you to see your lash line more clearly without your lashes getting in the way.
Pro tip: Practice holding your chosen eyeliner and making small, controlled movements on the back of your hand before applying it to your eye. This builds muscle memory and confidence.
Step 3: The Foundational Dot-to-Dash Method
Instead of attempting one continuous line, which can be challenging, break down the process into smaller, manageable segments. This method helps you build a smooth, even line gradually.
- Look Down Slightly: Keep your eye partially open but looking down into your mirror. This stretches the lid slightly and reveals your lash line. Avoid pulling your lid taut, as this can distort the line when you release it.
- Create Guiding Dots or Dashes: Starting from the outer corner of your eye, place small, short dots or dashes along your upper lash line, getting as close to the roots of your lashes as possible. Aim for about 3-5 dots/dashes, spacing them evenly. You can start from the middle of your lash line and work outwards, then move to the inner corner if you find it easier.
Pro tip: For a more natural look, focus the liner on the outer two-thirds of your lash line. For full definition, extend it all the way to the inner corner.
Step 4: Connecting the Dots – Building Your Line
Now that you have your guide, it’s time to connect the segments to form a cohesive line.
- Gentle, Short Strokes: Using the same eyeliner, gently connect the dots/dashes you just made with short, feathery strokes. Work slowly and deliberately.
- Fill in Gaps: Once the basic line is formed, go back and fill in any tiny gaps between your lashes. The goal is to make the line look seamless and integrated with your lash line.
- Adjust Thickness: If you desire a thicker line, gradually build it up by adding more product in thin layers. It’s always easier to add more than to take away.
Pro tip: If your hand isn’t perfectly steady, try wiggling the eyeliner pencil or brush in short, back-and-forth motions along the lash line instead of trying to draw one long, continuous stroke.
Step 5: Defining the Waterline & Tightline for Intensity
These techniques add incredible depth and make your lashes appear fuller, without necessarily looking like you’re wearing a lot of makeup.
- Tightlining (Upper Waterline): This involves applying eyeliner to the underside of your upper lash line, between the lashes.
- Gently lift your upper eyelid and look down into the mirror.
- Using a waterproof pencil eyeliner, carefully dot and wiggle the pencil into the roots of your upper lashes, making sure to fill in the space between each lash.
- This creates the illusion of darker, denser lashes and makes your eyes pop subtly.
- Waterlining (Lower Waterline): Applying liner to the lower waterline can create a more dramatic or smoky effect, but it’s not for everyone.
- Gently pull down your lower eyelid.
- Using a waterproof pencil, carefully trace along your lower waterline.
- Use a nude or white pencil to open up the eyes, or a black/dark pencil for a more intense, dramatic look.
Pro tip: Always use a waterproof and ophthalmologist-tested eyeliner for tightlining and waterlining to prevent irritation and smudging. Avoid liquid liner for these areas.
Step 6: The Classic Wing – A Step-by-Step Approach
The winged eyeliner, or “cat eye,” is a timeless look. Here’s a foolproof method to achieve it.
- Step 6a: Map Your Angle:
- Imagine a line extending from your lower lash line upwards towards the tail of your eyebrow. This is your guiding angle.
- Alternatively, use a piece of tape or a business card aligned with your lower lash line to create a crisp, straight guide.
- Step 6b: Create the Tail:
- Using your chosen liquid or gel liner, start from the outer corner of your upper lash line.
- Draw a small, short line extending upwards and outwards at your desired angle, following your imaginary guide. This is the bottom edge of your wing.
- Step 6c: Form the Triangle:
- From the tip of the tail you just created, draw a line back down towards the middle of your upper lash line, creating a small triangle or an outline of your wing.
- The thickness of this line will determine the thickness of your wing.
- Step 6d: Fill and Perfect:
- Carefully fill in the outlined triangle with your eyeliner.
- Smooth out any jagged edges. You can use a fine-tip brush with a tiny bit of concealer or makeup remover to sharpen the edges.
- Repeat on the other eye, striving for symmetry. This is often the hardest part, so be patient and take your time.
Pro tip: For symmetrical wings, work on both eyes simultaneously, applying a little bit to one eye, then the other, rather than trying to complete one wing perfectly before moving to the next. This helps you match the angles and thickness.
Step 7: Perfecting the Inner Corner
Lining the inner corner can open up your eyes or create a more dramatic, elongated effect, but it requires precision.
- Use a Light Hand: The skin in the inner corner is very delicate. Use minimal pressure.
- Smallest Application: With a very fine-tipped liquid liner or the tip of a pencil, apply the smallest amount of product to the innermost point of your upper lash line.
- Avoid Over-Lining: Don’t extend the line too far into the tear duct, as this can cause smudging and irritation.
- Connect Seamlessly: Ensure the inner corner line connects smoothly with the rest of your upper lash line.
Pro tip: If you find liquid liner too challenging for the inner corner, use a well-sharpened pencil and then gently smudge it with a fine brush for a softer, more forgiving approach.
Step 8: Setting and Finishing Touches
To ensure your hard work lasts all day and to complete your eye look.
- Set Your Eyeliner (Optional but Recommended): If you used a pencil or gel liner, gently dab a small amount of matching dark eyeshadow over the liner with a fine, angled brush. This “sets” the liner, making it more smudge-proof and long-lasting.
- Curl Your Lashes: Use an eyelash curler to lift and open up your eyes.
- Apply Mascara: Finish with 1-2 coats of your favorite mascara to complete the look, defining your lashes and making your eyes truly pop.
Pro tip: If you accidentally get mascara on your freshly applied eyeliner, wait for it to dry completely, then gently flake it off with a clean cotton swab or spoolie. Trying to wipe it wet will only smudge your liner.
Step 9: Practice Makes Perfect
Eyeliner is a skill that improves significantly with consistent practice. Don’t get discouraged if your first few attempts aren’t perfect.
- Experiment: Try different eyeliner types, colors, and styles. Discover what works best for your eye shape and personal preference.
- Dedicate Time: Set aside 5-10 minutes each day, even on days you’re not going out, just to practice your technique.
- Embrace Imperfection: Remember that even professional makeup artists don’t get it perfect every time. Makeup is meant to be fun and expressive.
Pro tip: Use a cotton swab dipped in micellar water or makeup remover to clean up any mistakes or sharpen your lines. This is your best friend for achieving crisp edges.
Common Mistakes to Avoid
Even seasoned makeup enthusiasts can fall prey to these common eyeliner blunders. Being aware of them can save you frustration and lead to a more polished result.
-
Pulling the Eyelid Taut:
Why it’s problematic: While it might seem like a good idea to create a smooth surface, pulling your eyelid stretches the skin. When you release it, the liner line snaps back into place, often looking jagged, distorted, or thicker than intended. This is particularly noticeable with winged liner, where the wing can look completely different once the skin relaxes.
The correct approach: Instead of pulling, look down into a mirror with your eye partially open. This naturally stretches the lid slightly without distorting the skin. If you need more visibility, gently lift your brow slightly with your non-dominant hand, but avoid tugging directly on the lash line.
-
Applying Too Much Pressure:
Why it’s problematic: Pressing down too hard, especially with pencil or gel liners, can create a thick, clumpy line that’s hard to refine. It can also irritate the delicate skin around your eyes, cause the liner to skip, or even break the tip of your pencil/brush. Furthermore, heavy pressure can lead to a less precise application, making it difficult to achieve a sharp wing.
The correct approach: Use a light, feathery touch. Build up your line in thin layers and short strokes. This allows for greater control, smoother application, and the ability to gradually increase the intensity or thickness of your line without overdoing it.
-
Not Using a Primer or Setting the Liner:
Why it’s problematic: Eyelids can get oily throughout the day, causing eyeliner to smudge, fade, or transfer to your upper lid (especially if you have hooded eyes). Without a base, the liner has nothing to “grip” onto, leading to poor longevity and a messy appearance.
The correct approach: Always start with an eyeshadow primer to create a smooth, oil-absorbing base. After applying your eyeliner, especially if using a pencil or gel, gently dab a matching matte eyeshadow over the liner with a fine, angled brush. This “sets” the liner, making it significantly more smudge-proof and extending its wear time.
-
Starting with a Thick Line at the Inner Corner:
Why it’s problematic: A thick line at the inner corner can make your eyes appear smaller and heavier. It can also look unnatural and feel uncomfortable, potentially leading to irritation or product transfer into the tear duct area.
The correct approach: Begin your eyeliner application with a very thin line at the inner corner, or even start from the middle of your lash line and work outwards. Gradually build up the thickness as you move towards the outer corner. The goal is to create a gradient where the line is thinnest at the inner corner and subtly thickens towards the outer edge, opening up the eye.
-
Using the Wrong Product for the Desired Look:
Why it’s problematic: Trying to create a razor-sharp wing with a kohl pencil or a soft, smudged look with a liquid felt-tip liner will only lead to frustration and a subpar result. Each eyeliner type is designed for specific effects, and using the wrong one can make achieving your desired look unnecessarily difficult.
The correct approach: Understand the strengths of each eyeliner type. Use liquid or gel liner for sharp, precise lines and dramatic wings. Opt for pencil liner for a softer, smudged, or smoky effect, as well as for tightlining and waterlining. Choose a felt-tip liquid pen for ease of application and quick, clean lines.
Troubleshooting
Even with the best intentions, eyeliner can sometimes go awry. Here are quick solutions for common issues:
-
Smudged Eyeliner (especially under the eye):
Issue: Your eyeliner, particularly on the lower lash line or outer corner, has smudged, creating a raccoon-eye effect.
Solution:
- Quick Fix: Dip a pointed cotton swab (or a regular one twisted to a point) into a tiny bit of micellar water or makeup remover. Gently clean up the smudge without disturbing the rest of your makeup. Follow up with a tiny bit of concealer if needed.
- Prevention: Always use an eye primer on your lids and a setting powder under your eyes. For lower lash line, opt for waterproof eyeliner and set it with a matching eyeshadow. Avoid touching your eyes throughout the day.
-
Uneven Wings / Difficulty with Symmetry:
Issue: Your winged liner looks great on one eye, but the other one just isn’t cooperating, or they’re completely different shapes/angles.
Solution:
- Quick Fix: Don’t try to make the “bad” wing match the “good” one by adding more liner. Instead, use a flat, angled brush dipped in a bit of concealer or micellar water to carve out and sharpen the edges of the less-perfect wing. This subtractive method often works better than adding more product. Work on both wings simultaneously, building them up little by little, rather than finishing one entirely before starting the other.
- Prevention: Use a physical guide like a piece of tape or a business card for consistent angles. Stand back from the mirror frequently to assess symmetry from a distance. Practice is key here.
-
Gaps Between Eyeliner and Lash Line:
Issue: You’ve drawn a line, but there’s a visible gap of skin between the liner and the roots of your lashes, making your lashes look sparse.
Solution:
- Quick Fix: This is where tightlining comes in handy. After applying your regular liner, go back with a waterproof pencil and gently wiggle it into the roots of your upper lashes from underneath. This fills in the “gap” and makes your lash line appear denser and darker, connecting the liner seamlessly to your lashes.
- Prevention: When applying your initial line (Step 4), ensure you’re getting as close to the lash roots as possible. Use small, controlled strokes and gently press the product into the lash line.
Key Takeaways
- Preparation is Paramount: Always prime your eyelids to ensure longevity and prevent smudging.
- Choose Your Tool Wisely: Select the eyeliner type that best suits your skill level and the desired look. Pencils for beginners, liquid/gel for precision.
- Stability is Key: Anchor your elbow and use your pinky finger for a steady hand during application.
- Build Your Line Gradually: Use the dot-to-dash method and short, controlled strokes instead of trying one continuous line.
- Tightlining Transforms: Don’t underestimate the power of tightlining to make your lashes appear fuller and connect your liner.
- Practice Makes Perfect: Eyeliner is a skill, and consistent practice will lead to significant improvement. Don’t be afraid to experiment and make mistakes.
- Clean Up is Your Friend: Keep cotton swabs and makeup remover handy for quick corrections and sharpening.
Frequently Asked Questions
-
Which type of eyeliner is best for beginners?
Felt-tip liquid eyeliners (pen style) and pencil eyeliners are generally best for beginners. Felt-tip pens offer precise control similar to drawing with a marker, while pencils are very forgiving and easy to smudge if you make a mistake. Gel liners applied with an angled brush are a good intermediate step before tackling traditional liquid brush-and-pot formulas.
-
How do I prevent my eyeliner from smudging throughout the day?
Several strategies can help:
- Always apply an eye primer before eyeliner.
- Use a waterproof or long-wear formula.
- Set your eyeliner with a matching eyeshadow (especially pencil or gel liners).
- If you have oily eyelids, blot them periodically or use a mattifying setting spray.
- Avoid touching or rubbing your eyes.
-
Can I use eyeliner on my lower lash line?
Yes, you can! Lining the lower lash line can create a more intense, smoky, or dramatic look. However, it can also make eyes appear smaller if applied too heavily or with a very dark color all the way across. For a softer look, apply liner only to the outer third of your lower lash line and gently smudge it. Always use waterproof eyeliner to prevent smudging and irritation on the lower waterline.
-
What’s the difference between tightlining and lining the waterline?
Tightlining involves applying eyeliner to the underside of your upper lash line, between the roots of your lashes. Its purpose is to make your lashes look fuller and darker at the base, creating a subtle definition without a visible line on your lid. Lining the waterline refers to applying eyeliner directly on the wet, inner rim of your lower (and sometimes upper) eyelid. This technique is used to create a more dramatic, intense, or smoky effect, or to make eyes appear larger with a nude/white liner.
What’s Next?
Congratulations on taking the first step towards mastering eyeliner! With these foundational techniques, you’re well on your way to creating stunning eye looks. Now that you’ve got the basics down, don’t stop there!
- Experiment with Different Styles: Try a subtle kitten flick, a dramatic double wing, or a reverse cat eye.
- Explore Color: Step beyond black and brown. Experiment with navy, emerald green, or even vibrant pastels to add a pop of color to your look.
- Pair with Eyeshadow: Learn how to seamlessly integrate your eyeliner with various eyeshadow looks, from natural daytime to glamorous evening styles.
- Practice Daily: The more you practice, the more confident and precise you’ll become. Make it a part of your daily routine, even if it’s just a quick line.
Your journey to perfect eyeliner is an exciting one of discovery and self-expression. Take out your favorite eyeliner today and start practicing. Your eyes will thank you!